

Review sản phẩm
Khám Phá Cách Tạo Passkey Trên Dashlane: Bảo Mật Mật Khẩu Cấp Cao!

Th5
## Khám Phá Cách Tạo Passkey Trên Dashlane: Bảo Mật Mật Khẩu Cấp Cao!
Bài viết hướng dẫn bạn cách tạo và sử dụng Passkey trên Dashlane, một giải pháp bảo mật mật khẩu tiên tiến, giúp bảo vệ tài khoản của bạn khỏi những mối đe dọa trực tuyến. Passkey là tương lai của xác thực, mang lại sự bảo mật mạnh mẽ hơn so với mật khẩu truyền thống. Hướng dẫn này sẽ giúp bạn dễ dàng thiết lập Passkey trên Dashlane và tận hưởng trải nghiệm đăng nhập an toàn và thuận tiện hơn.
Bước 1: Cập nhật Dashlane lên phiên bản mới nhất. Đảm bảo bạn đang sử dụng phiên bản Dashlane mới nhất để đảm bảo tính năng Passkey hoạt động tốt. Kiểm tra cập nhật trong cửa hàng ứng dụng hoặc trên trang web Dashlane.
Bước 2: Truy cập cài đặt Passkey. Mở ứng dụng Dashlane và tìm đến phần cài đặt. Thông thường, bạn sẽ tìm thấy tùy chọn Passkey trong mục “Bảo mật” hoặc “Cài đặt Bảo mật”.
Bước 3: Bắt đầu tạo Passkey. Sau khi tìm thấy tùy chọn Passkey, hãy làm theo hướng dẫn trên màn hình để bắt đầu tạo một Passkey mới. Quá trình này có thể bao gồm việc xác thực danh tính bằng sinh trắc học (ví dụ: vân tay hoặc Face ID) hoặc bằng mật khẩu Dashlane hiện tại của bạn.
Bước 4: Liên kết Passkey với tài khoản của bạn. Sau khi tạo Passkey, bạn sẽ được hướng dẫn liên kết nó với các tài khoản trực tuyến của mình. Dashlane sẽ giúp bạn tự động điền Passkey khi bạn đăng nhập vào các trang web hoặc ứng dụng hỗ trợ.
Bước 5: Quản lý Passkey của bạn. Dashlane cho phép bạn quản lý tất cả Passkey của mình một cách an toàn và thuận tiện. Bạn có thể xem, chỉnh sửa hoặc xóa Passkey bất cứ lúc nào.
Lợi ích của việc sử dụng Passkey với Dashlane:
* Bảo mật nâng cao: Passkey loại bỏ rủi ro bị đánh cắp hoặc bị lộ như mật khẩu truyền thống.
* Đăng nhập dễ dàng: Quá trình đăng nhập nhanh chóng và thuận tiện hơn nhờ xác thực sinh trắc học.
* Tương thích rộng rãi: Dashlane hỗ trợ nhiều trang web và ứng dụng phổ biến.
* Quản lý tập trung: Quản lý tất cả Passkey của bạn tại một nơi an toàn.
Mua ngay các sản phẩm công nghệ cao cấp tại Queen Mobile để bảo vệ thông tin cá nhân của bạn một cách tốt nhất!
Queen Mobile là nhà cung cấp uy tín các sản phẩm Apple chính hãng tại Việt Nam, bao gồm iPhone, iPad, Apple Watch và các phụ kiện chính hãng. Hãy đến với Queen Mobile để trải nghiệm những sản phẩm công nghệ hàng đầu và dịch vụ chăm sóc khách hàng tuyệt vời.
#Passkey #Dashlane #BảoMậtMậtKhẩu #AnToànTrựcTuyến #QueenMobile #Apple #iPhone #iPad #AppleWatch #CôngNghệ #BảoMậtThôngTin #MuaSắmCôngNghệ #ViệtNam
Giới thiệu How to create passkeys in Dashlane
: How to create passkeys in Dashlane
Hãy viết lại bài viết dài kèm hashtag về việc đánh giá sản phẩm và mua ngay tại Queen Mobile bằng tiếng VIệt: How to create passkeys in Dashlane
Mua ngay sản phẩm tại Việt Nam:
QUEEN MOBILE chuyên cung cấp điện thoại Iphone, máy tính bảng Ipad, đồng hồ Smartwatch và các phụ kiện APPLE và các giải pháp điện tử và nhà thông minh. Queen Mobile rất hân hạnh được phục vụ quý khách….
_____________________________________________________
Mua #Điện_thoại #iphone #ipad #macbook #samsung #xiaomi #poco #oppo #snapdragon giá tốt, hãy ghé [𝑸𝑼𝑬𝑬𝑵 𝑴𝑶𝑩𝑰𝑳𝑬]
✿ 149 Hòa Bình, phường Hiệp Tân, quận Tân Phú, TP HCM
✿ 402B, Hai Bà Trưng, P Tân Định, Q 1, HCM
✿ 287 đường 3/2 P 10, Q 10, HCM
Hotline (miễn phí) 19003190
Thu cũ đổi mới
Rẻ hơn hoàn tiền
Góp 0%
Thời gian làm việc: 9h – 21h.
KẾT LUẬN
Hãy viết đoạn tóm tắt về nội dung bằng tiếng việt kích thích người mua: How to create passkeys in Dashlane
Hardware is nothing without secure software, and even Android phones, with their robust components, are no exception. But security should be convenient if it’s going to be widely adopted, and that’s what passkeys are about. They remove the hassle of typing passwords when you log in to your online accounts.
Dashlane is one of the services that allows users to create, use, and manage passkeys across various platforms, and we show you how it works.
How to set up passkeys in the Dashlane web app
Dashlane lets you create and manage passkeys on your web browser.
Create a passkey in the Dashlane web app
To use Dashlane’s passkeys on your computer, download the Chrome extension and create an account. The website where you intend to use the passkey must also support passkeys. After you have that, follow these steps:
- Launch the Dashlane web app and log in to your account.
- Open a website that supports passkeys like Google or Adobe. We use Google for this example.
- Go to myaccount.google.com and select Security > Passkeys.
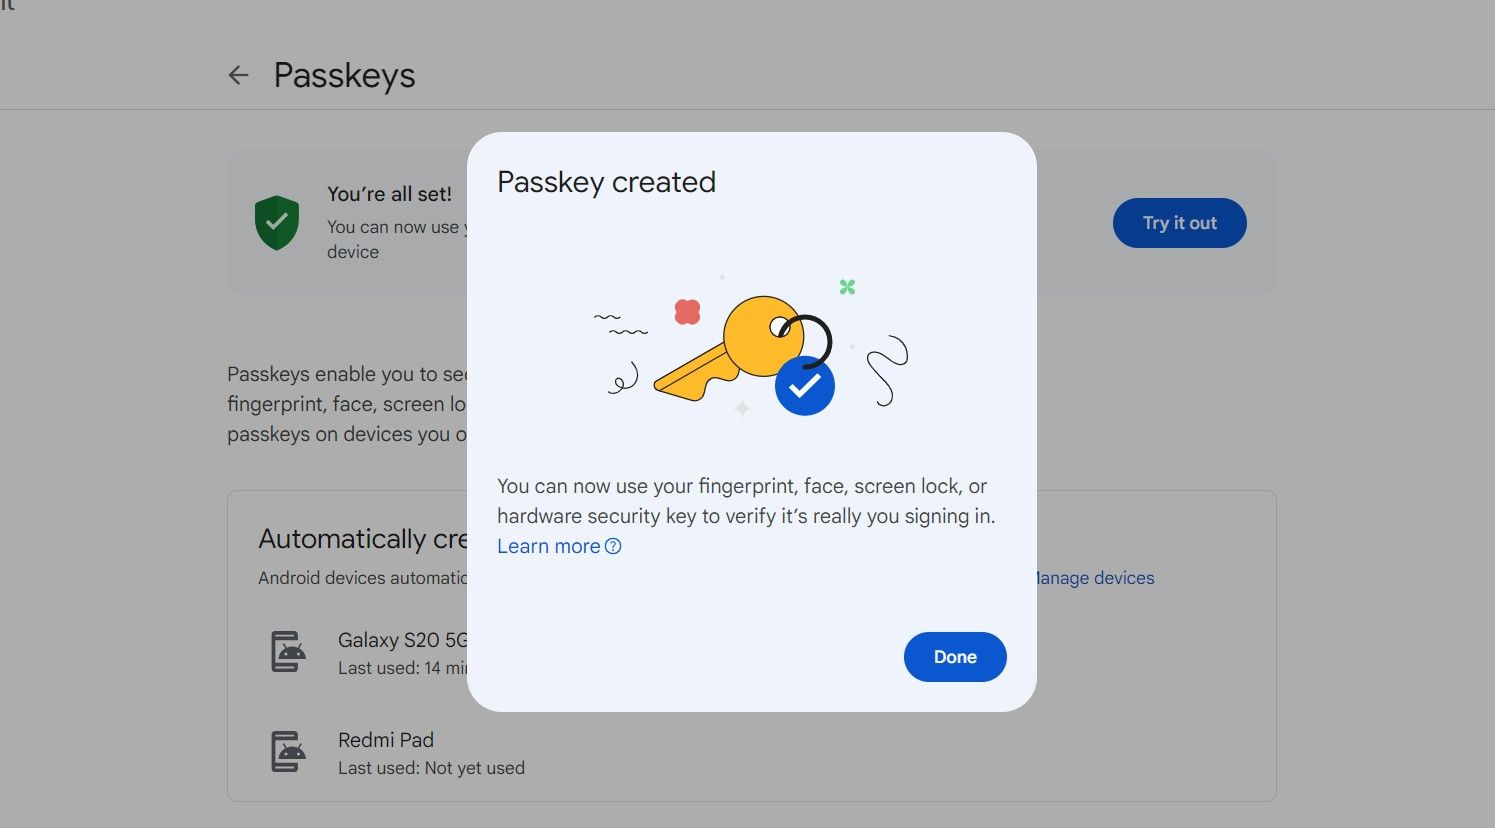
- Click the blue Create a passkey button in the upper-right corner of the screen. A Dashlane pop-up box appears, prompting you to complete the process with the third-party service.
- Click Confirm on the pop-up. Another box appears, telling you the process was successful.
- Click Done.


Some services, like Google, require you to go to your account settings to activate the passkey feature. Others automatically ask you to set up a passkey while logging in.
Sign in with a passkey saved in the Dashlane web app
After setting up a passkey on a supported service, you can make subsequent logins using Dashlane. Here’s how it works:
- Launch the Dashlane web app in your browser and log in to your account.
- Open a website with a saved passkey. In this example, we use Google.
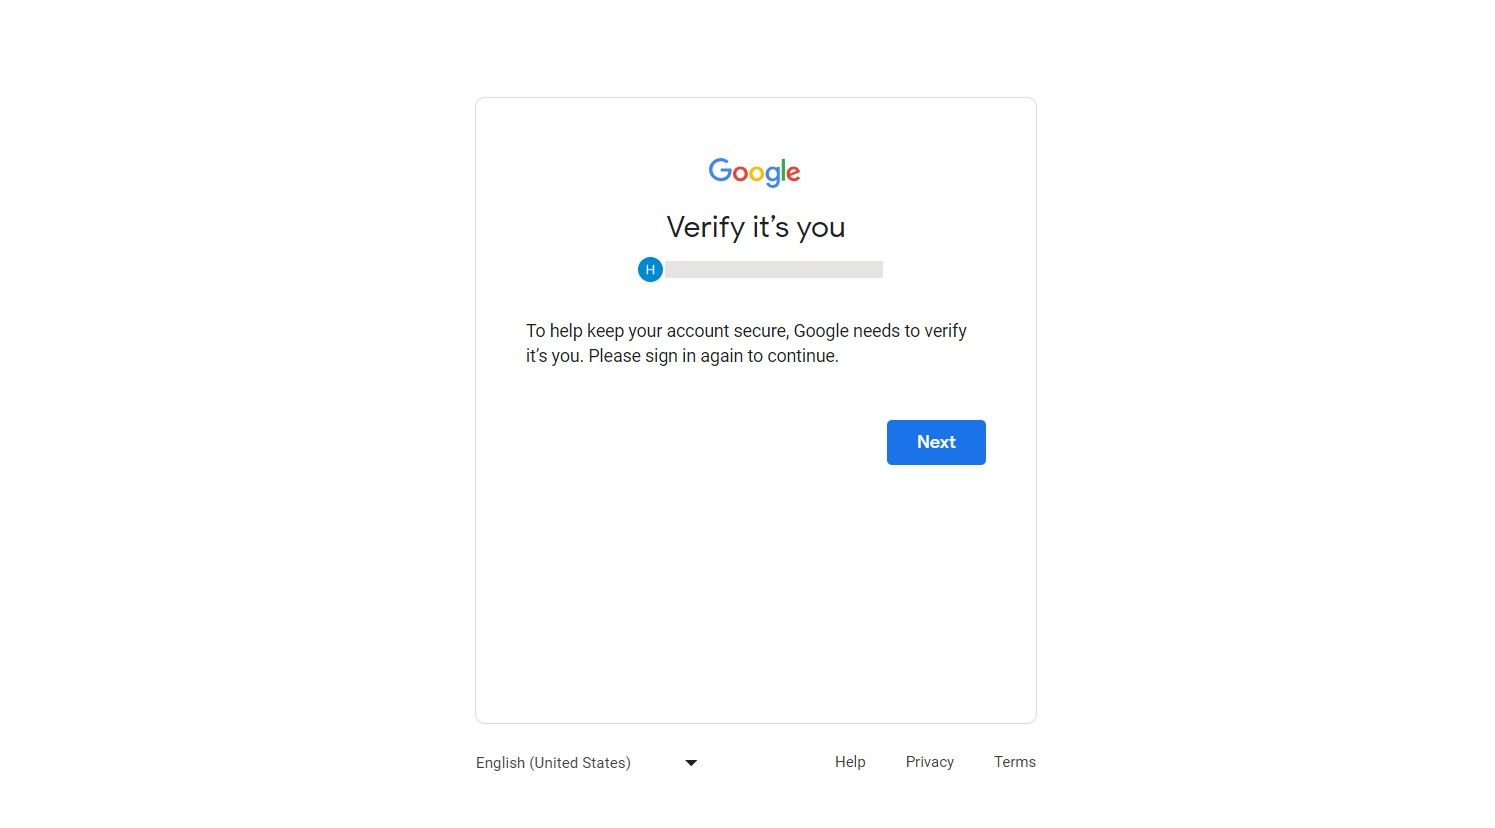
- Click Next on the account login page. You’re asked to confirm your login with a passkey.
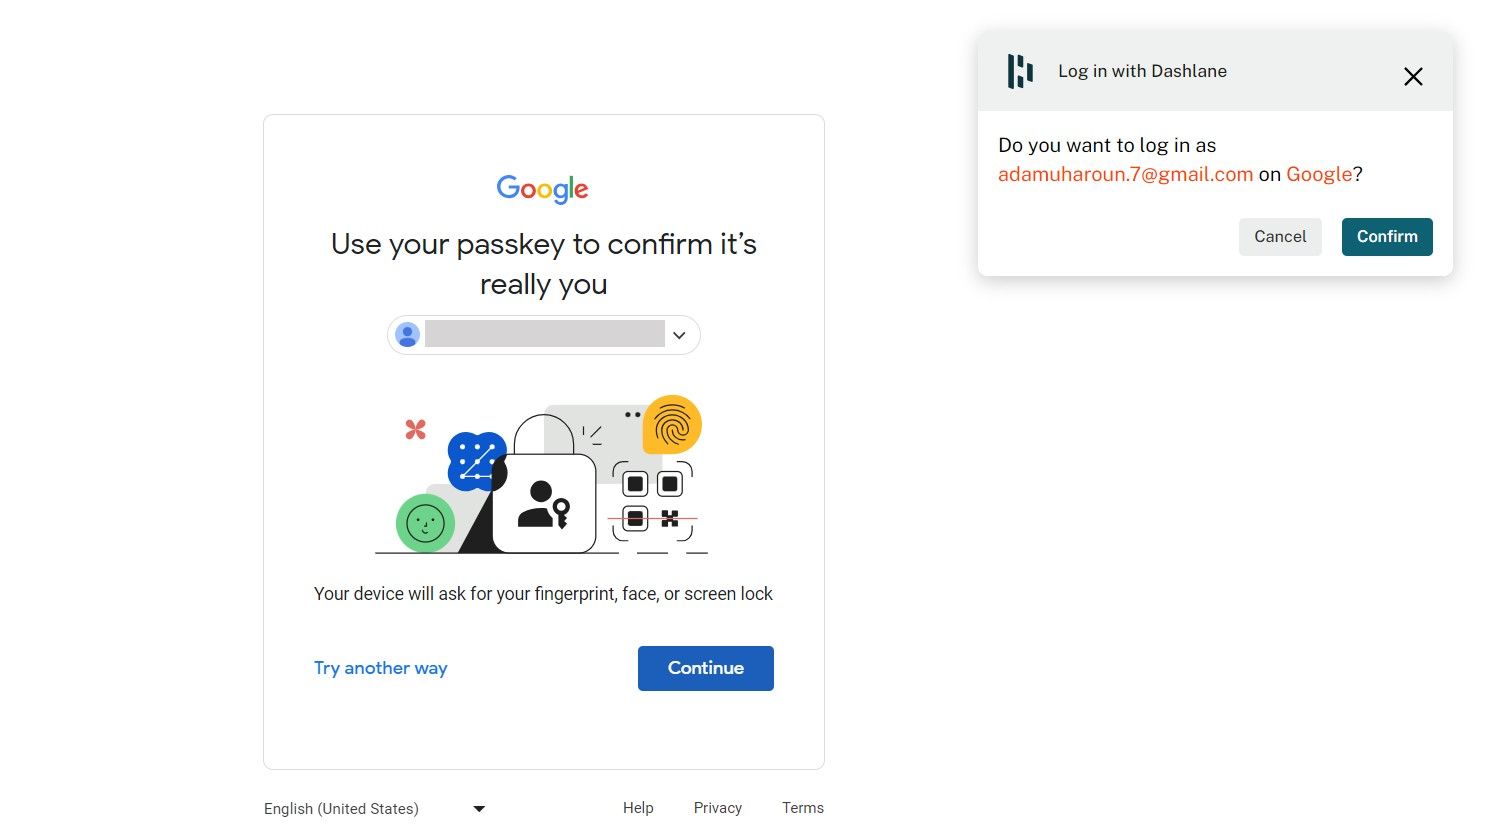
- Click Continue. The Dashlane login pop-up box appears in the upper-right corner.
- Click Confirm. You’re successfully signed in to your account.
Some services require you to specify that you want to log in with a passkey. So, when prompted to enter your password, choose the option to Sign in with passkey instead.
Manage passkeys in the Dashlane web app
You can view, edit, and delete Dashlane passkeys in the web app. Here’s how:
- Log in to the Dashlane web app.
- Click the Passkeys tab on the left sidebar.
- Select the service with the passkey you wish to manage. A right sidebar emerges, showing important information like your username and the website.
- You can edit the Item name, which controls how a particular passkey is labeled in your vault. You can also add relevant information in the Note section or delete the passkey.


How to set up passkeys in the Dashlane mobile app
You can download Dashlane from the Google Play Store or Apple AppStore and start using passkeys, provided your device runs Android 14 or iOS 17 and later.
For this demonstration, we use the Android app, but the steps are the same on the iOS version.
Create a passkey in the Dashlane mobile app
Before now, you could only create and use passkeys on Android using Google Password Manager. However, Android 14 allows you to manage passkeys using third-party apps like Dashlane. To get started, you must first set Dashlane as an identity provider in your device’s Password and Identity settings. After that, follow these steps:
- Launch the Dashlane Android app and log in to your account.
- Open a passkey-supported app. In this case, we use the Google app.
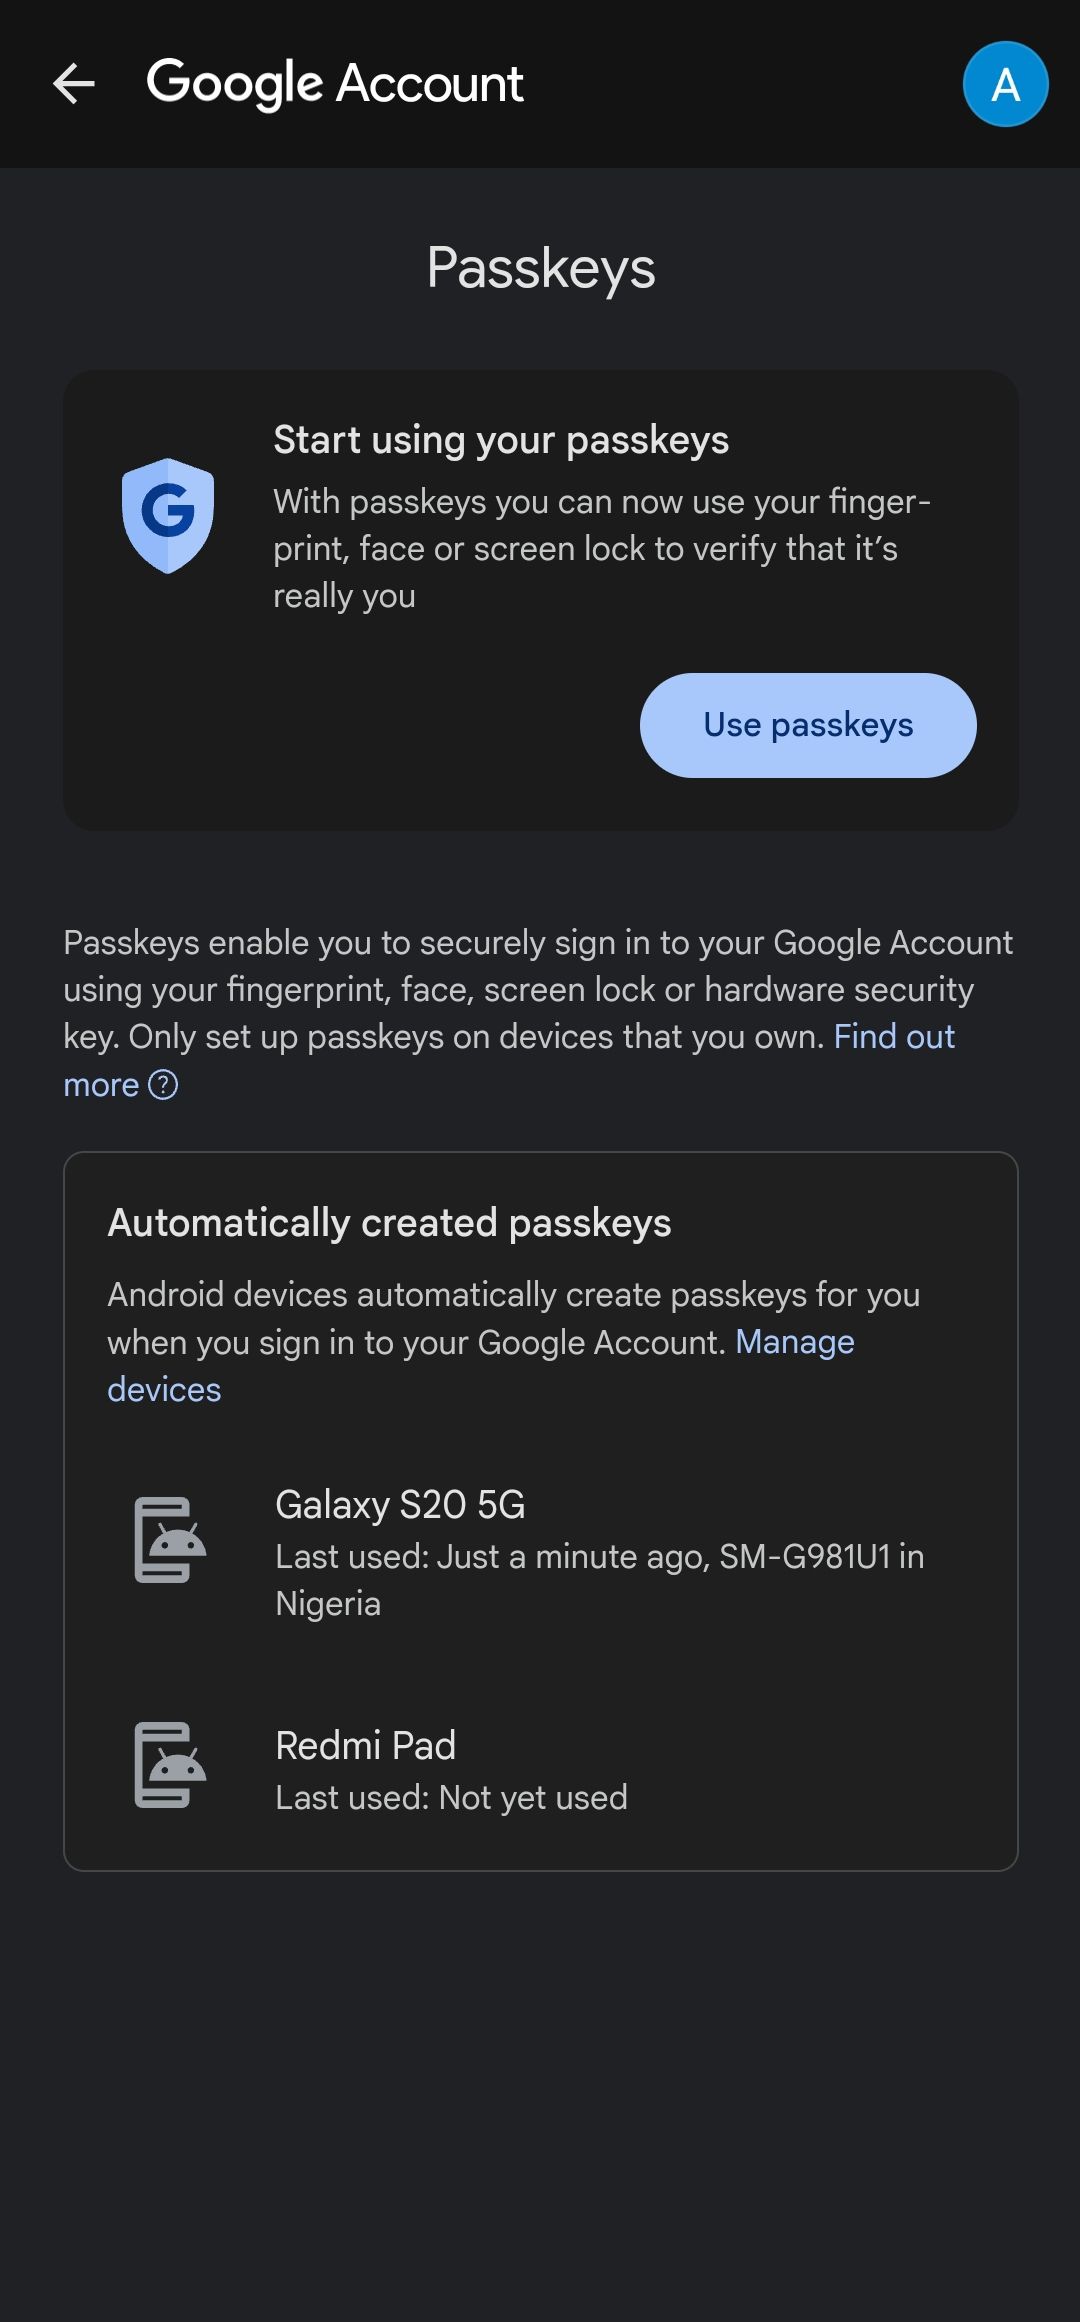
- Tap your profile icon and navigate to Manage your Google account > Security > Passkeys.
- Tap Continue. You’re asked to unlock your phone with your screen lock.
- Tap Use passkeys. Dashlane prompts you to create a new key for the app.
- Select Continue. You may be asked to enter your primary password.

You can only use passkeys for apps on your Android device but not websites.
Sign in with a passkey saved in the Dashlane mobile app
After setting up a passkey for an app, follow these steps to log in with it:
- Launch the Dashlane web app and log in to your account.
- Open an application with a saved Dashlane passkey. We use Google in this example.
- Enter your email account on the login page. You’re asked to confirm your login with a passkey.
- Click Continue. Dashlane prompts you to log in to the site.
- Click Confirm. You’re signed in to your account.
Manage passkeys in the Dashlane mobile app
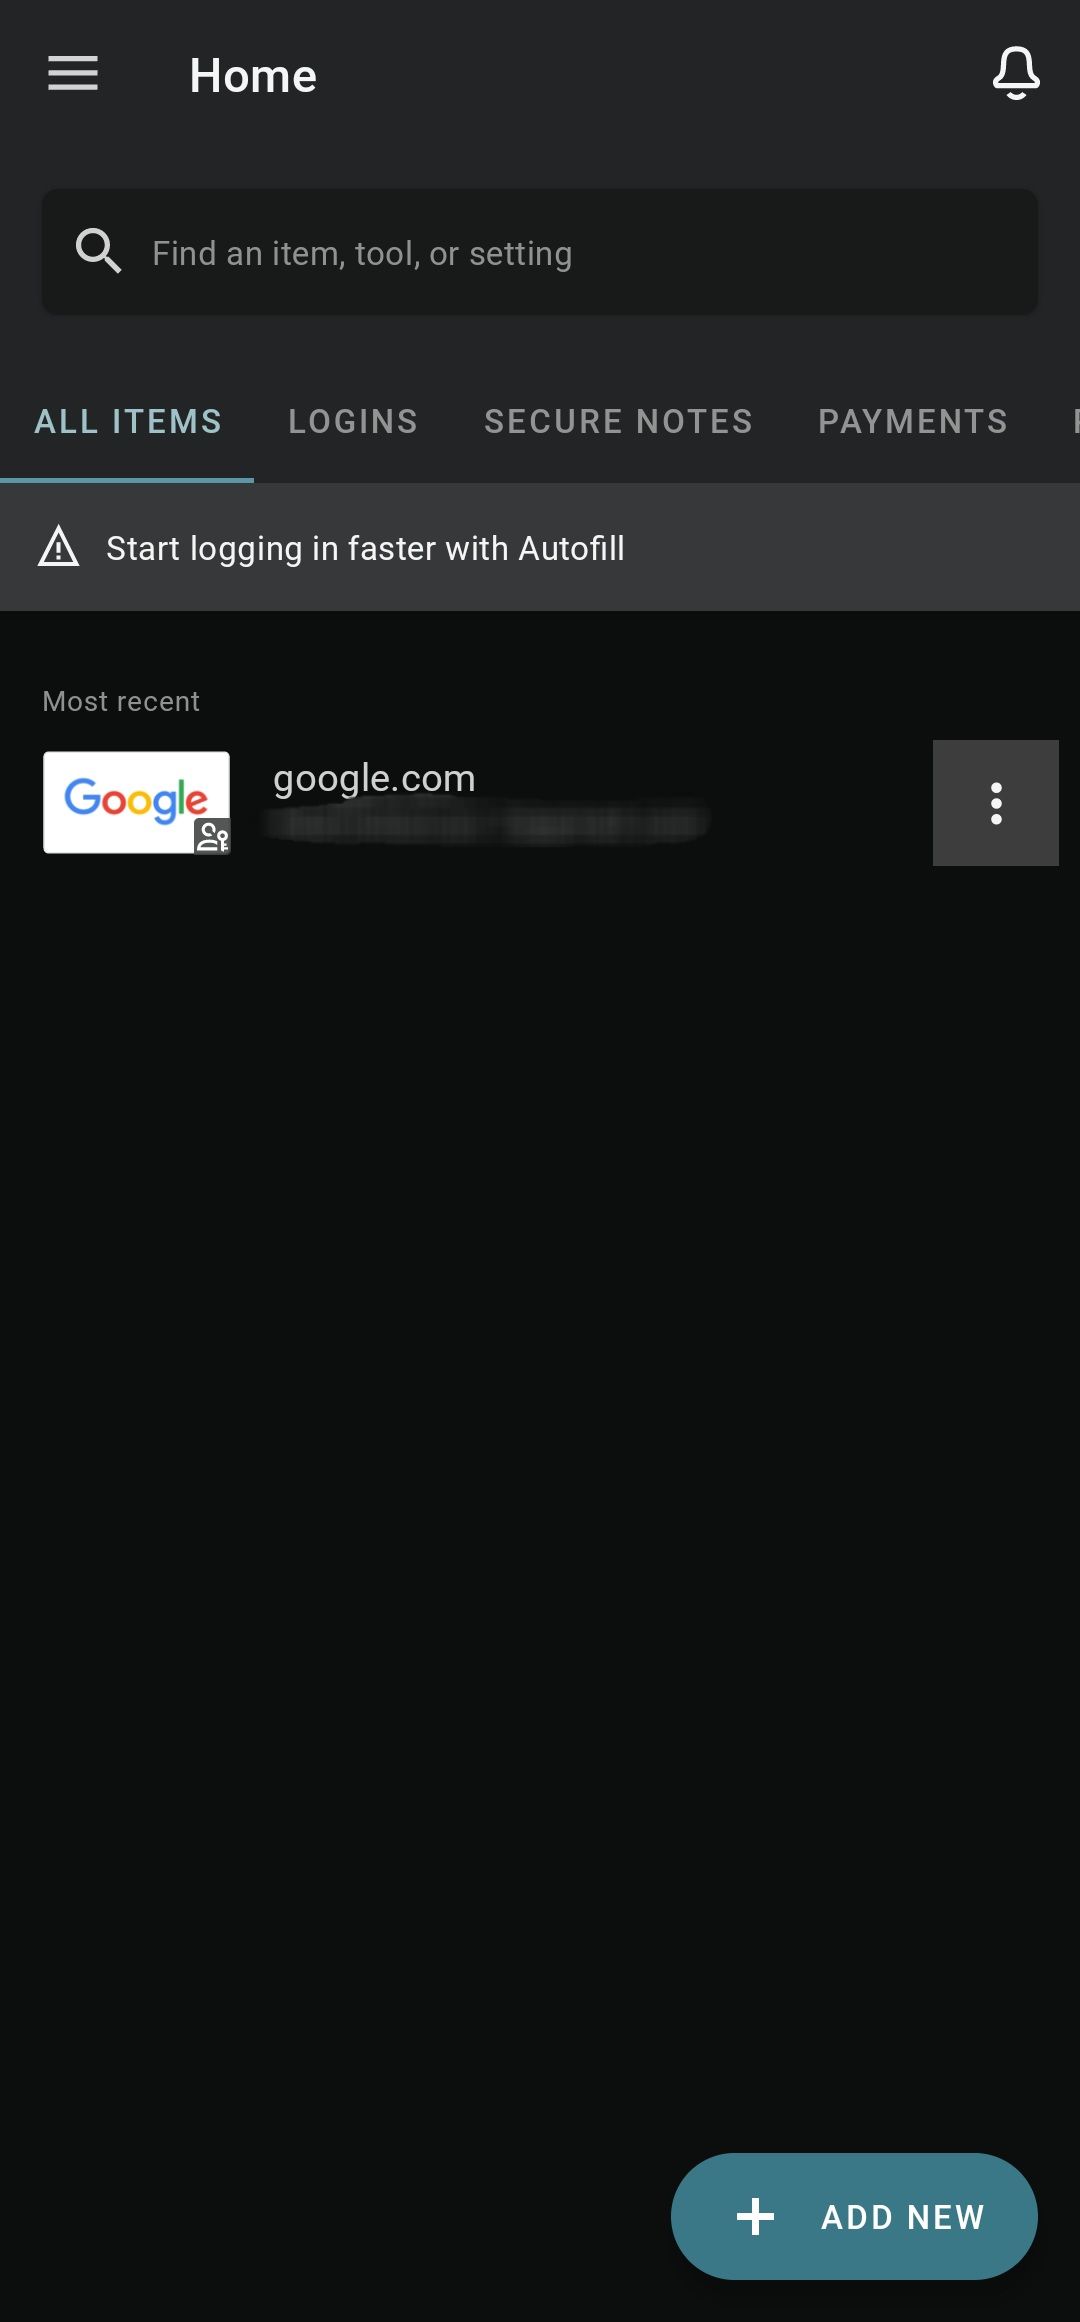
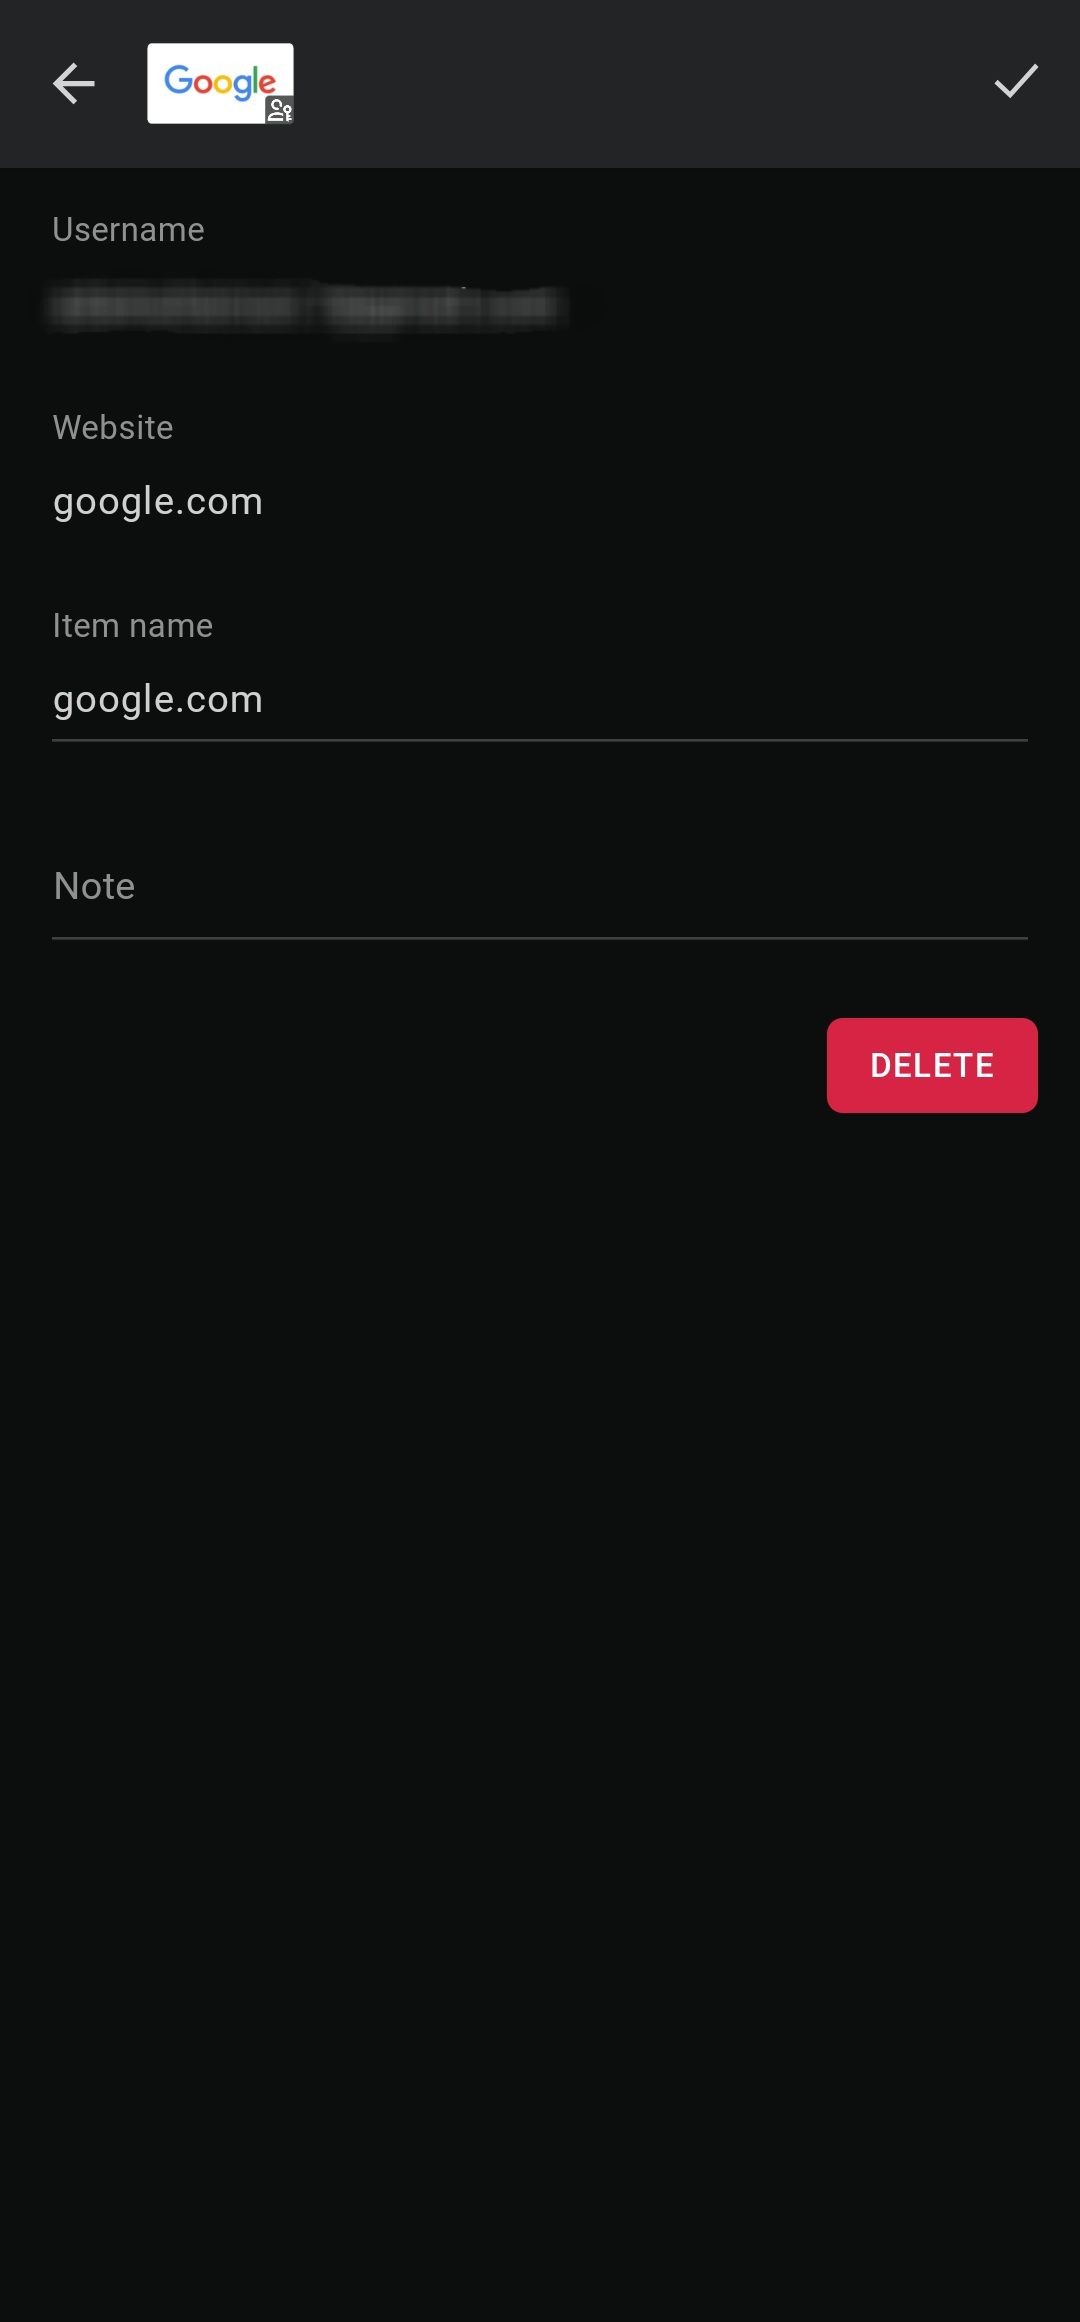
Like the web app, you can view, edit, and delete passkeys in the Dashlane Android app. However, the mobile app doesn’t have a dedicated passkey section. Instead, passkeys appear alongside other logins in your vault but take a passkey icon. Here’s how to manage your passkeys on Android:
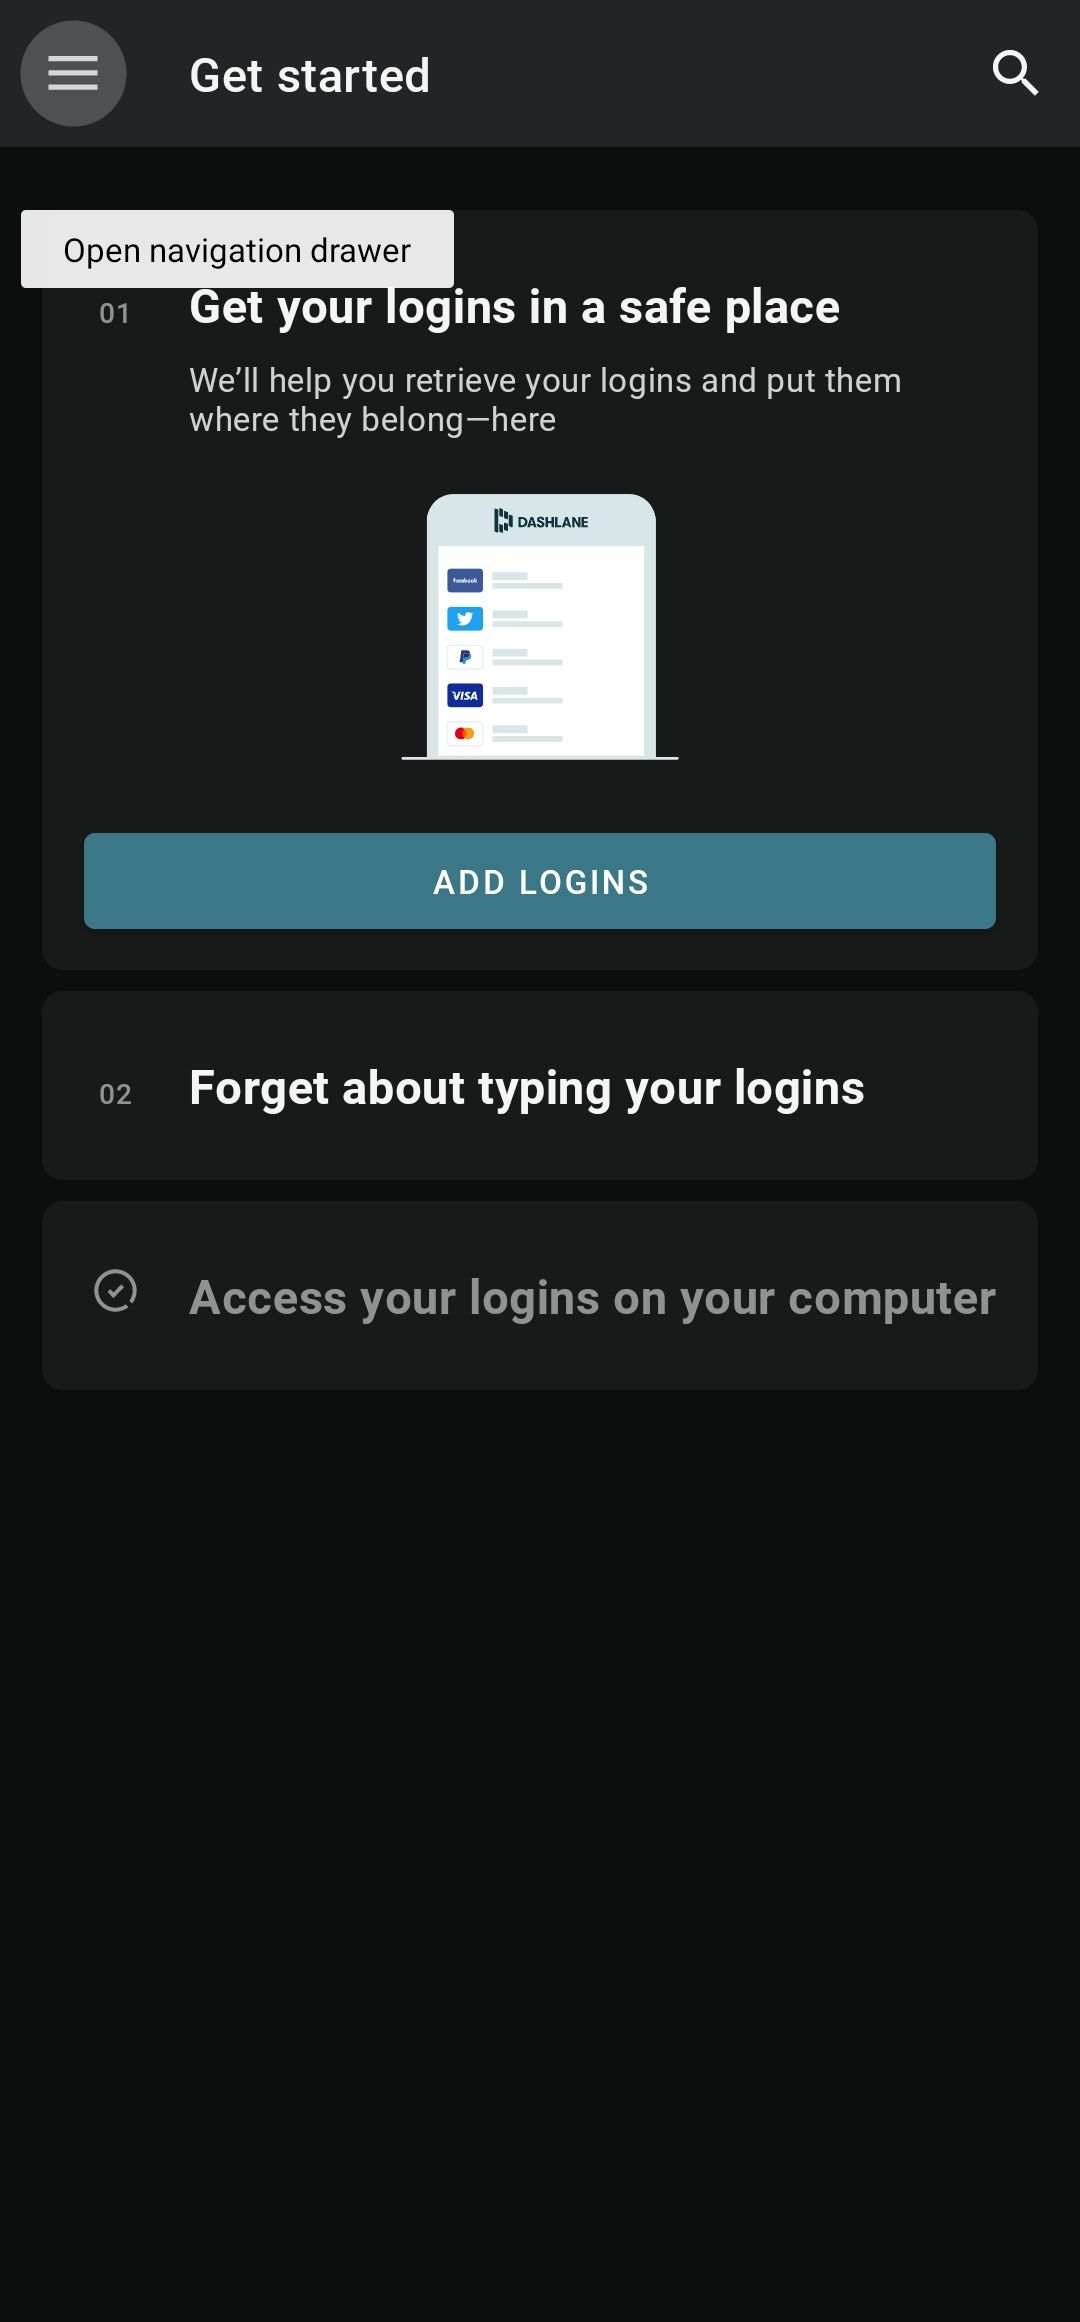
- Launch the Dashlane app. You’re asked to unlock it with your fingerprint ID.
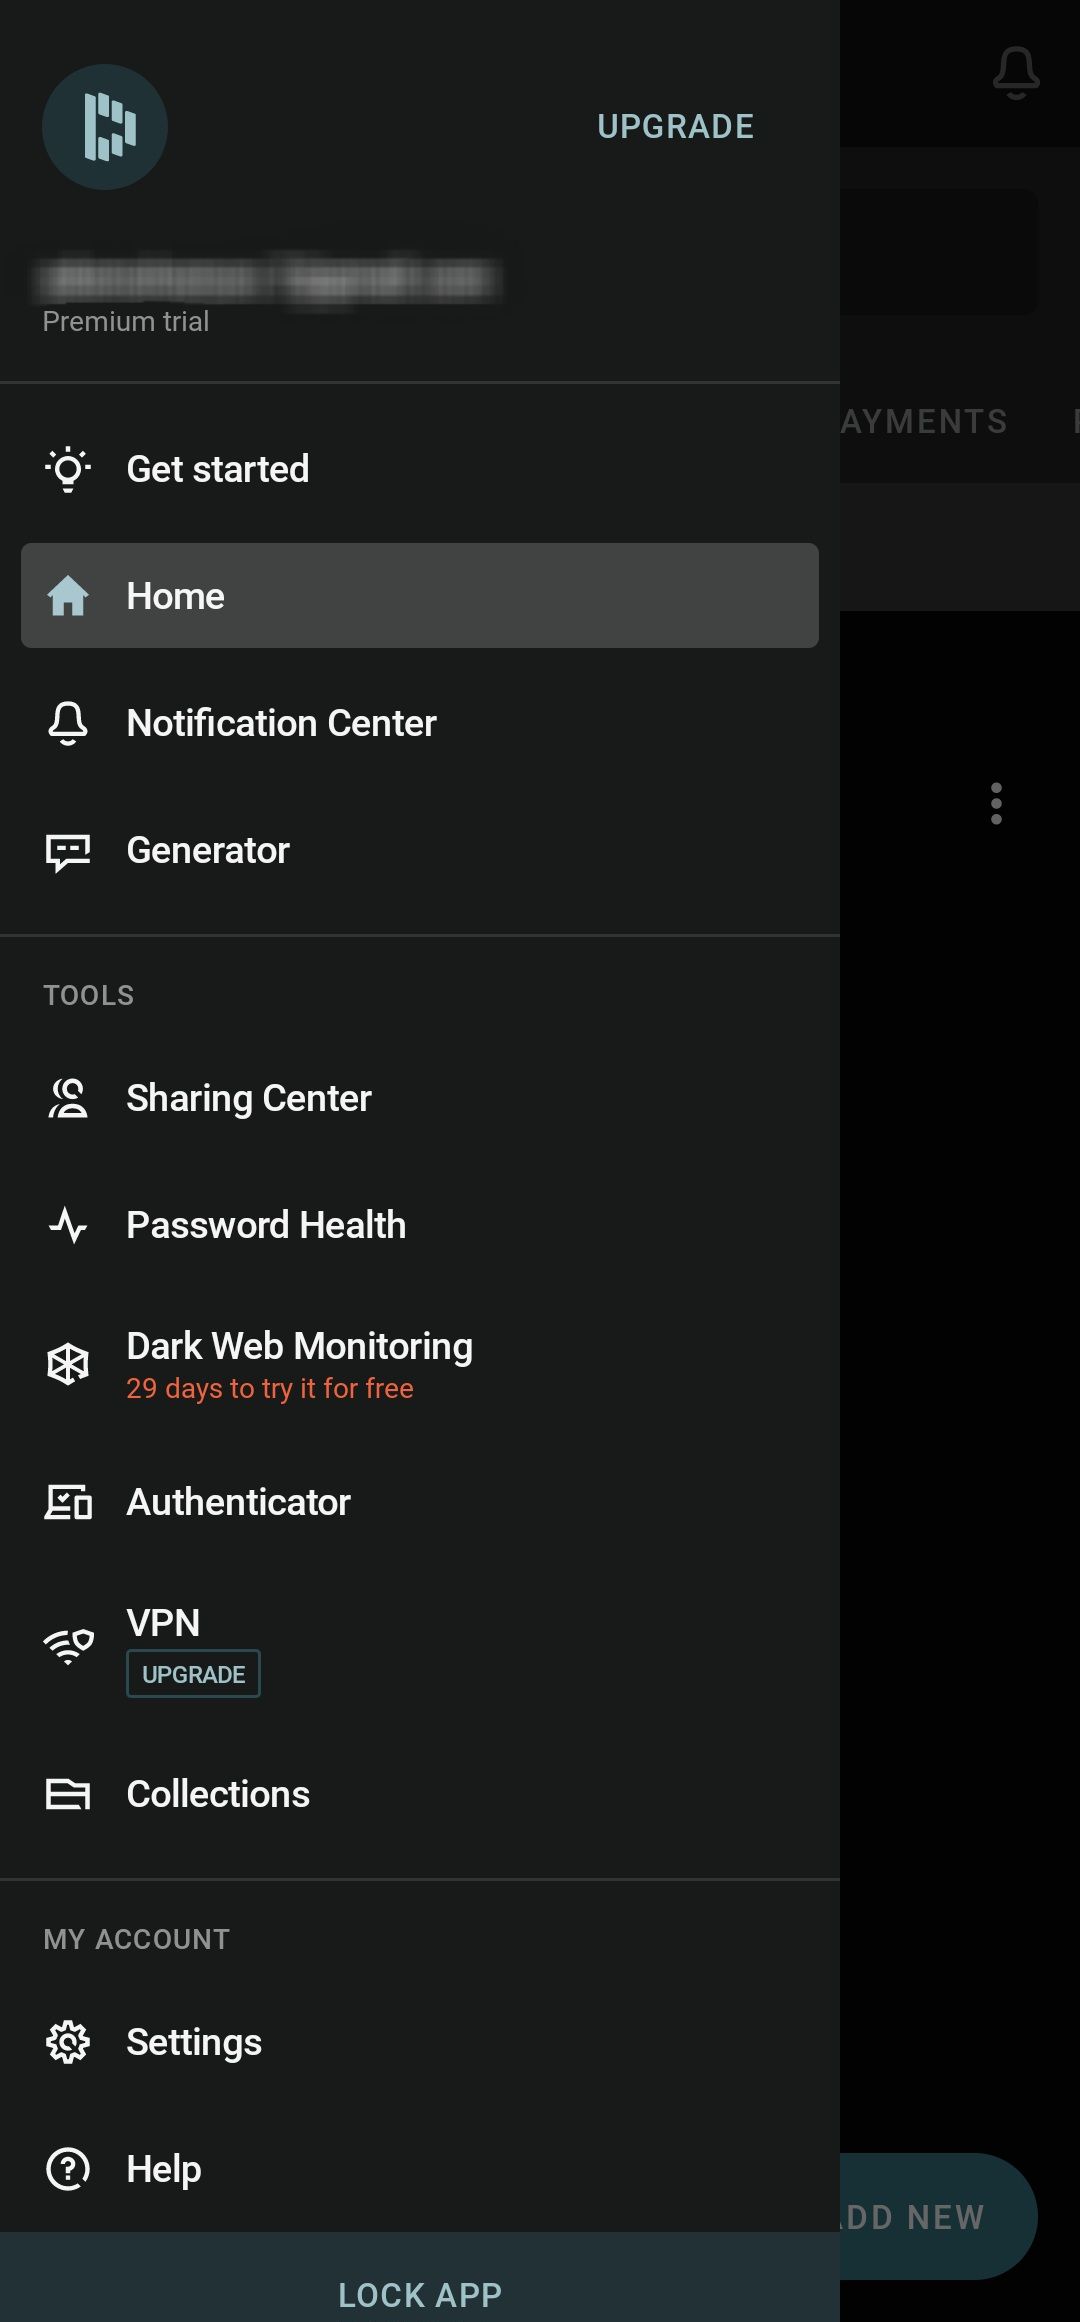
- Tap the hamburger icon in the upper-left corner of the screen. A sidebar opens.
- Select Home from the options.
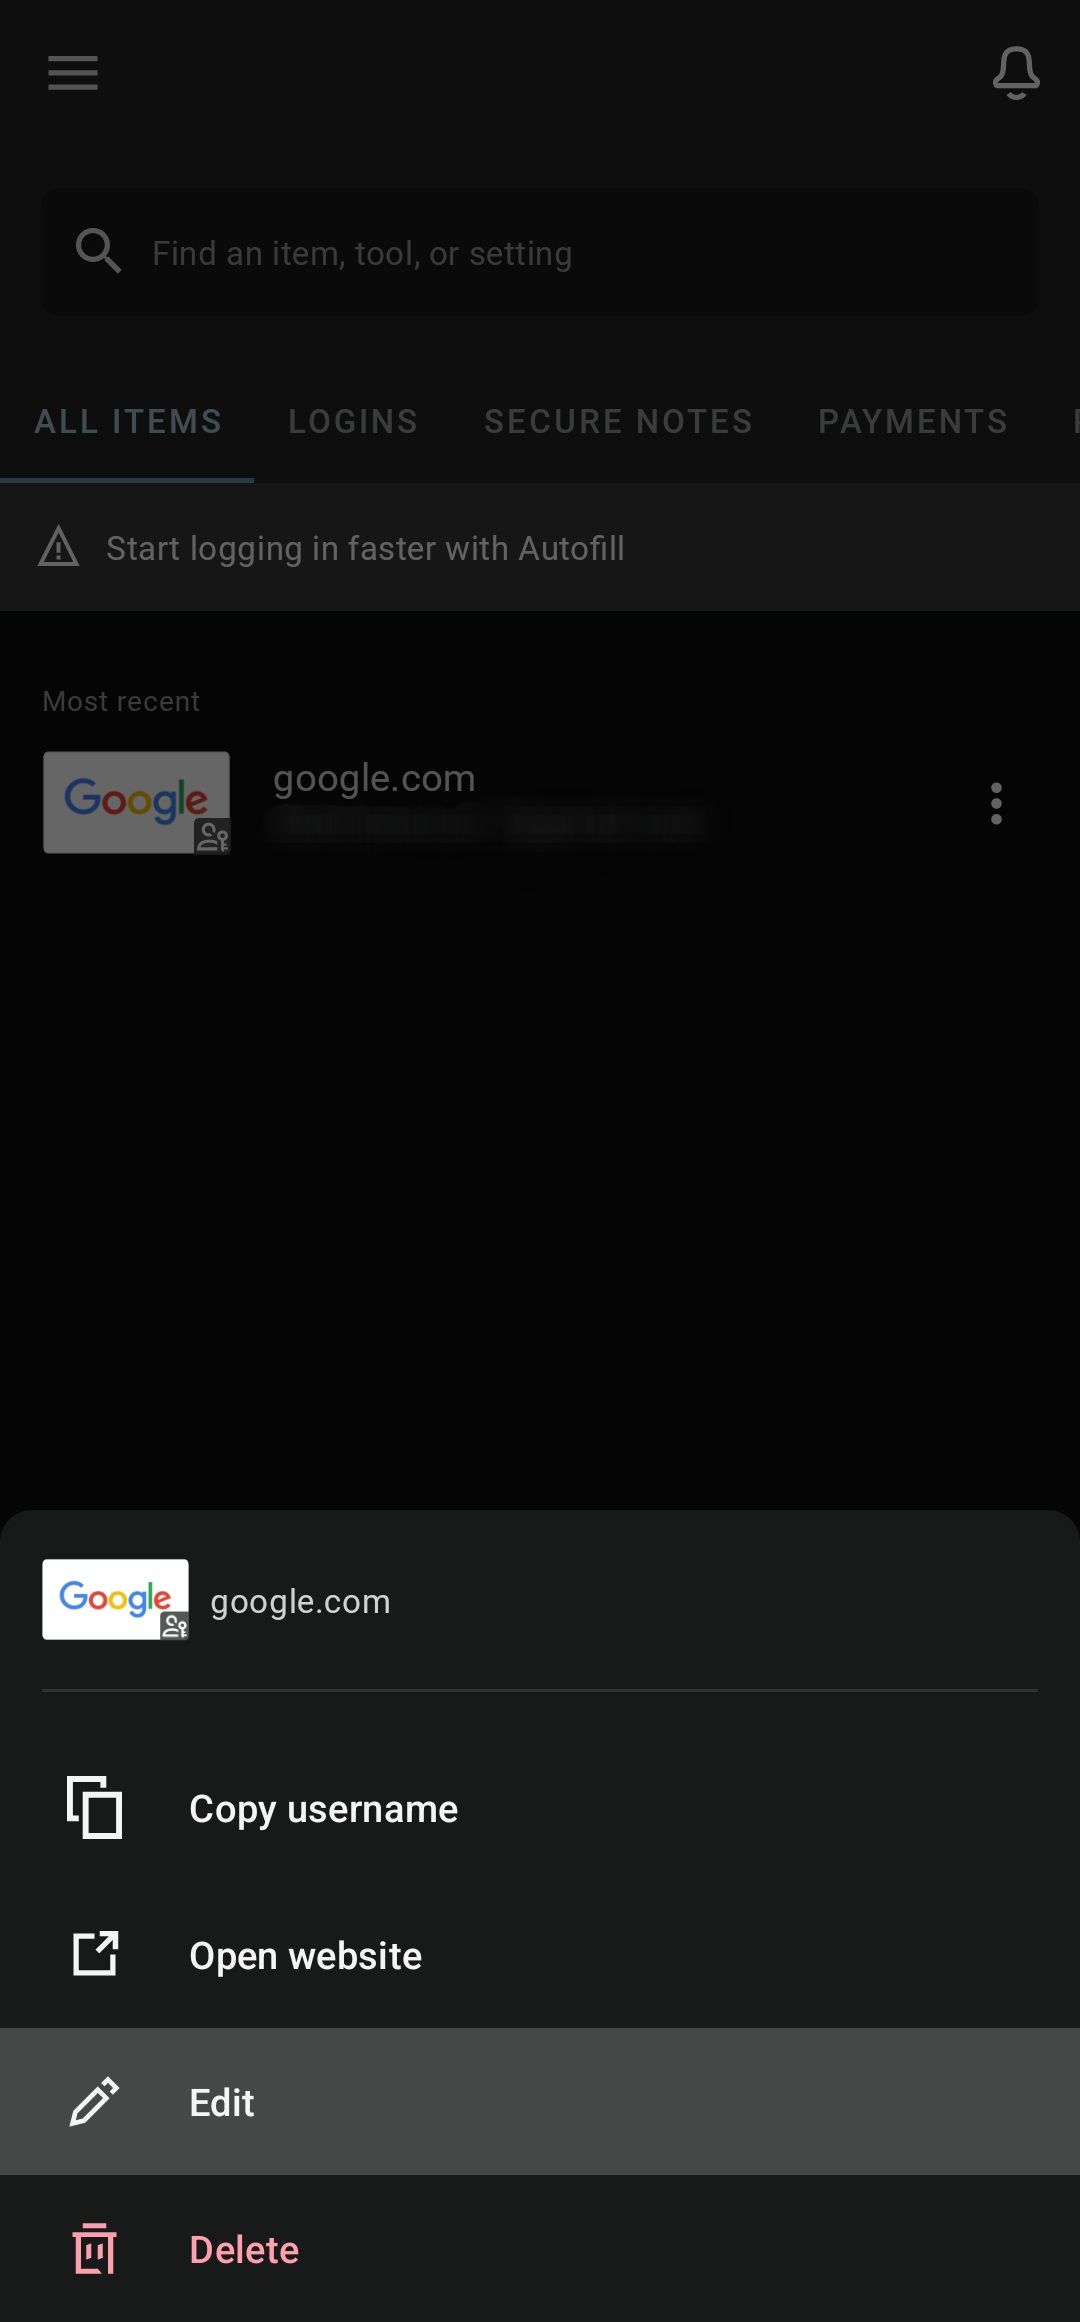
- Tap the More options icon beside the passkey you wish to manage. A box pops up.
- Select Edit from the options.
- Change the item name, add a note, or delete the passkey.
- Tap the Save icon in the upper-right corner of the display.
You need Android 14 and iOS 17 to set up and use Dashlane passkeys on Android and iOS, respectively.
Start using Dashlane passkeys right away
Thanks to the easy process, you can quickly set up and use Dashlane passkeys on your computer via the web app. However, unless you own a Google Pixel 8 or Pixel 8 Pro, you may not be able to use the service on your Android phone for a few months. Aside from passkeys, Dashlane is also one of the best password managers on the market.

Khám phá thêm từ Phụ Kiện Đỉnh
Đăng ký để nhận các bài đăng mới nhất được gửi đến email của bạn.

