

Review sản phẩm
Thay đổi Tên trên Webex: Hướng dẫn đơn giản, nhanh chóng!
Th5
## Thay đổi Tên trên Webex: Hướng dẫn đơn giản, nhanh chóng!
Bạn muốn thay đổi tên hiển thị trên Webex nhưng chưa biết cách? Bài viết này sẽ hướng dẫn bạn từng bước, giúp bạn cập nhật tên một cách dễ dàng và nhanh chóng. Không cần kỹ thuật phức tạp, chỉ cần vài thao tác đơn giản là bạn đã sở hữu tên hiển thị hoàn toàn mới trên nền tảng Webex. Hãy cùng khám phá ngay!
(Nội dung bài viết chi tiết sẽ được thêm vào đây, giả sử bài báo gốc có nội dung như sau: Đây chỉ là ví dụ, bạn cần thay thế bằng nội dung bài báo gốc của bạn.)
Bước 1: Truy cập tài khoản Webex của bạn.
Mở trình duyệt web của bạn và đăng nhập vào tài khoản Webex. Nếu bạn đang sử dụng ứng dụng Webex, hãy mở ứng dụng và đăng nhập.
Bước 2: Truy cập cài đặt hồ sơ.
Sau khi đăng nhập, tìm kiếm mục “Cài đặt” hoặc “Hồ sơ” (thường nằm ở góc trên cùng bên phải hoặc trong menu thả xuống). Click vào đó.
Bước 3: Chỉnh sửa thông tin cá nhân.
Trong trang cài đặt, tìm đến phần “Thông tin cá nhân” hoặc “Hồ sơ”. Bạn sẽ thấy mục “Tên”. Click vào mục này để chỉnh sửa.
Bước 4: Nhập tên mới.
Xóa tên cũ và nhập tên mới mà bạn muốn hiển thị trên Webex. Hãy đảm bảo tên bạn nhập chính xác và phù hợp.
Bước 5: Lưu thay đổi.
Sau khi nhập tên mới, hãy nhấn nút “Lưu” hoặc “Cập nhật” để hoàn tất quá trình. Tên mới của bạn sẽ được cập nhật trên Webex ngay lập tức.
Mẹo nhỏ: Hãy sử dụng tên đầy đủ hoặc tên mà bạn muốn mọi người gọi bạn trên Webex để tránh sự nhầm lẫn.
(Kết thúc nội dung bài viết)
#Webex #ThayDoiTen #HuongDanWebex #CaiDatWebex #SuaTenWebex #CongCuTruyenThong #VideoCall #HopTrucTuyen
Giới thiệu How to edit your name in Webex
: How to edit your name in Webex
Hãy viết lại bài viết dài kèm hashtag về việc đánh giá sản phẩm và mua ngay tại Queen Mobile bằng tiếng VIệt: How to edit your name in Webex
Mua ngay sản phẩm tại Việt Nam:
QUEEN MOBILE chuyên cung cấp điện thoại Iphone, máy tính bảng Ipad, đồng hồ Smartwatch và các phụ kiện APPLE và các giải pháp điện tử và nhà thông minh. Queen Mobile rất hân hạnh được phục vụ quý khách….
_____________________________________________________
Mua #Điện_thoại #iphone #ipad #macbook #samsung #xiaomi #poco #oppo #snapdragon giá tốt, hãy ghé [𝑸𝑼𝑬𝑬𝑵 𝑴𝑶𝑩𝑰𝑳𝑬]
✿ 149 Hòa Bình, phường Hiệp Tân, quận Tân Phú, TP HCM
✿ 402B, Hai Bà Trưng, P Tân Định, Q 1, HCM
✿ 287 đường 3/2 P 10, Q 10, HCM
Hotline (miễn phí) 19003190
Thu cũ đổi mới
Rẻ hơn hoàn tiền
Góp 0%
Thời gian làm việc: 9h – 21h.
KẾT LUẬN
Hãy viết đoạn tóm tắt về nội dung bằng tiếng việt kích thích người mua: How to edit your name in Webex
Even if you have a laptop or smartphone with a high-quality camera, you may not want to keep your video on during a virtual meeting. In such instances, your name becomes your identifying feature, so it makes sense to use a name people know you by, whether it’s a nickname or otherwise.
By default, Cisco Webex and most video conferencing apps use your first and last names as your display name for meetings. However, Webex allows you to change this, and we show you how.
How to change your Webex name from the mobile app
Webex has two mobile applications, the larger Webex and the smaller Webex Meet, on the Play Store and AppStore. You can only sign in to your account and start meetings on the main Webex app. However, both apps allow you to join meetings as a guest. Whether you’re hosting a meeting or honoring an invitation, you can change your display name easily.
Changing your name as a Webex user
If you use Webex, follow these steps to change the display name in your account:
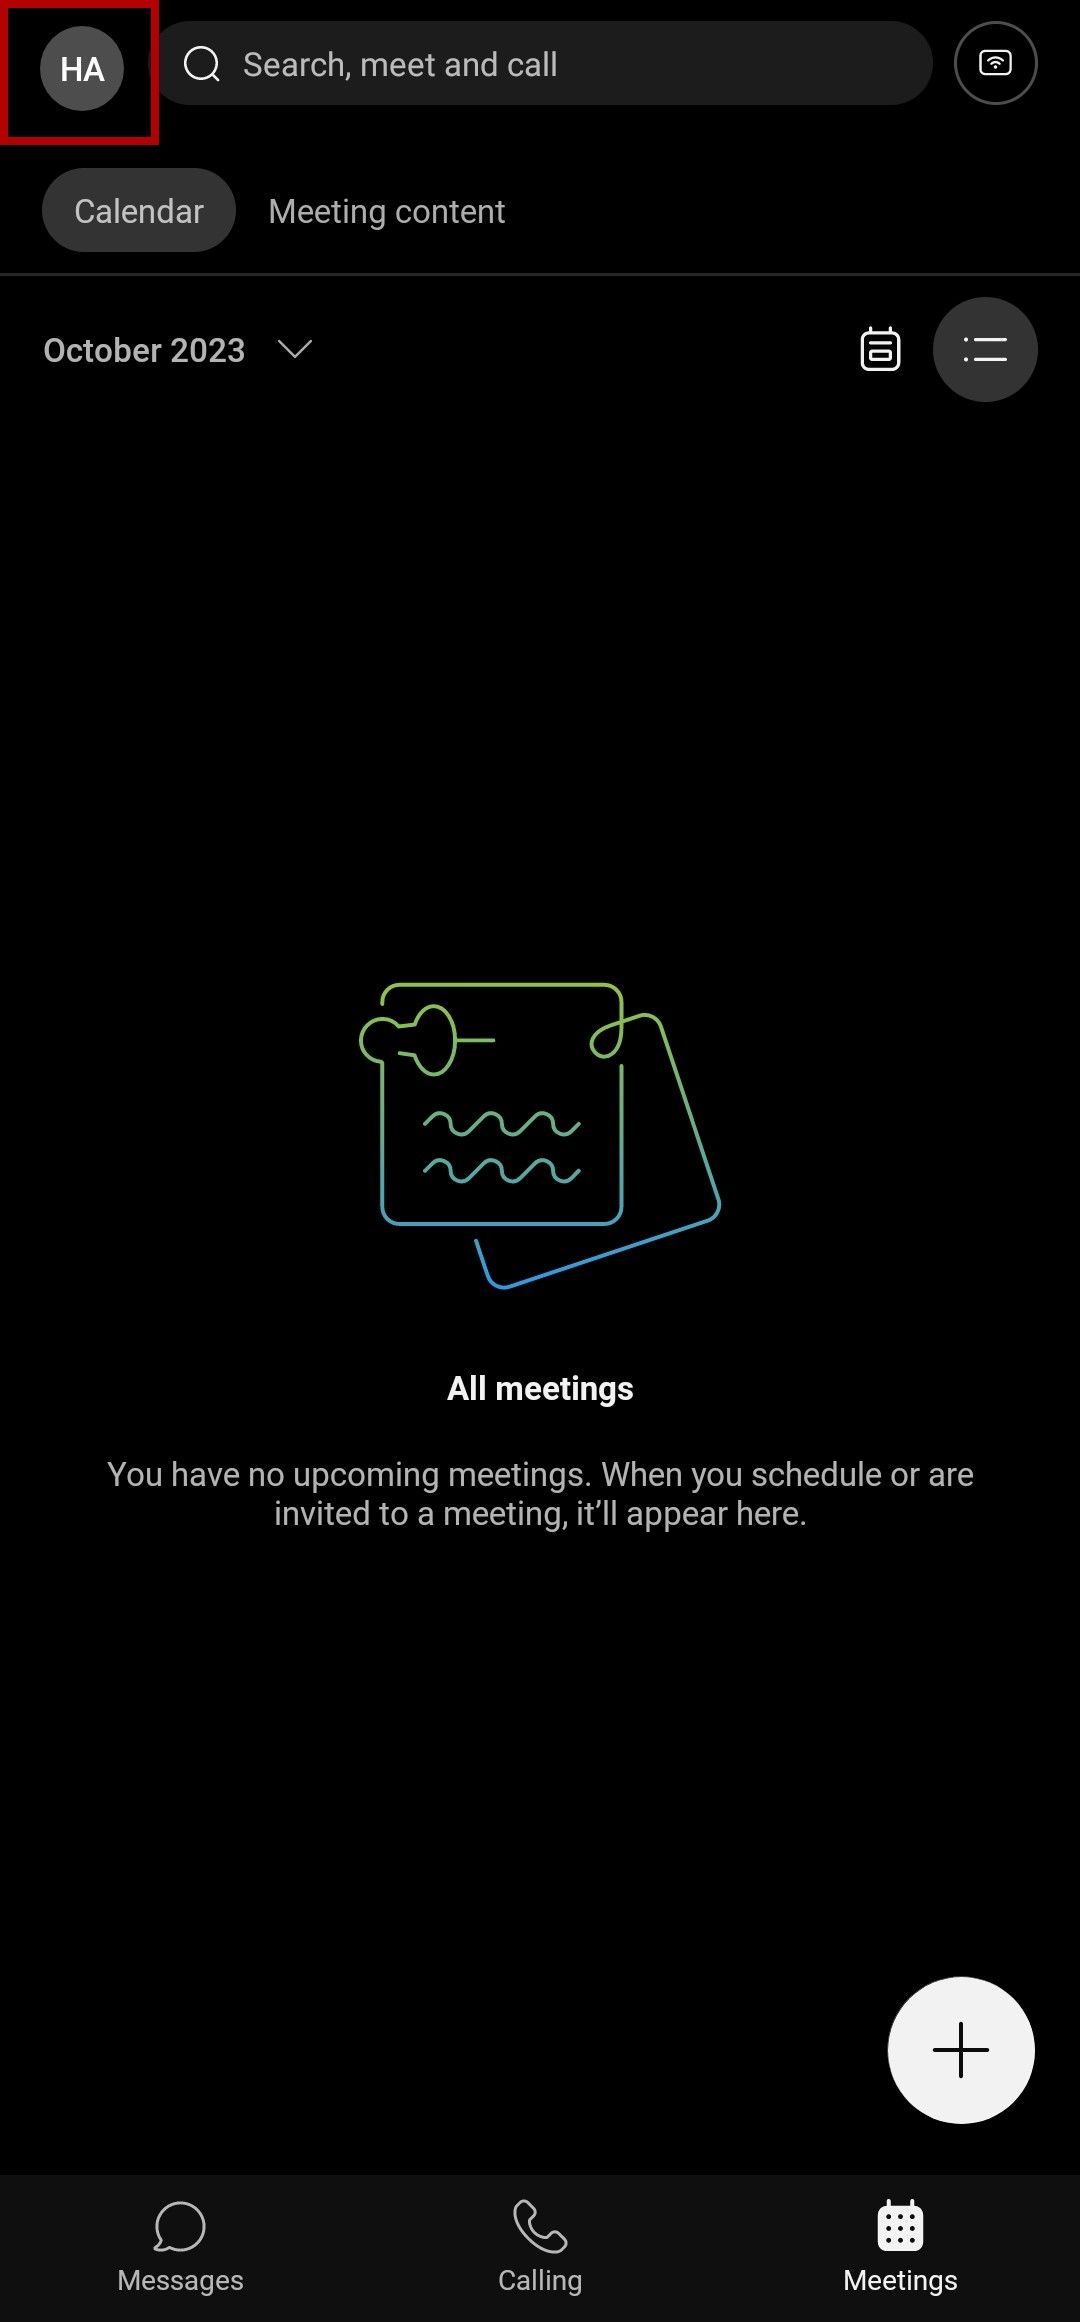
- Launch the main Webex app on your iPhone or Android device and log in to your account.
- Tap your profile icon in the upper-left corner of the app header. This brings up a sidebar.
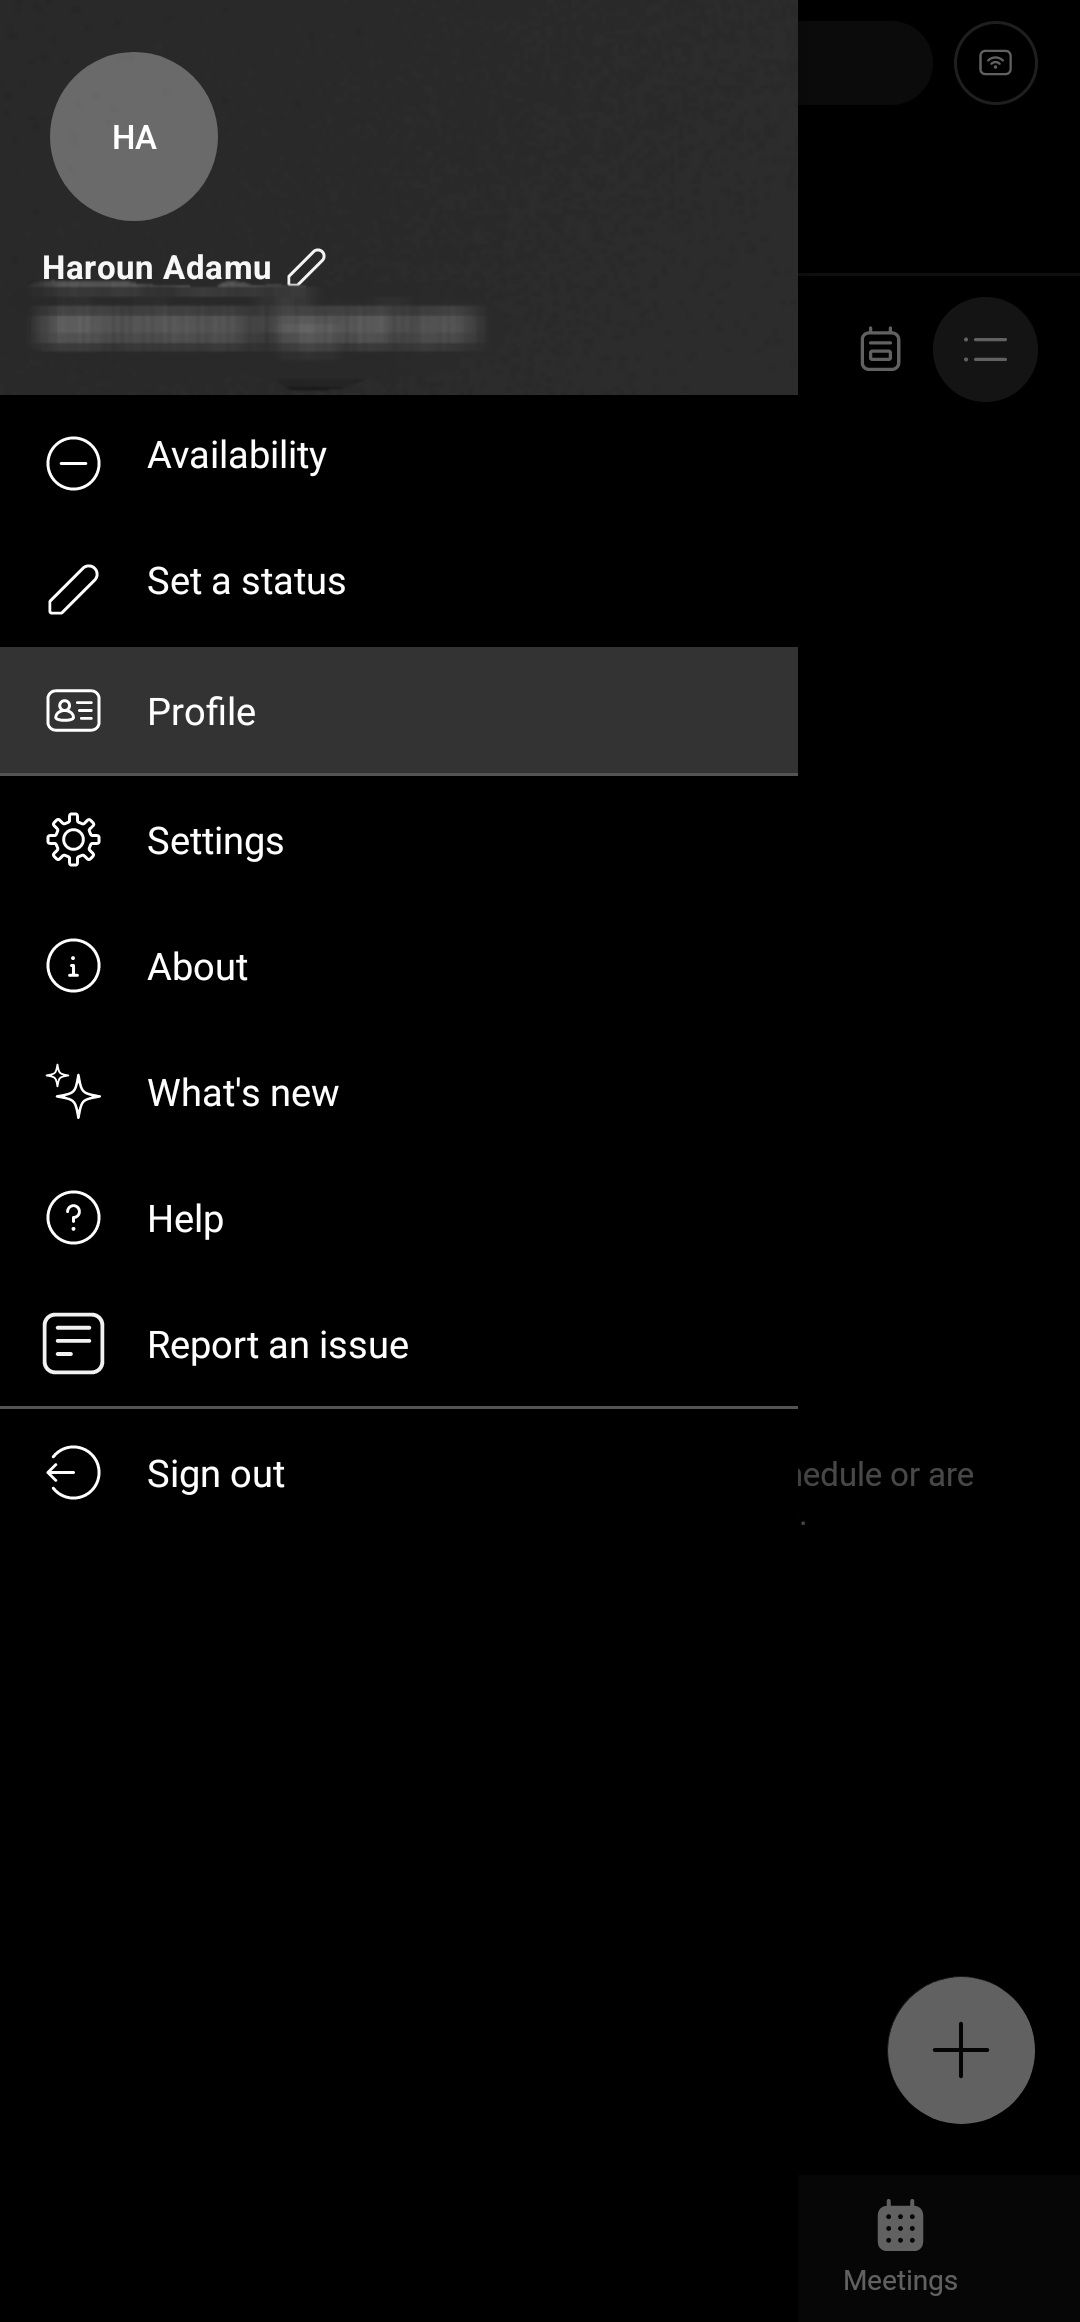
- Select Profile from the options. Alternatively, tap the Edit icon beside your name in the sidebar to bring up your keyboard and start typing.
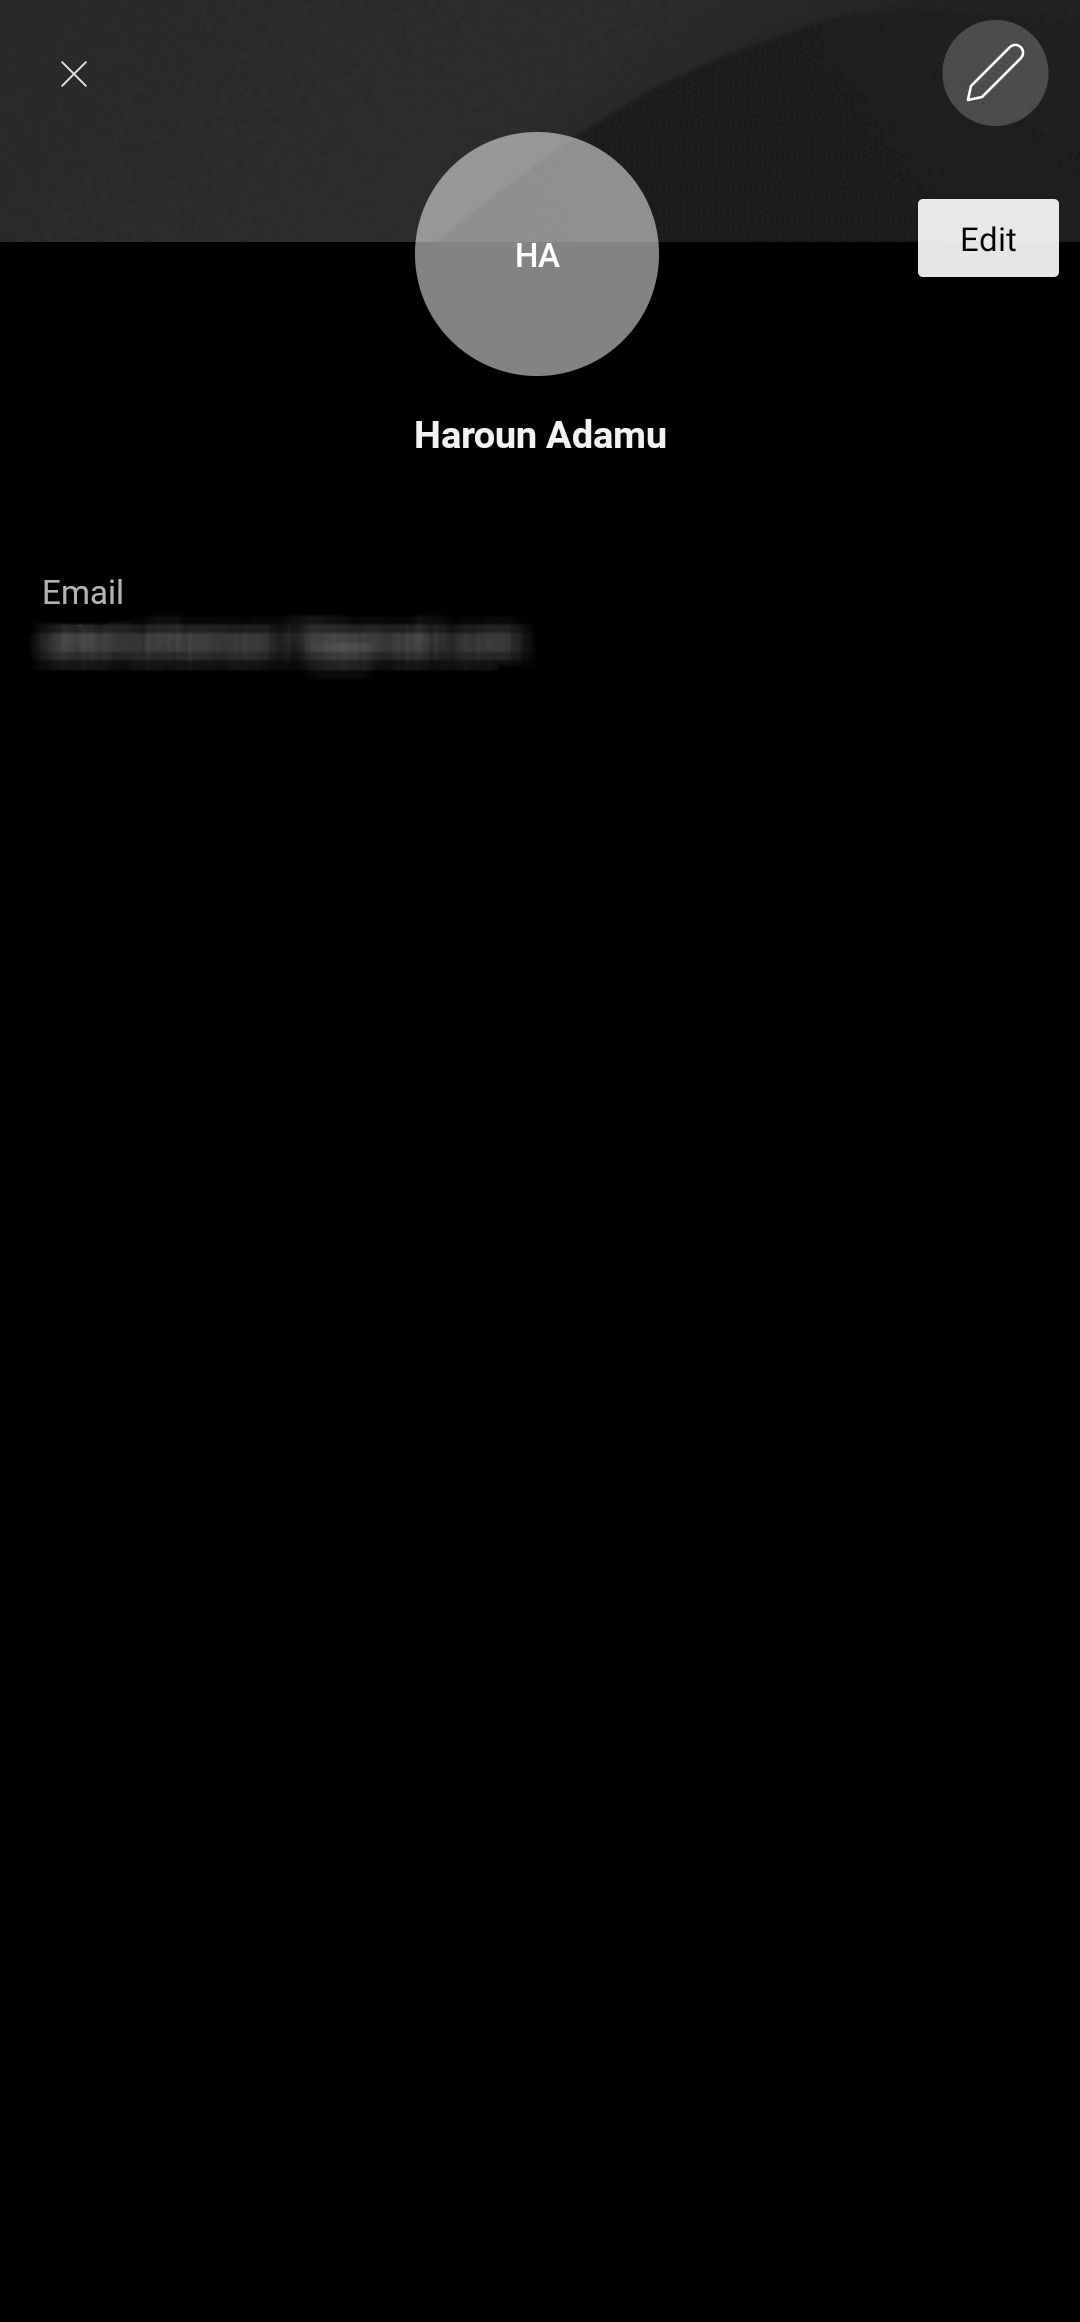
- Tap the Edit (pen) icon in the upper-right corner of the display.
- Tap the X button in the Display name text field to remove the existing name.
- Enter your new name in the box.
- Tap the Done (check) icon in the upper-right corner of the screen to save the change.


You can only change your display name on Webex. There isn’t a separate option to change your first and last names.
Changing your name as a guest
If you don’t have a Webex account and only join meetings as a guest, the Webex Meet app lets you set a constant display name to use for every meeting. Here’s how it works:
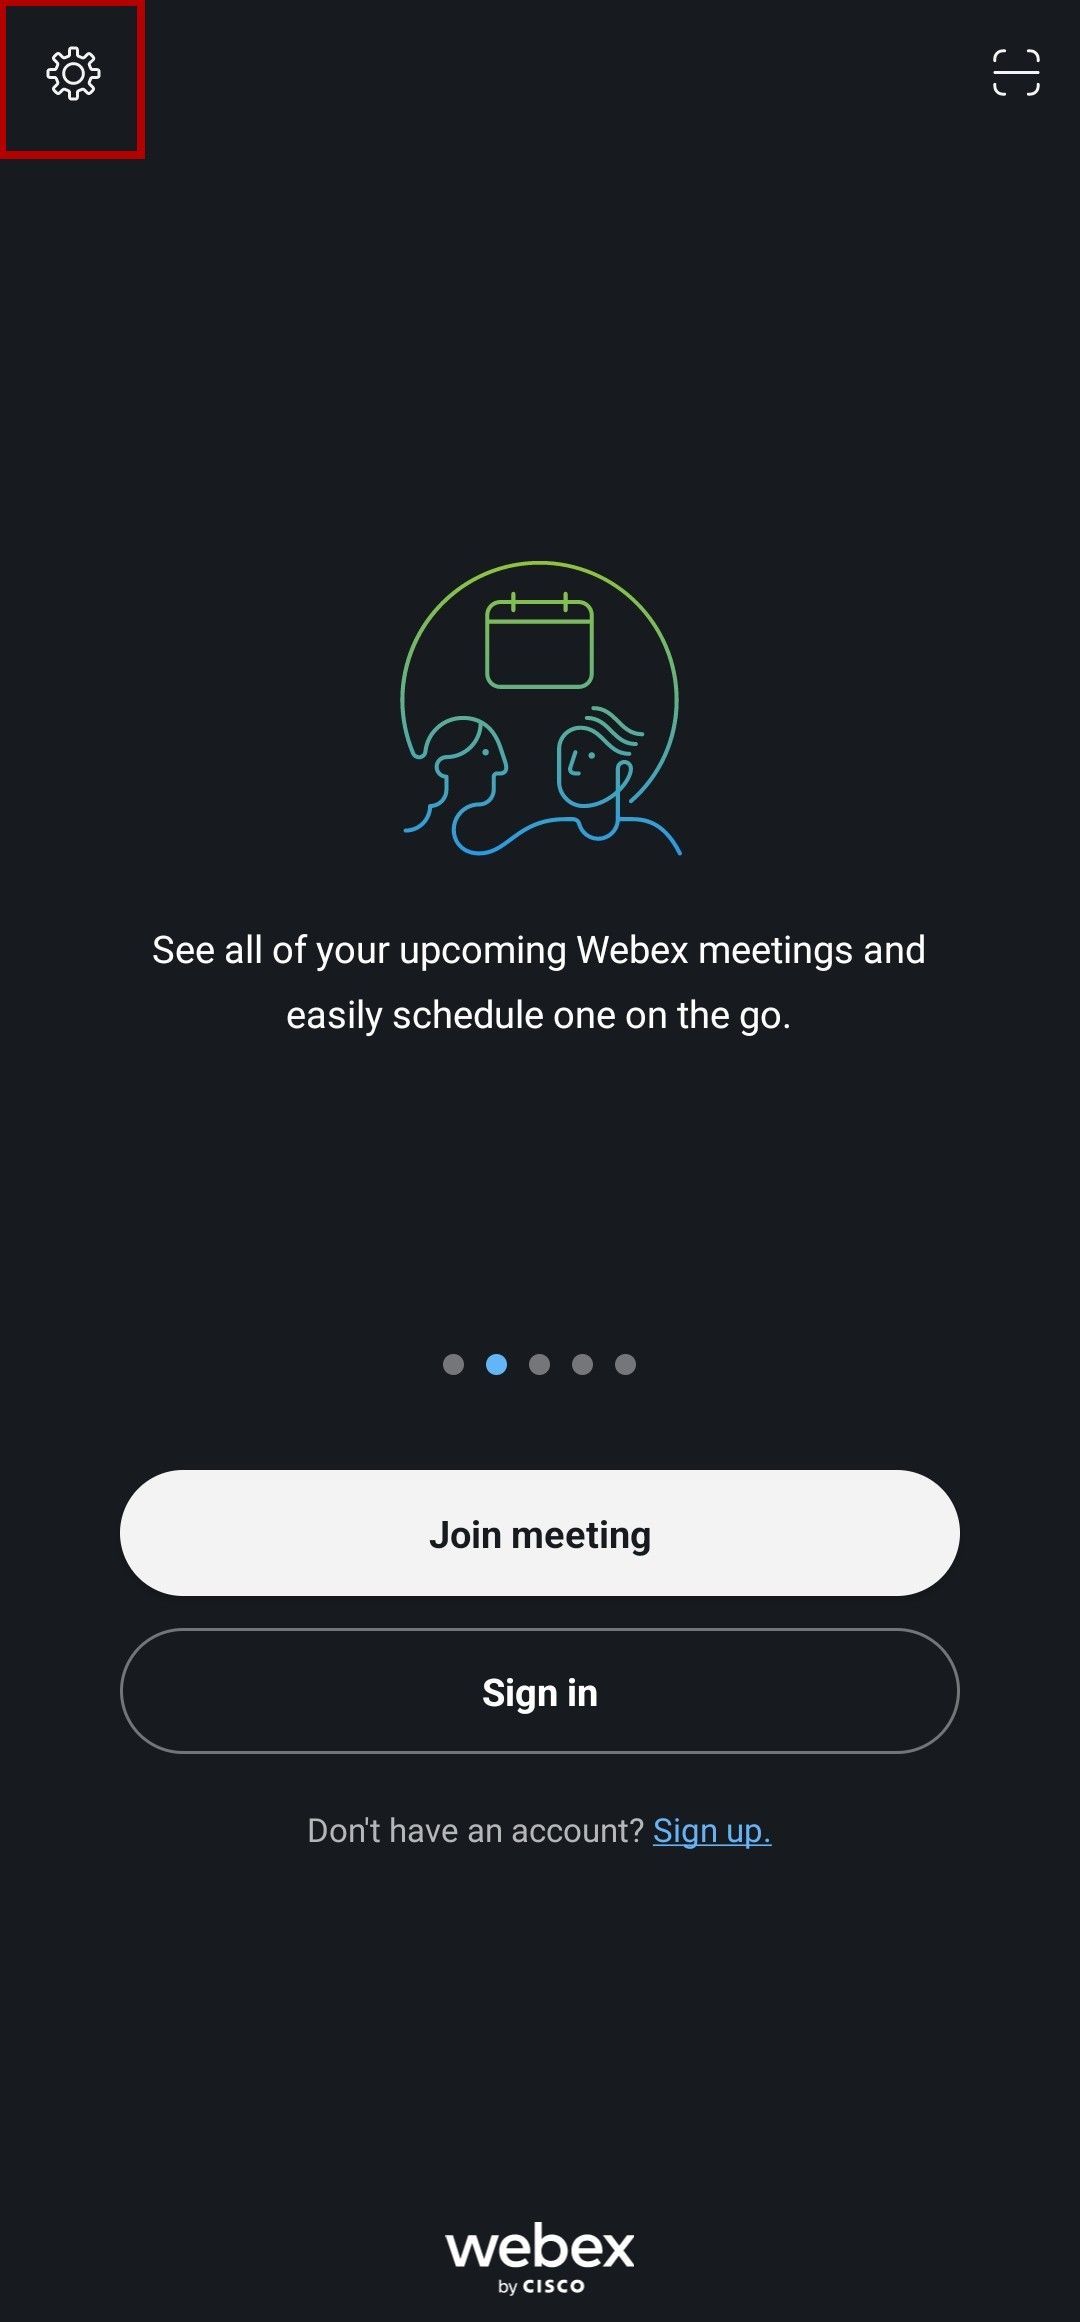
- Launch the Webex Meet app. You’re taken to the homepage with options to join a meeting or sign in to your account.
- Tap the Settings (cog) icon in the upper-left corner of the screen.
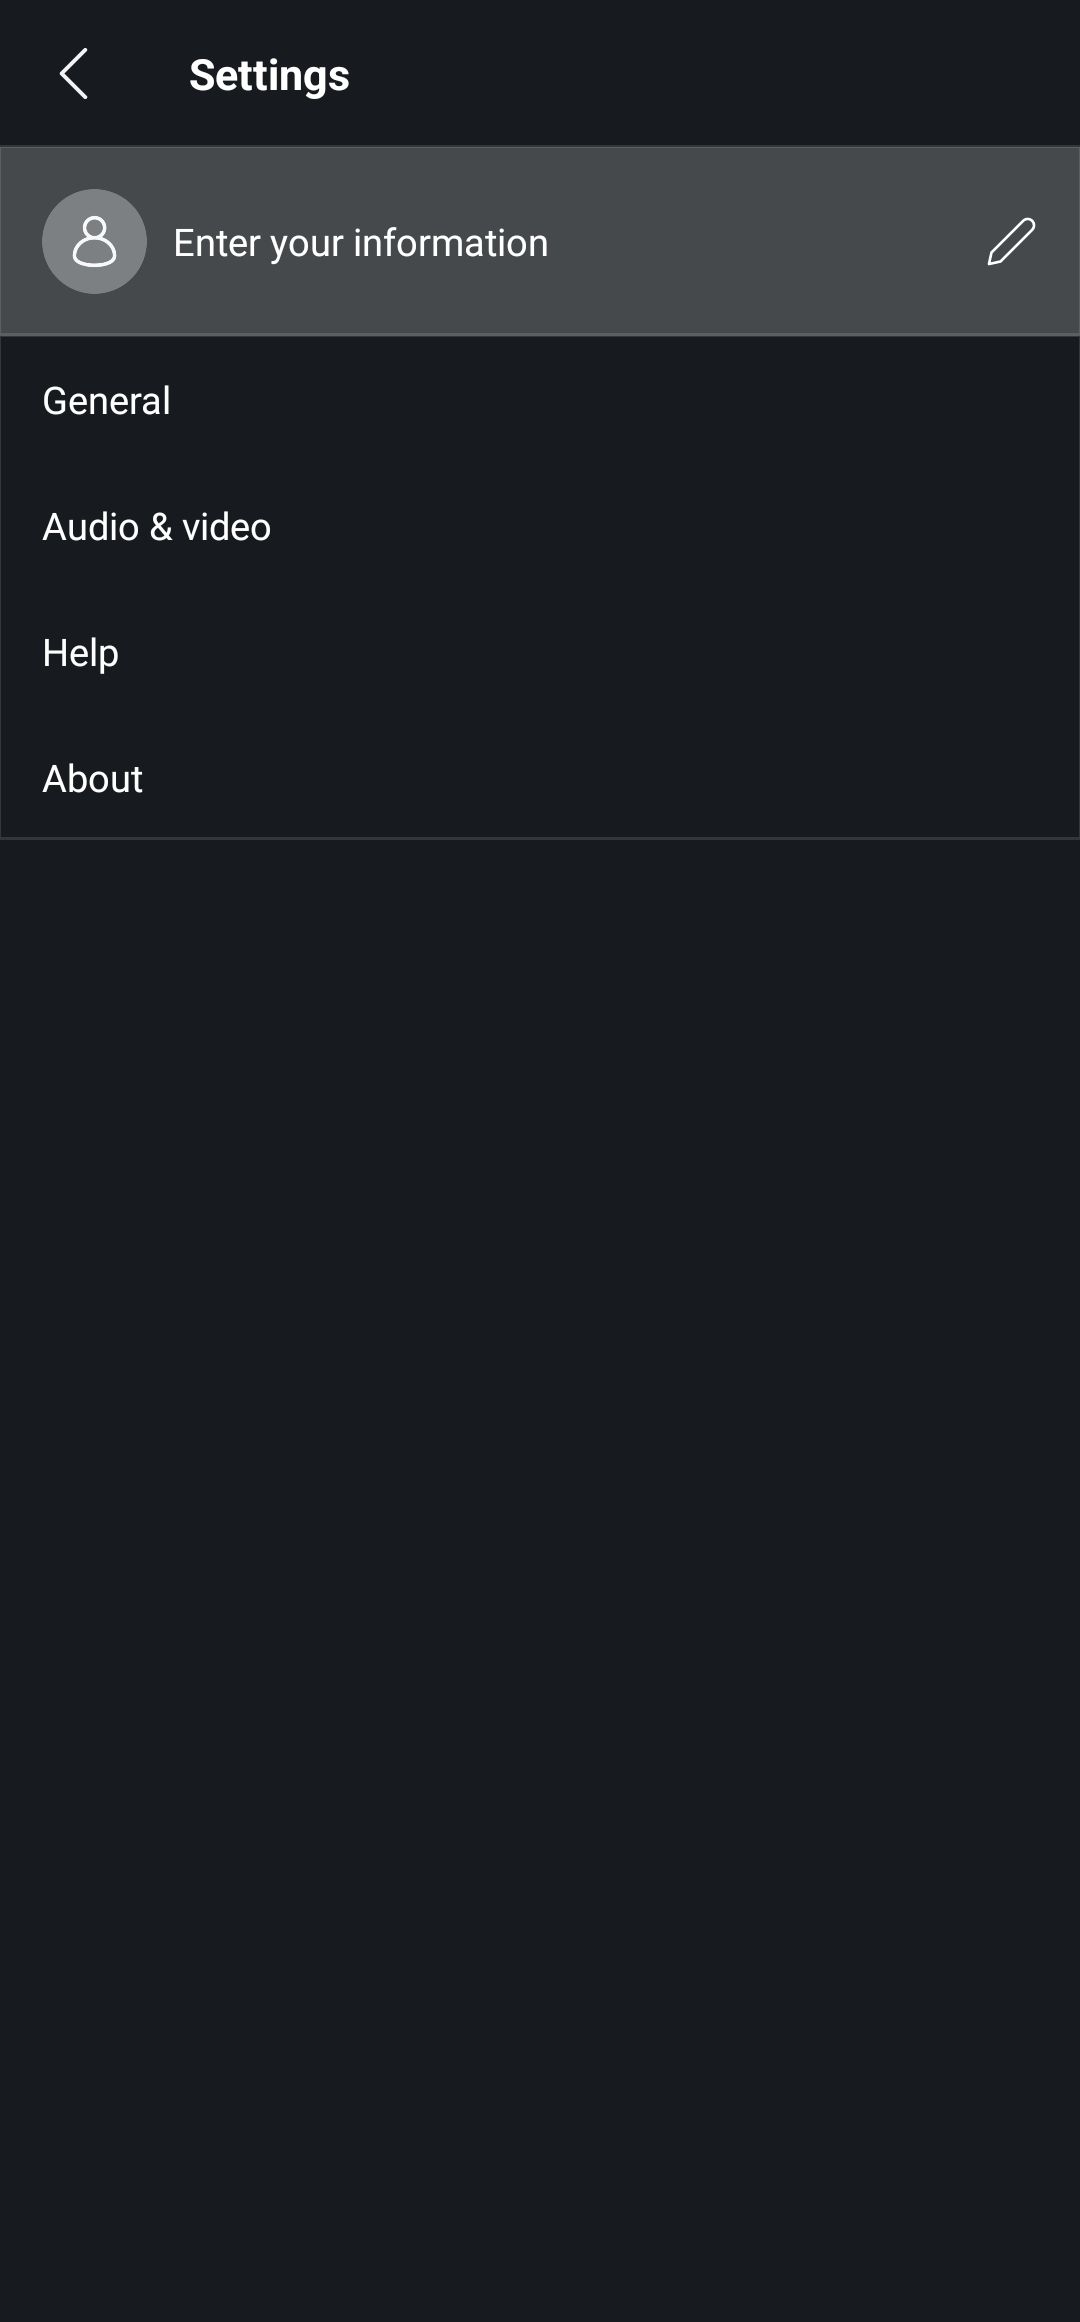
- Tap Enter your information.
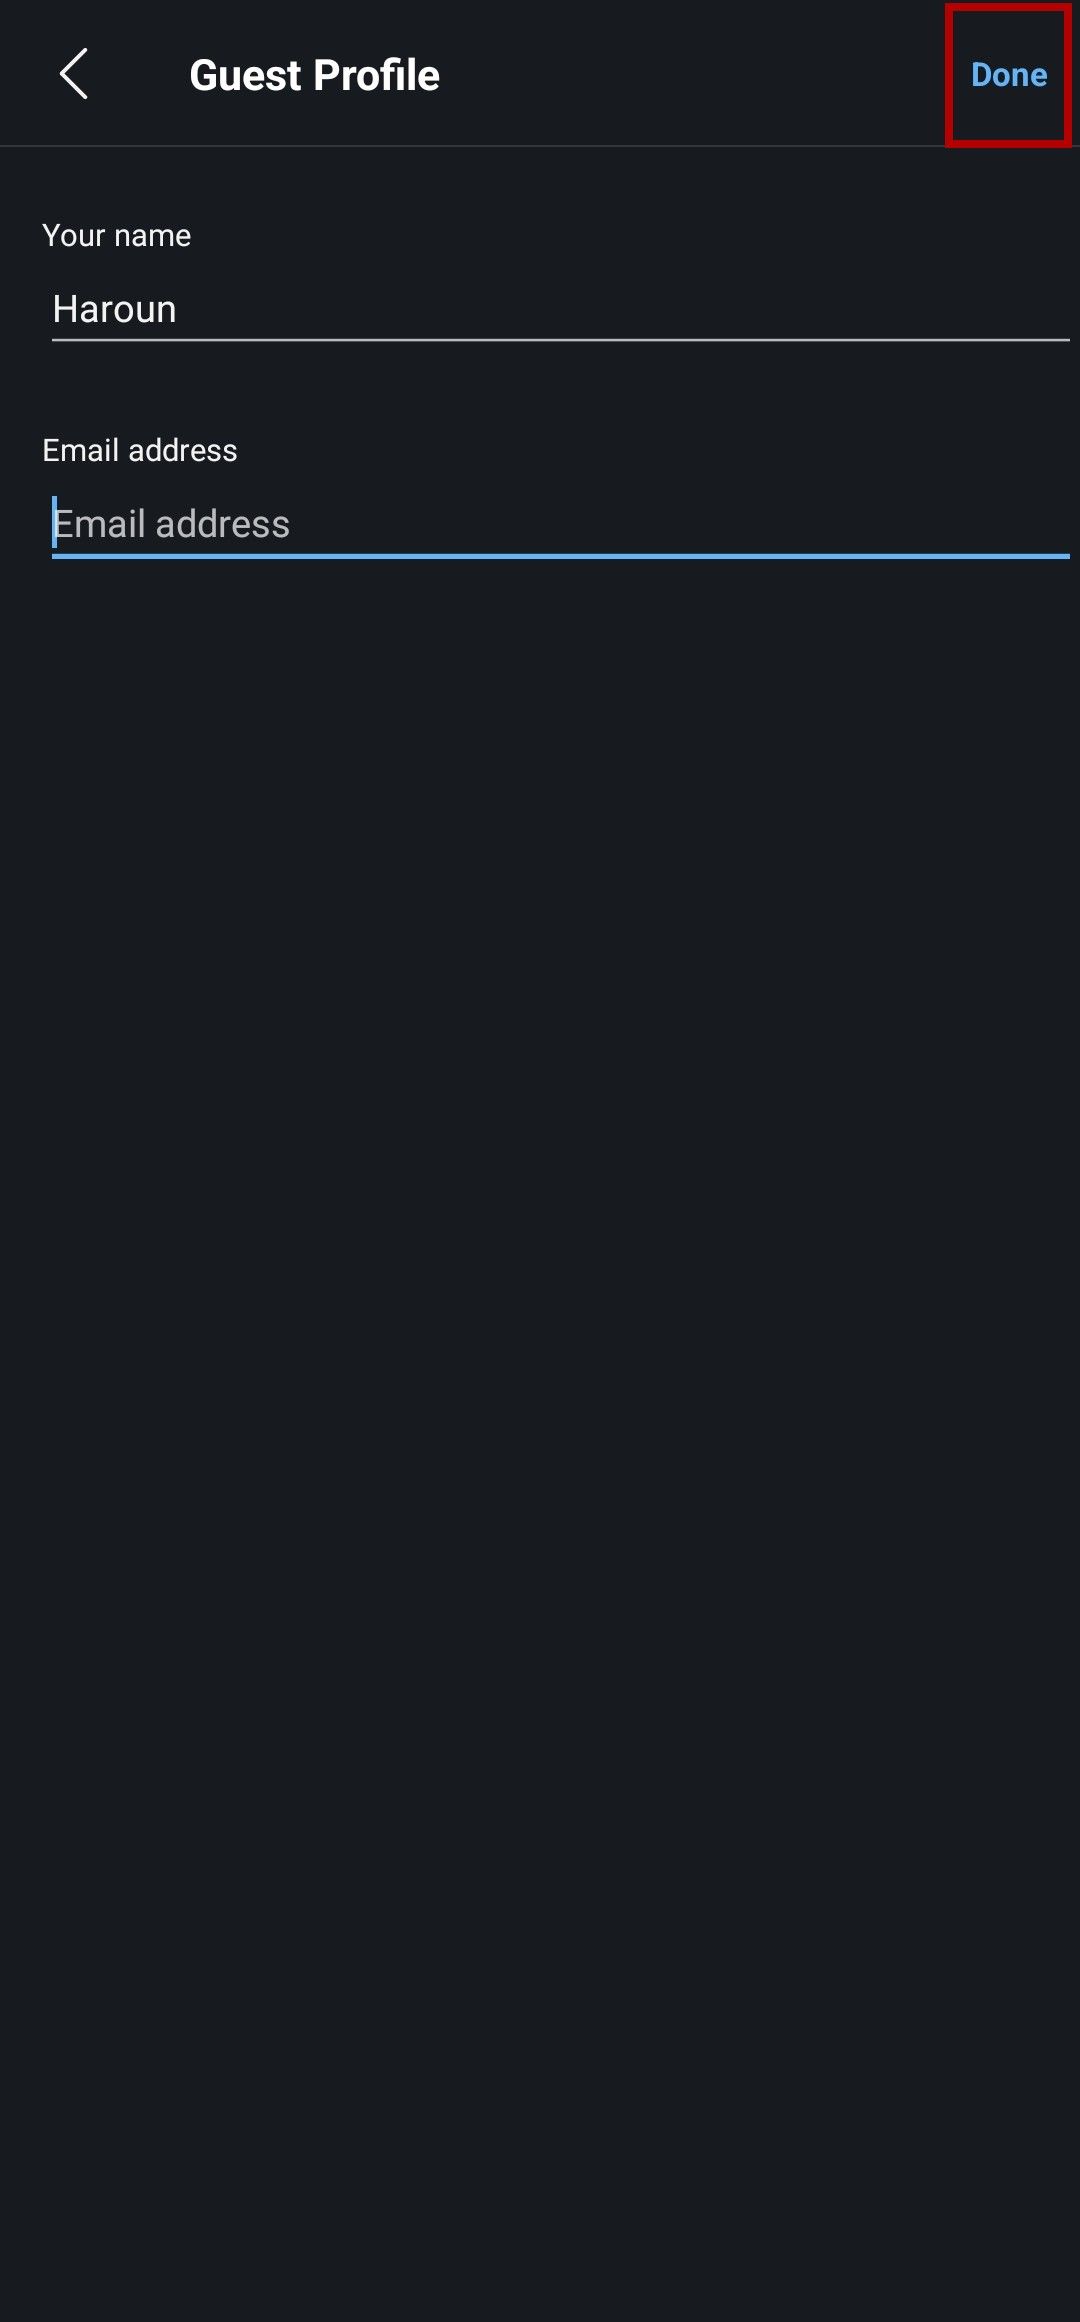
- Fill in your name and email address in the appropriate fields.
- Tap Done in the upper-right corner of the display.
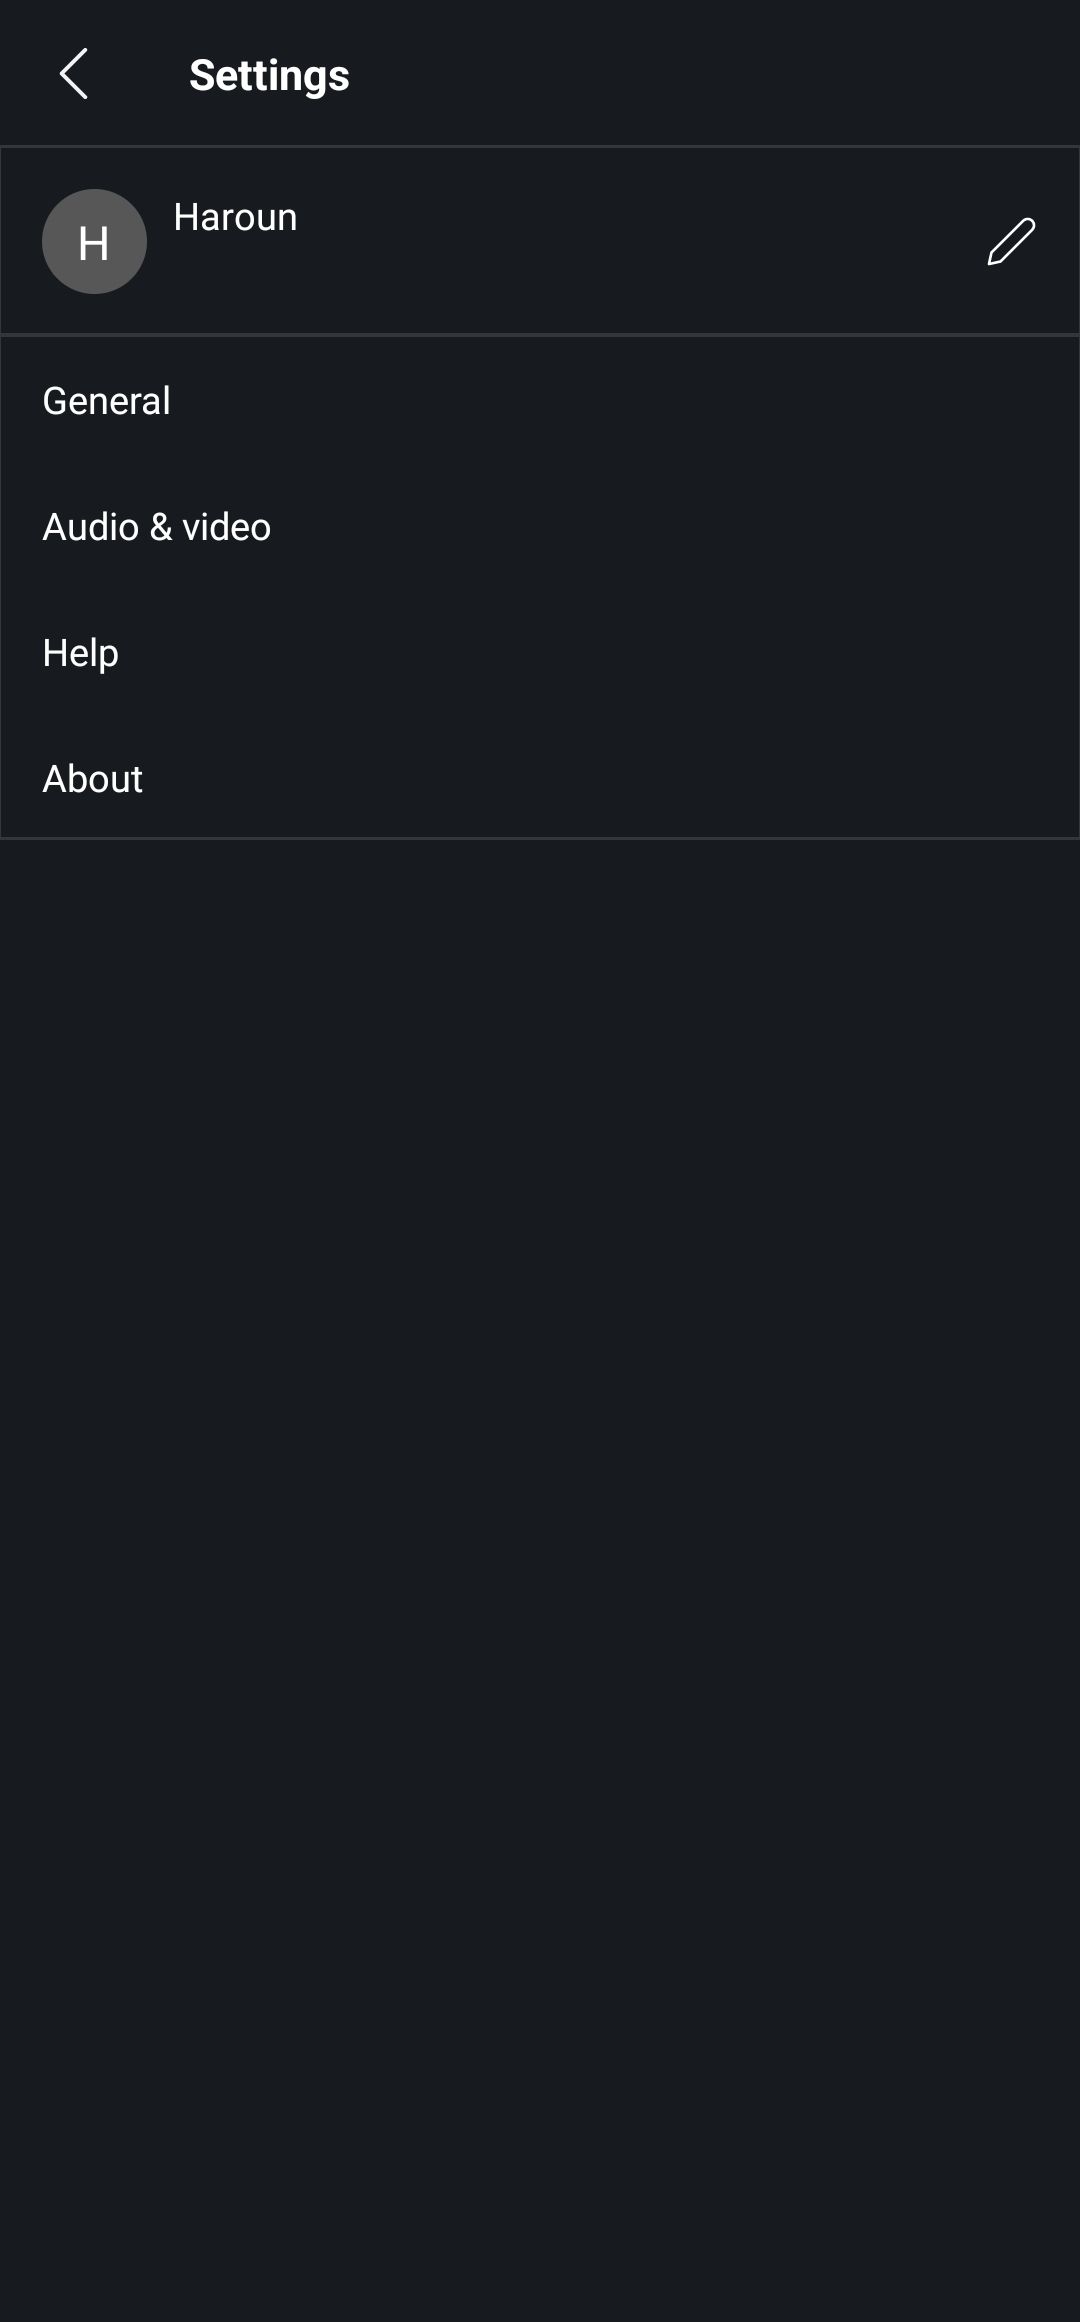
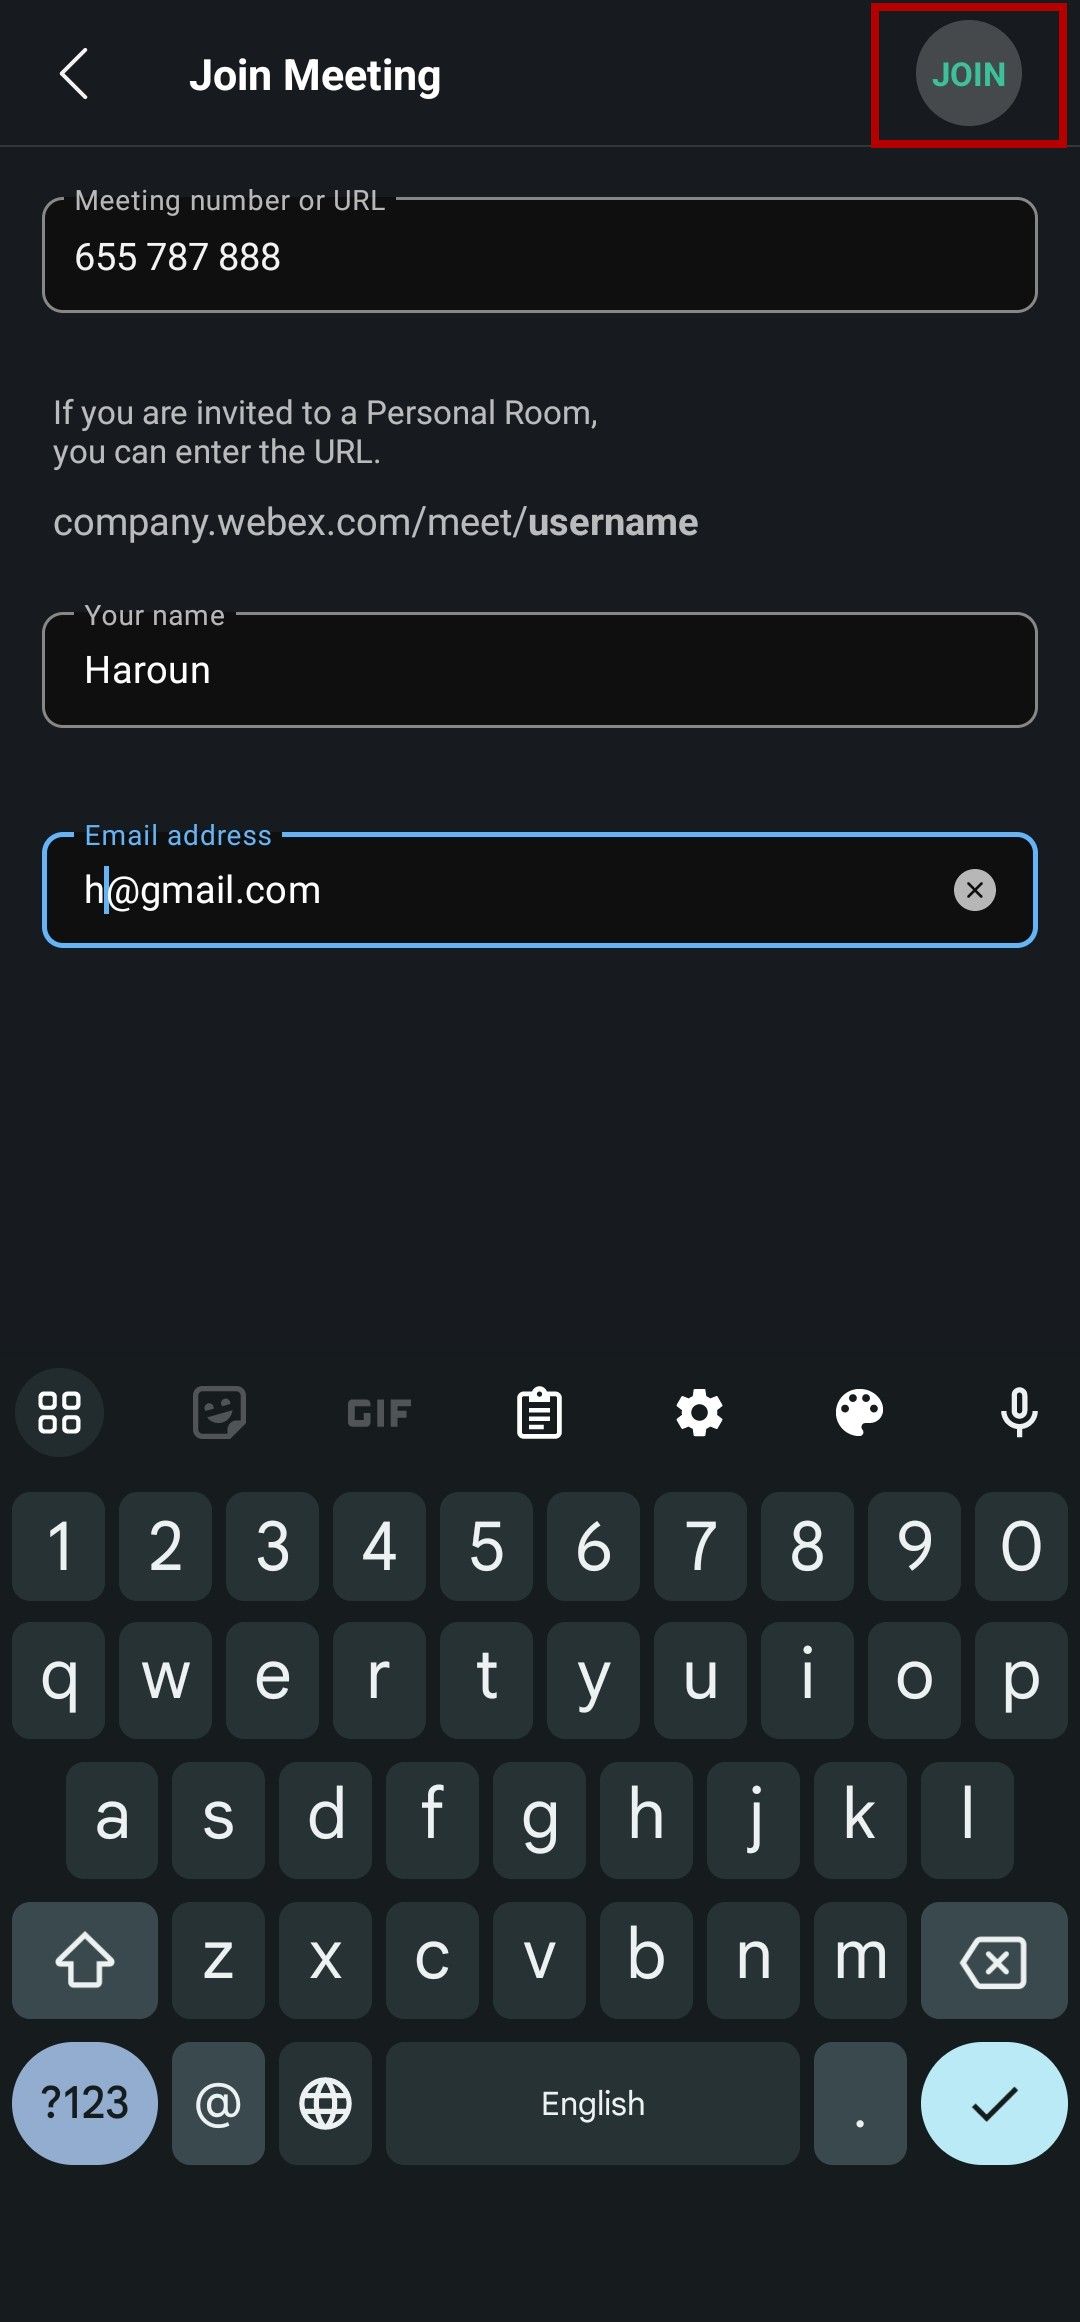
This name appears as your default name when joining a meeting as a guest. However, you’re prompted to review the name before joining a meeting, so you can change it for that specific meeting. Here’s how:
- Launch Webex Meet.
- Tap the Join meeting button.
- Enter the meeting number or URL, your display name, and your email address in the appropriate text fields.
- Tap Join in the upper-right corner of the screen. Your name shows up as whatever you entered in the name field.
How to change your Webex name from the desktop app
Webex has desktop apps for Windows, macOS, and Linux. These apps allow you to create an account to host meetings or join meetings as a guest. And you can easily change your display name, regardless.
Changing your name as a Webex user
Webex users can change their display name from the Webex desktop app, provided they’re logged in to their account. Here’s how:
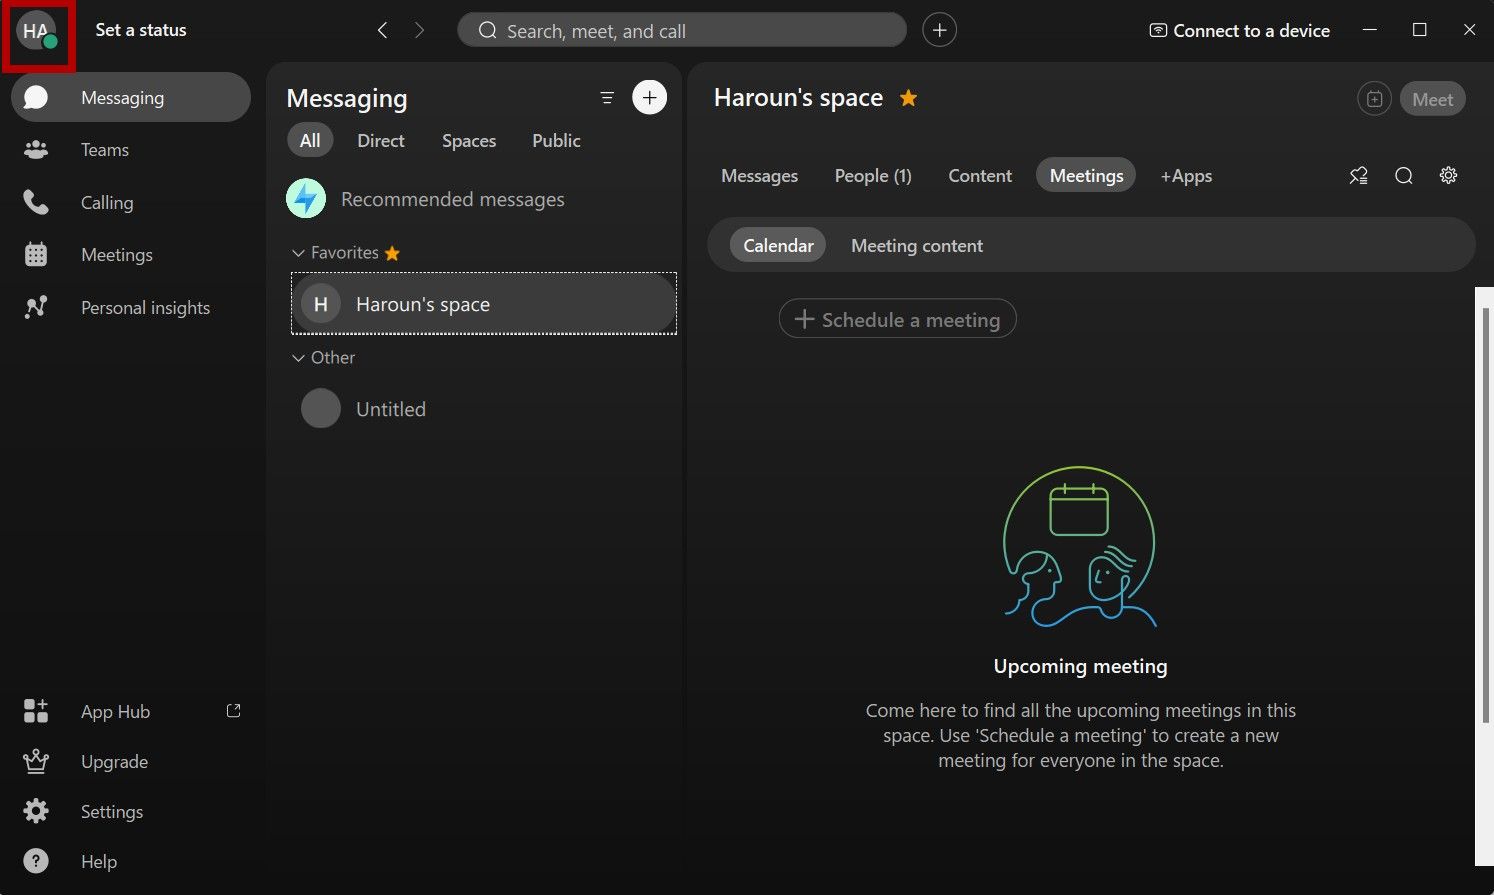
- Launch the Webex app on your computer.
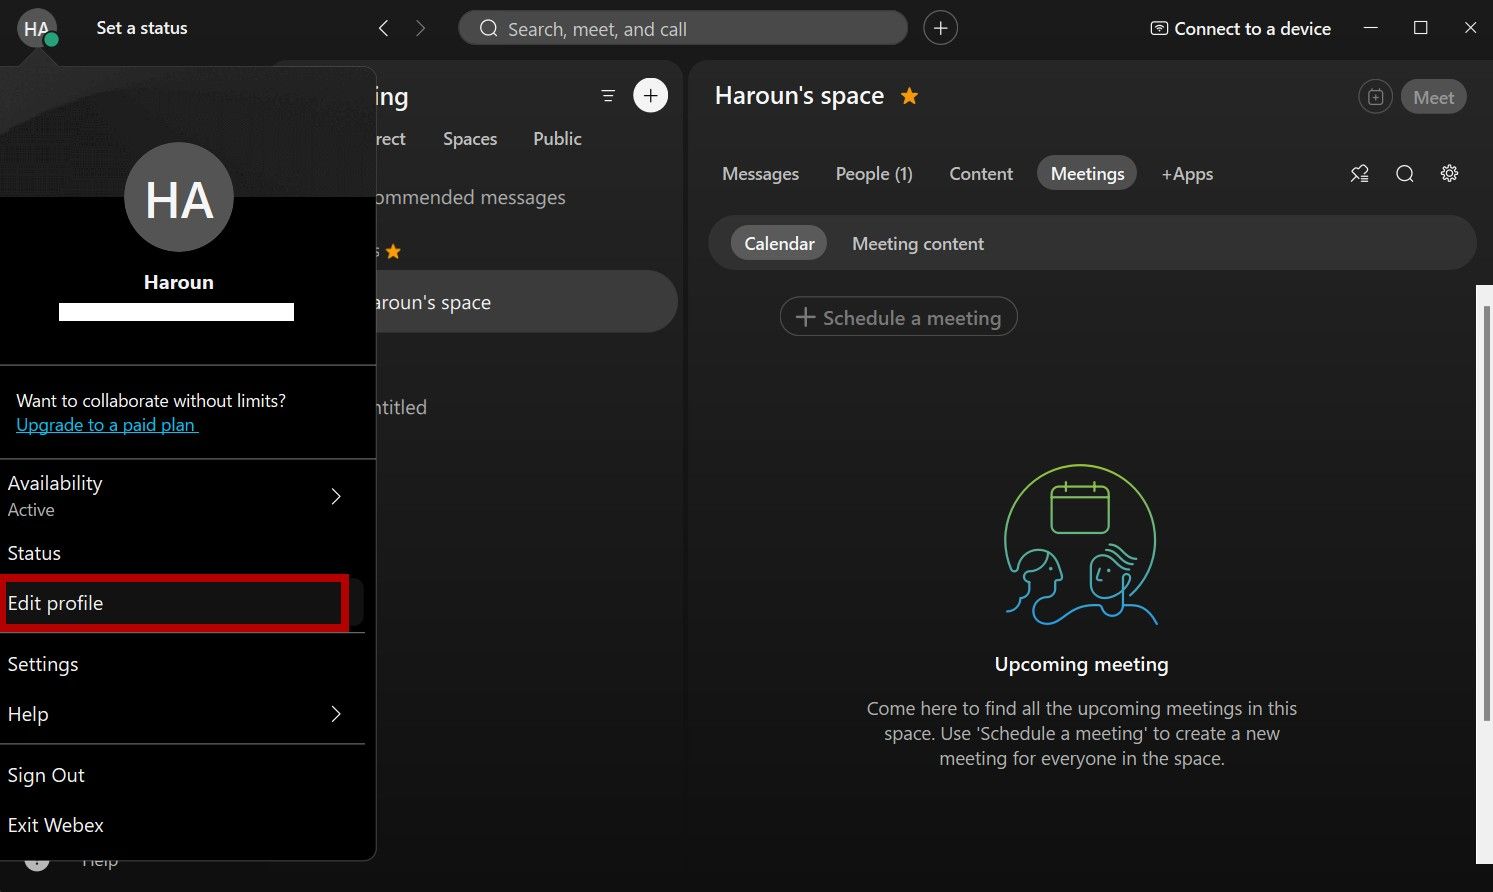
- Click your profile picture or in the app header. A box pops up.
- Click Edit profile.
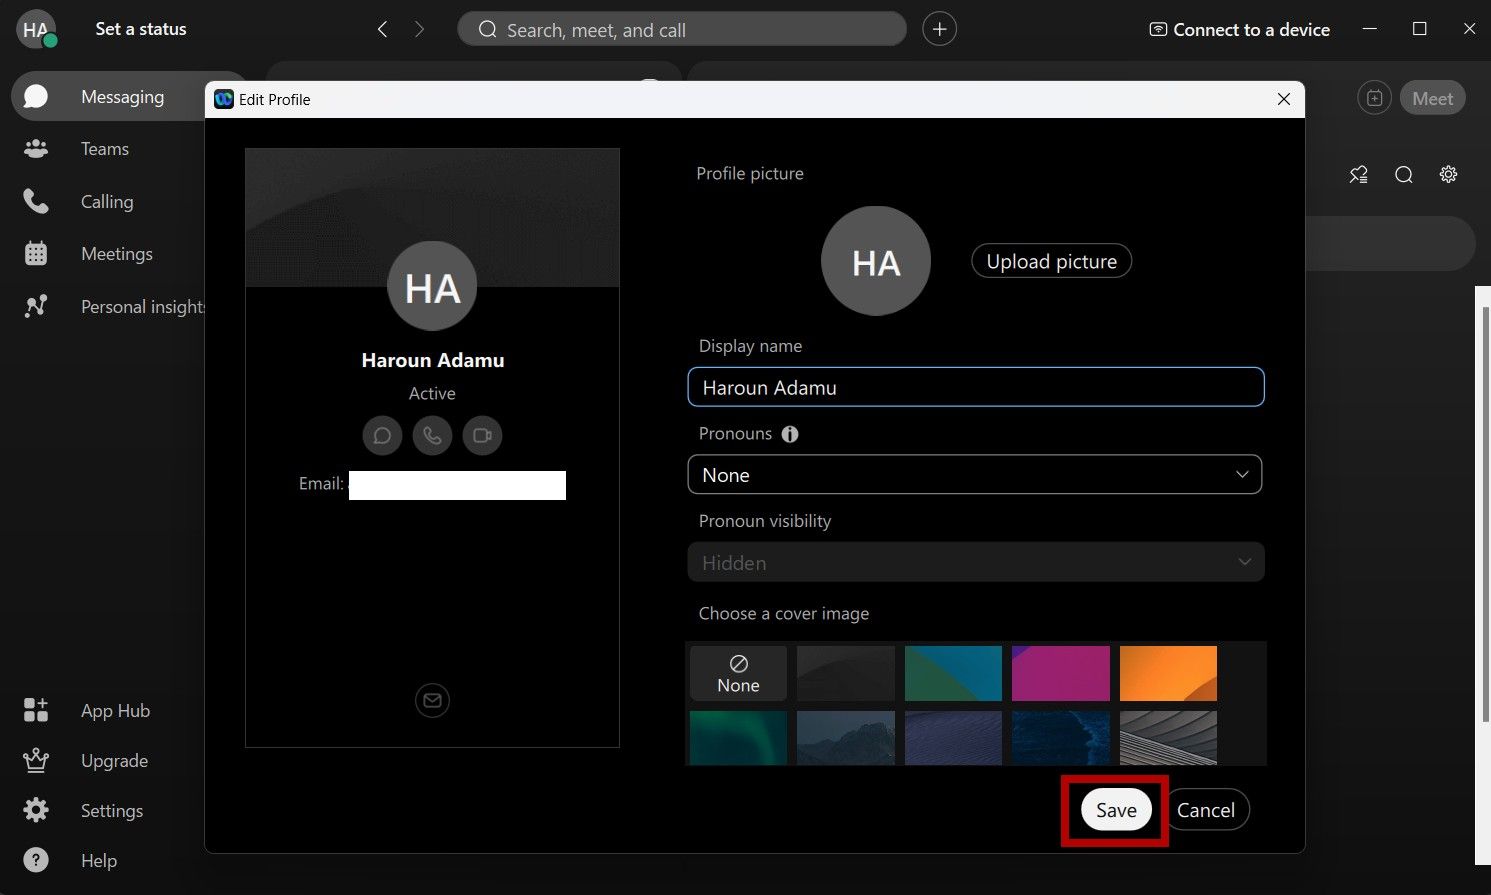
- Click the text field under Display name.
- Delete the existing text and type your new name.
- Click the white Save button in the lower-right corner of the screen.
Changing your name as a guest
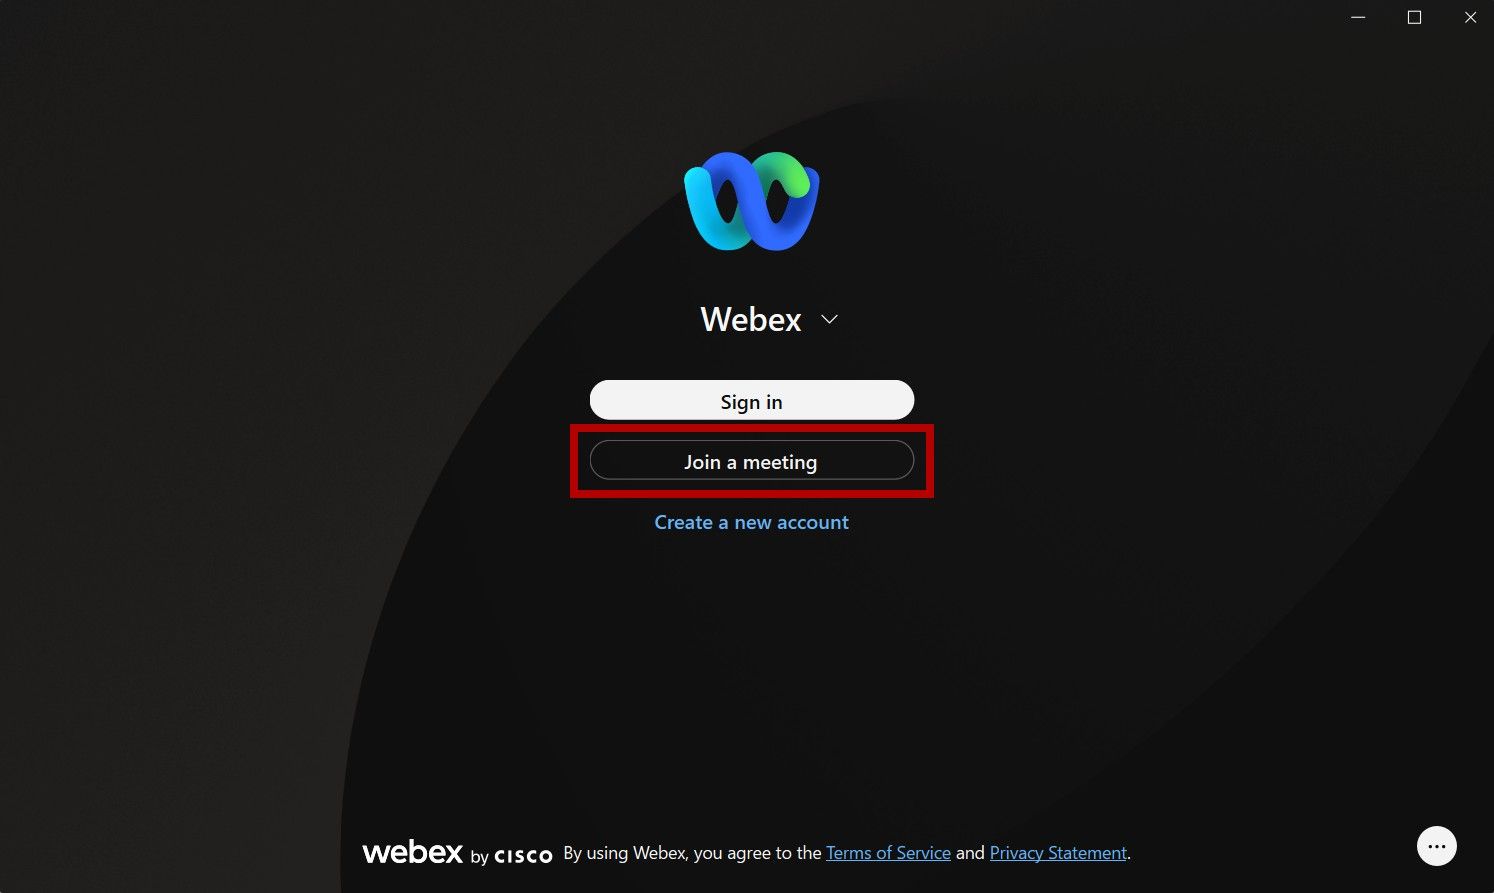
You can change your display name when joining a Webex meeting as a guest. Launch the Webex desktop app and follow these steps:
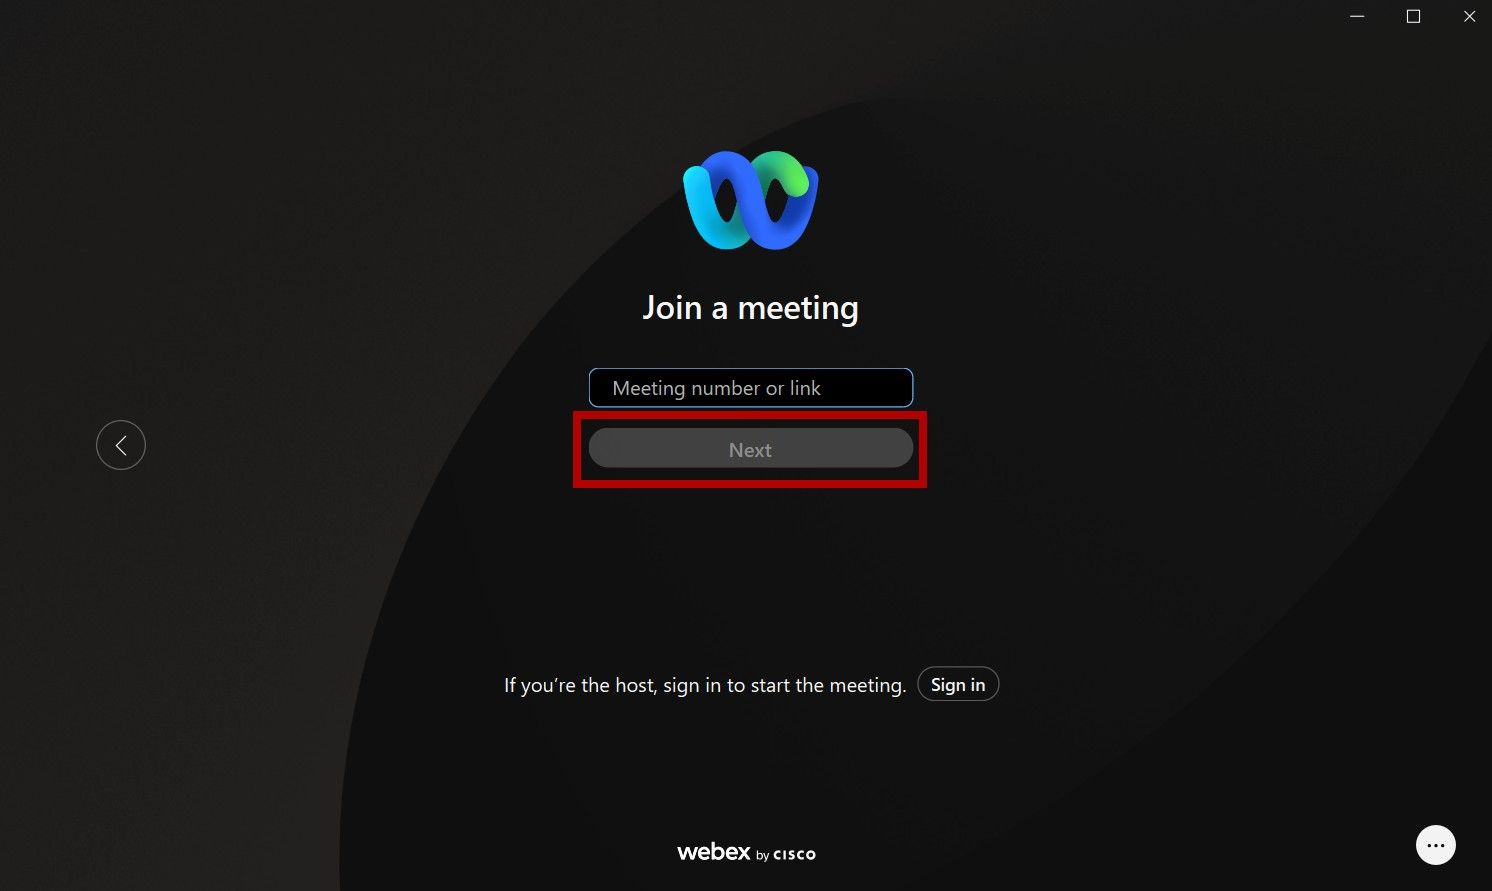
- Click Join meeting on the app sign-in screen. You’re prompted to enter the meeting number or link.
- Click Next. You’re asked to enter your display name and email address.
- Click Next. You’re asked to enter the meeting password.
- Click Continue to proceed to the joining screen.
You cannot change your display name after joining a meeting on either the mobile or desktop app. If you wish to change your name during an ongoing meeting, return to the joining screen, edit your name, and rejoin the call.
How to change your Webex name from the web app
Like the desktop app, the Webex web app lets you host or join meetings as a guest. You can change your display name in both scenarios.
To change your display name as a user:
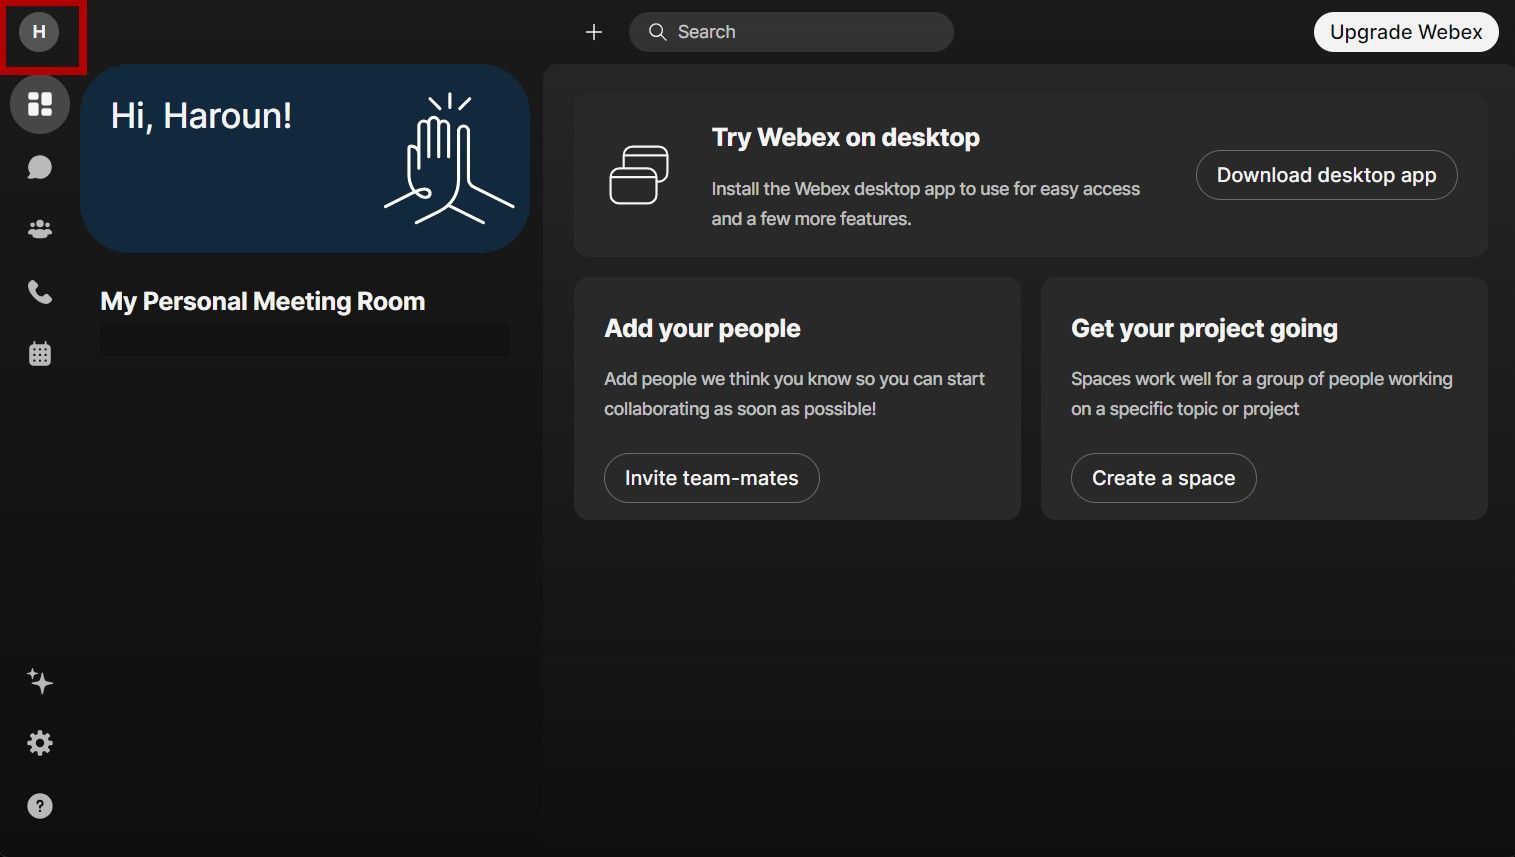
- Go to web.webex.com on your preferred browser and log in to your account.
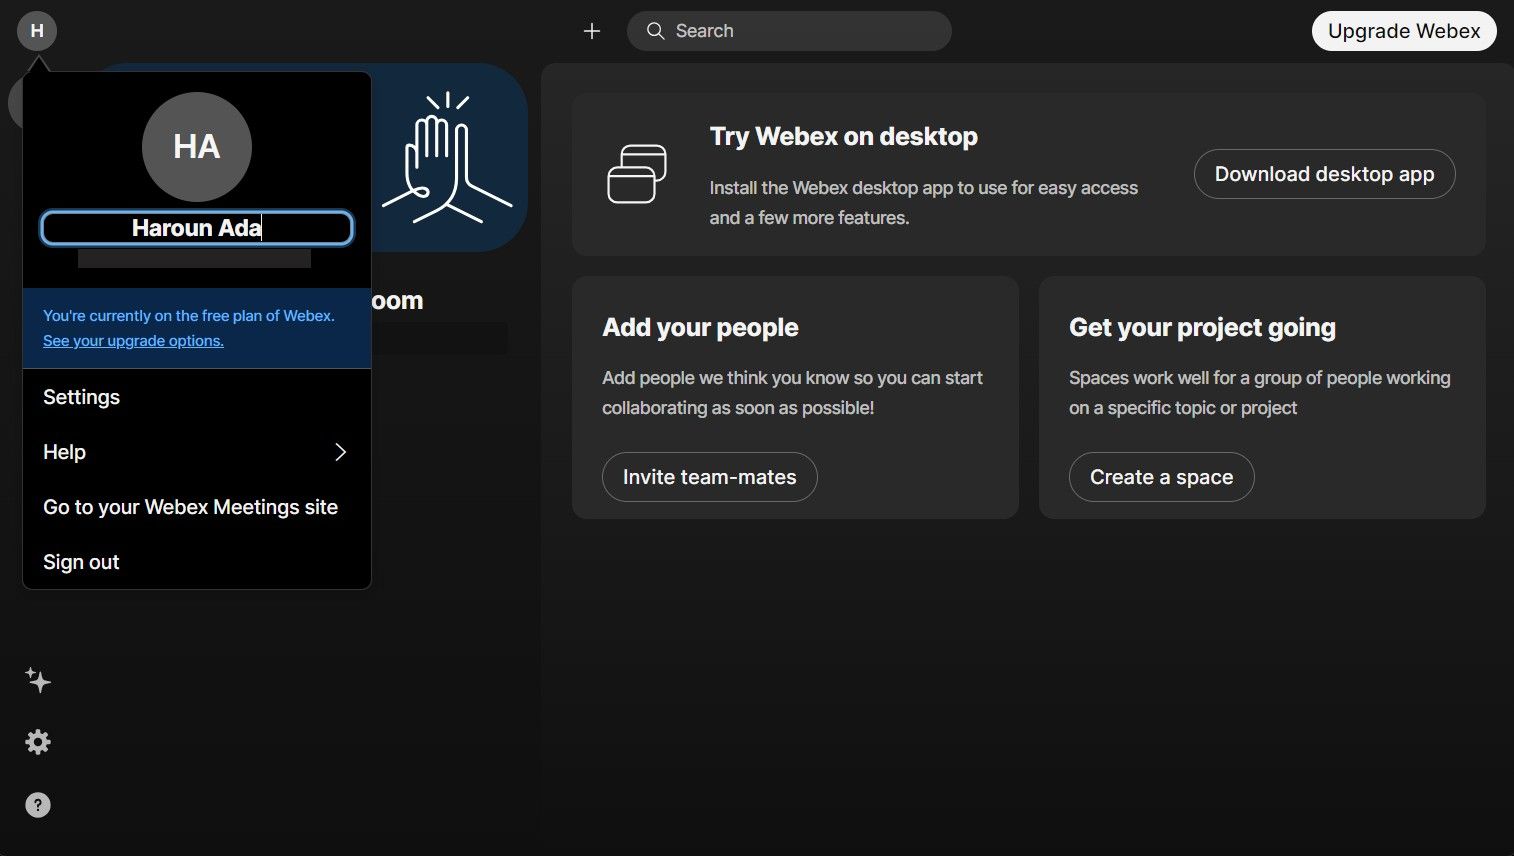
- Click your profile icon in the upper-left corner of the screen. A box pops up.
- Click your name. It turns into a text field.
- Type the new name.
- Click any part of the screen to save and close the text field.
To change your display name as a guest:
- Go to web.webex.com.
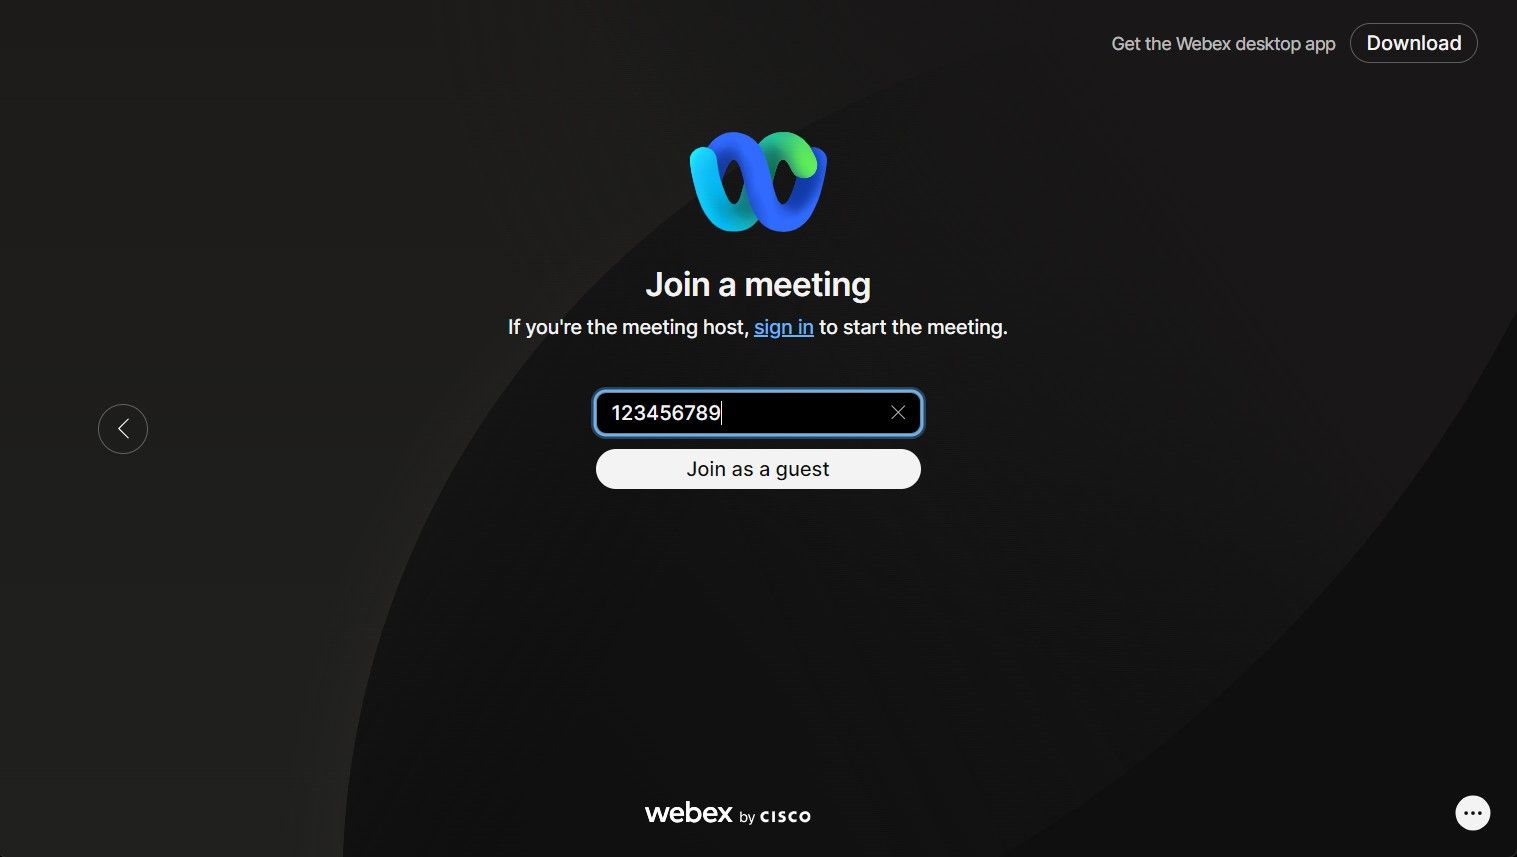
- Click Join a meeting on the homepage. You’re prompted to enter the meeting number or link.
- Click Join as a guest. You’re asked to enter your display name and email address.
- Click Next. You’re asked to enter the meeting password.
- Click Continue.
Personalize and connect
Whether it’s for easy identification, to maintain anonymity, or to correct a typo, Webex allows you to modify your display name easily. This quality-of-life feature is not limited to Cisco Webex. The best video chat apps on Android let you change your name.

Khám phá thêm từ Phụ Kiện Đỉnh
Đăng ký để nhận các bài đăng mới nhất được gửi đến email của bạn.

