

Review sản phẩm
Thuần thục Google Sheets: Bí kíp nhóm hàng & cột như chuyên gia!

Th5
## Thuần thục Google Sheets: Bí kíp nhóm hàng & cột như chuyên gia!
Bài viết này sẽ hướng dẫn bạn cách nhóm hàng và cột trong Google Sheets một cách dễ dàng và hiệu quả. Việc nhóm dữ liệu giúp bạn tổ chức bảng tính một cách logic, phân tích thông tin nhanh chóng và tạo báo cáo chuyên nghiệp hơn. Hãy cùng khám phá các bước đơn giản sau đây:
1. Chọn vùng dữ liệu cần nhóm:
Trước tiên, bạn cần chọn các hàng hoặc cột mà bạn muốn nhóm lại với nhau. Click chuột trái vào hàng/cột đầu tiên, giữ chuột và kéo xuống/sang để chọn tất cả các hàng/cột cần nhóm.
2. Nhóm hàng:
* Cách 1 (Sử dụng menu): Sau khi chọn các hàng, click chuột phải và chọn “Nhóm”. Google Sheets sẽ tự động nhóm các hàng đã chọn lại.
* Cách 2 (Sử dụng biểu tượng): Trên thanh công cụ, bạn sẽ thấy một biểu tượng hình tam giác nhỏ hướng xuống. Click vào đó để mở rộng hoặc thu gọn nhóm hàng. Bạn có thể thêm hoặc bớt hàng vào nhóm bằng cách chọn thêm hàng và click chuột phải -> “Thêm vào nhóm” hoặc “Bỏ khỏi nhóm”.
3. Nhóm cột:
Cách thực hiện nhóm cột tương tự như nhóm hàng. Bạn chọn các cột cần nhóm, click chuột phải và chọn “Nhóm”. Sau đó, bạn có thể sử dụng biểu tượng tam giác nhỏ trên thanh công cụ để mở rộng hoặc thu gọn nhóm cột.
4. Thu gọn và mở rộng nhóm:
Biểu tượng tam giác nhỏ bên cạnh nhóm sẽ cho phép bạn thu gọn hoặc mở rộng nhóm một cách nhanh chóng. Khi thu gọn, chỉ tiêu đề của nhóm sẽ hiển thị, giúp bảng tính gọn gàng hơn.
5. Bỏ nhóm:
Để bỏ nhóm hàng hoặc cột, bạn chọn nhóm đó, click chuột phải và chọn “Bỏ nhóm”.
Mẹo nhỏ:
* Nhóm dữ liệu giúp bạn dễ dàng lọc, sắp xếp và tổng hợp dữ liệu.
* Bạn có thể nhóm nhiều cấp độ để tạo cấu trúc phức tạp hơn.
* Sử dụng nhóm hiệu quả trong việc tạo báo cáo, phân tích dữ liệu và trình bày thông tin.
Với những hướng dẫn đơn giản trên, bạn đã có thể tự tin nhóm hàng và cột trong Google Sheets để quản lý và phân tích dữ liệu hiệu quả hơn. Hãy bắt đầu thử nghiệm và tận hưởng sự tiện lợi mà tính năng này mang lại!
—
(Phần giới thiệu sản phẩm Queen Mobile – không liên quan trực tiếp đến nội dung hướng dẫn Google Sheets, nên được tách biệt)
QUEEN MOBILE: Điện thoại, máy tính bảng & đồng hồ thông minh chính hãng
Tìm kiếm điện thoại iPhone, máy tính bảng iPad, hay đồng hồ Smartwatch chất lượng cao với giá cả cạnh tranh? Hãy đến ngay QUEEN MOBILE! Chúng tôi cam kết cung cấp sản phẩm chính hãng, chất lượng đảm bảo và dịch vụ khách hàng tận tâm.
Mua ngay tại QUEEN MOBILE và trải nghiệm sự khác biệt!
#GoogleSheets #NhómHàng #NhómCột #BíKípGoogleSheets #HọcGoogleSheets #BảngTính #DữLiệu #Productivity #QueenMobile #iPhone #iPad #Smartwatch #ĐiệnThoại #MáyTínhBảng #ĐồngHồThôngMinh #MuaSắmOnline #CôngNghệ
Giới thiệu How to group rows or columns in Google Sheets
: How to group rows or columns in Google Sheets
Hãy viết lại bài viết dài kèm hashtag về việc đánh giá sản phẩm và mua ngay tại Queen Mobile bằng tiếng VIệt: How to group rows or columns in Google Sheets
Mua ngay sản phẩm tại Việt Nam:
QUEEN MOBILE chuyên cung cấp điện thoại Iphone, máy tính bảng Ipad, đồng hồ Smartwatch và các phụ kiện APPLE và các giải pháp điện tử và nhà thông minh. Queen Mobile rất hân hạnh được phục vụ quý khách….
_____________________________________________________
Mua #Điện_thoại #iphone #ipad #macbook #samsung #xiaomi #poco #oppo #snapdragon giá tốt, hãy ghé [𝑸𝑼𝑬𝑬𝑵 𝑴𝑶𝑩𝑰𝑳𝑬]
✿ 149 Hòa Bình, phường Hiệp Tân, quận Tân Phú, TP HCM
✿ 402B, Hai Bà Trưng, P Tân Định, Q 1, HCM
✿ 287 đường 3/2 P 10, Q 10, HCM
Hotline (miễn phí) 19003190
Thu cũ đổi mới
Rẻ hơn hoàn tiền
Góp 0%
Thời gian làm việc: 9h – 21h.
KẾT LUẬN
Hãy viết đoạn tóm tắt về nội dung bằng tiếng việt kích thích người mua: How to group rows or columns in Google Sheets
Spreadsheet apps are a smart method for configuring, organizing, and tracking data. They’re ideal for getting the facts sorted and the figures ready to observe over time. Coupled with the Play Store’s finest business apps, you can turn your bargain Android tablet into the nerve center for your professional projects and prospects.
These, alongside the best business apps, have the potential to turn your favorite Android tablet into an efficient hub for your professional projects and prospects.
One way to make sure your figures don’t get lost or muddled is to categorize them in one place, and the Google Sheets app has you covered. You can create collapsible cell groupings that can be labeled with titles, resulting in a spreadsheet that looks neat and tidy, toggling the display of the information that you need at a moment’s notice. Here’s how to use category groupings on Google Sheets.
What is Google Sheets?
Google Sheets is a top-tier spreadsheet creation app and a free alternative to Microsoft Excel. The app allows you to draw up, edit, stylize, and code your spreadsheets, all from the comfort of a sleek Google Chromebook or cheap Android phone.
Are there any downsides to Google Sheets?
While the grouping mechanic works on the mobile and Chromebook versions of Google Sheets, the mechanic to label them in a drop-down menu isn’t available on the mobile version. You can still label them manually, but this makes the group category mechanic somewhat less efficient.
How to make Google Sheets cell groups on a Chromebook
The Sheets app works excellently on Google’s latest Chromebooks, providing you with everything you need to make a professional-grade spreadsheet. Cell groups are one of them. Chromebook users have full access to this nifty feature, and it’s way easier than you would think. Here’s what to do.
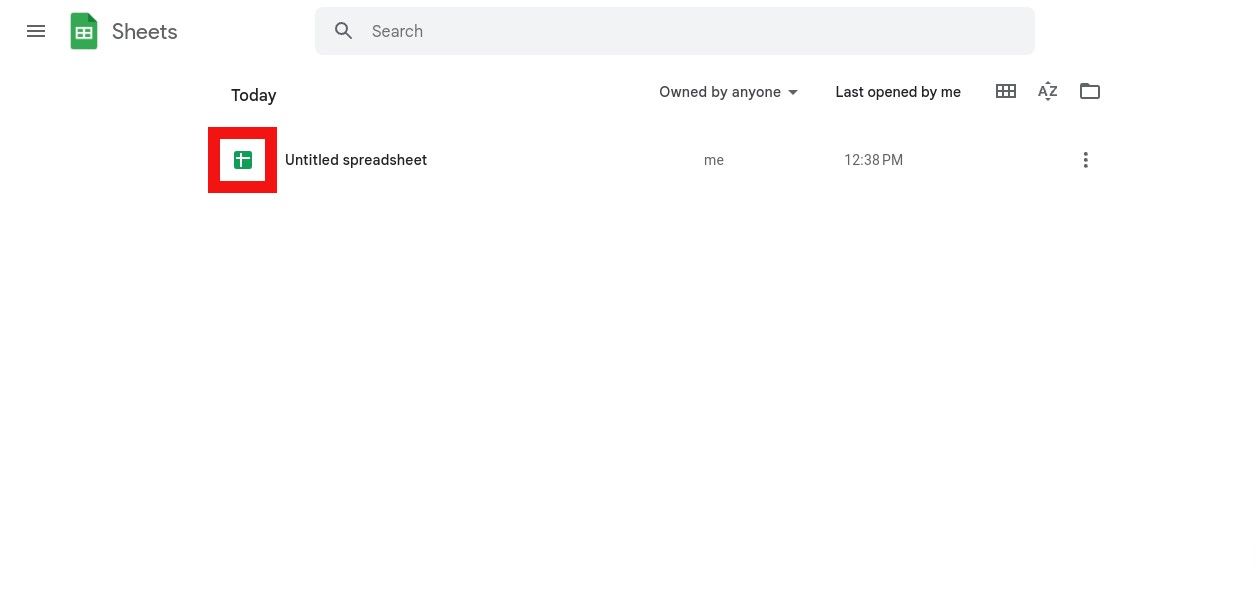
- Open the Google Sheets app.
- Open your spreadsheet.
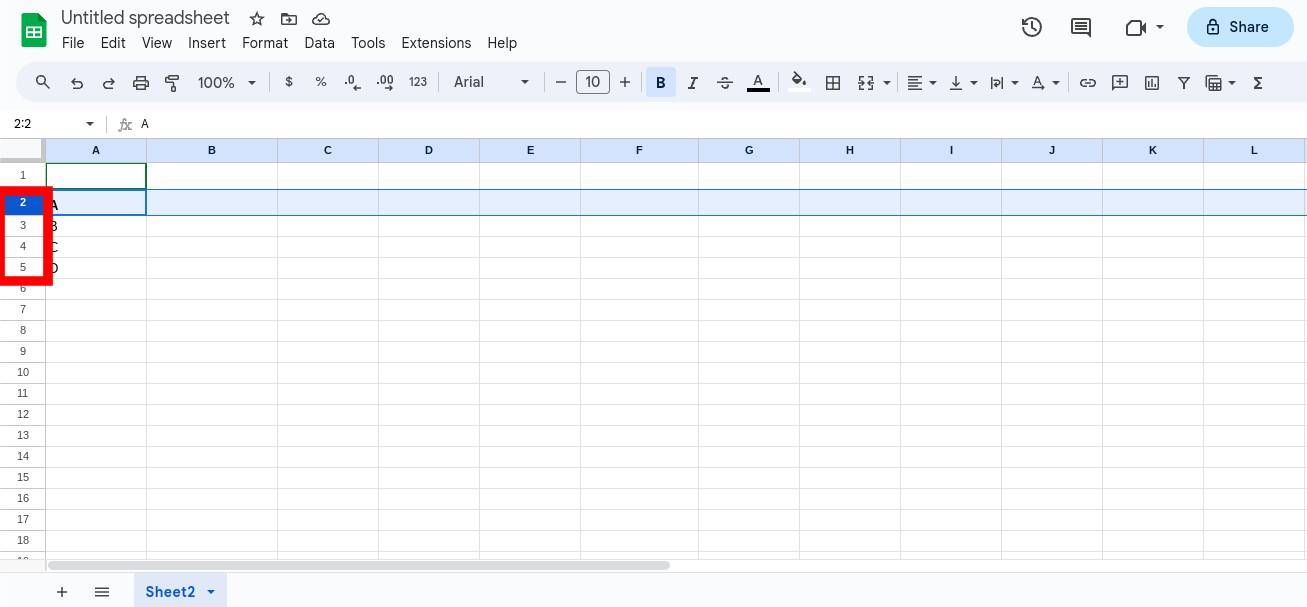
- Type your data into column one in descending order. Leave row one clear, or grouping will not work.
- Left-click row two on the left side of the screen. Drag the cursor down to highlight all the rows that contain your data.
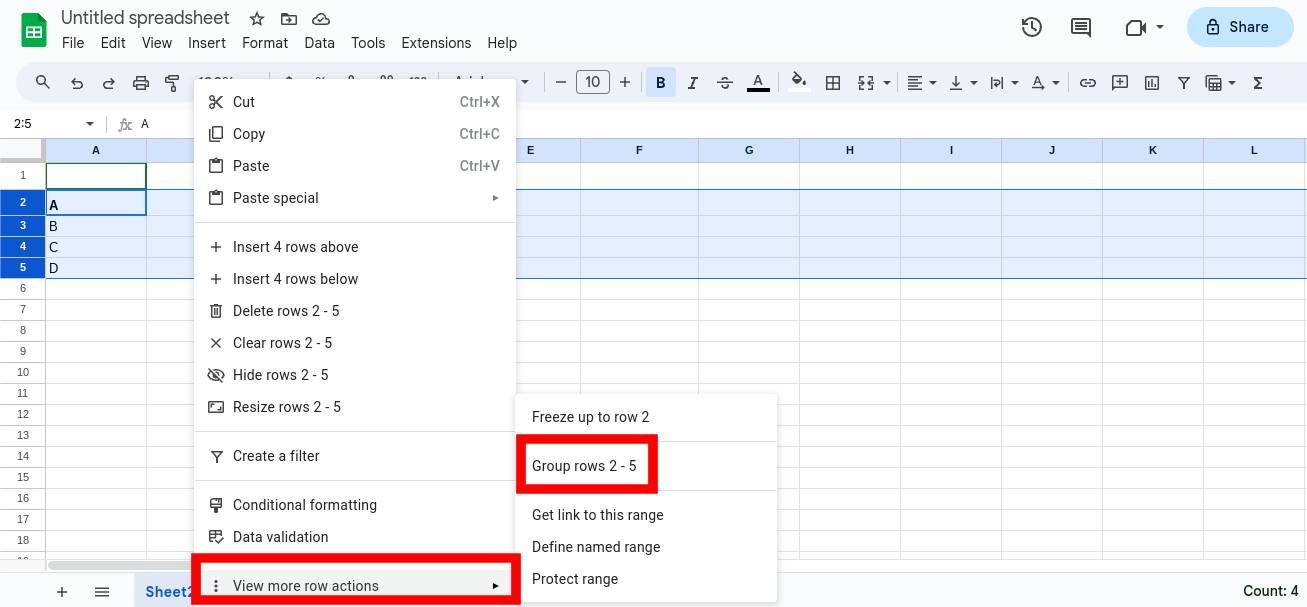
- Right-click and scroll down the menu to View more row actions. Hover over it and scroll up to click Group 2–5 (these numbers refer to the row numbers you selected, so yours may vary). This groups the rows.
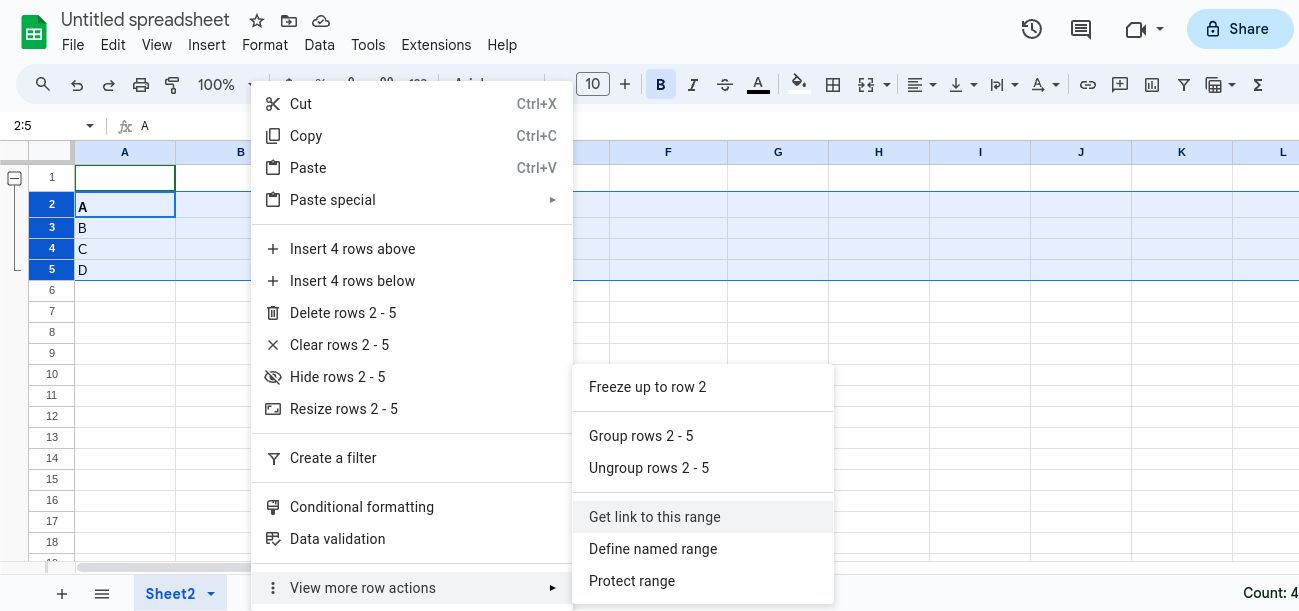
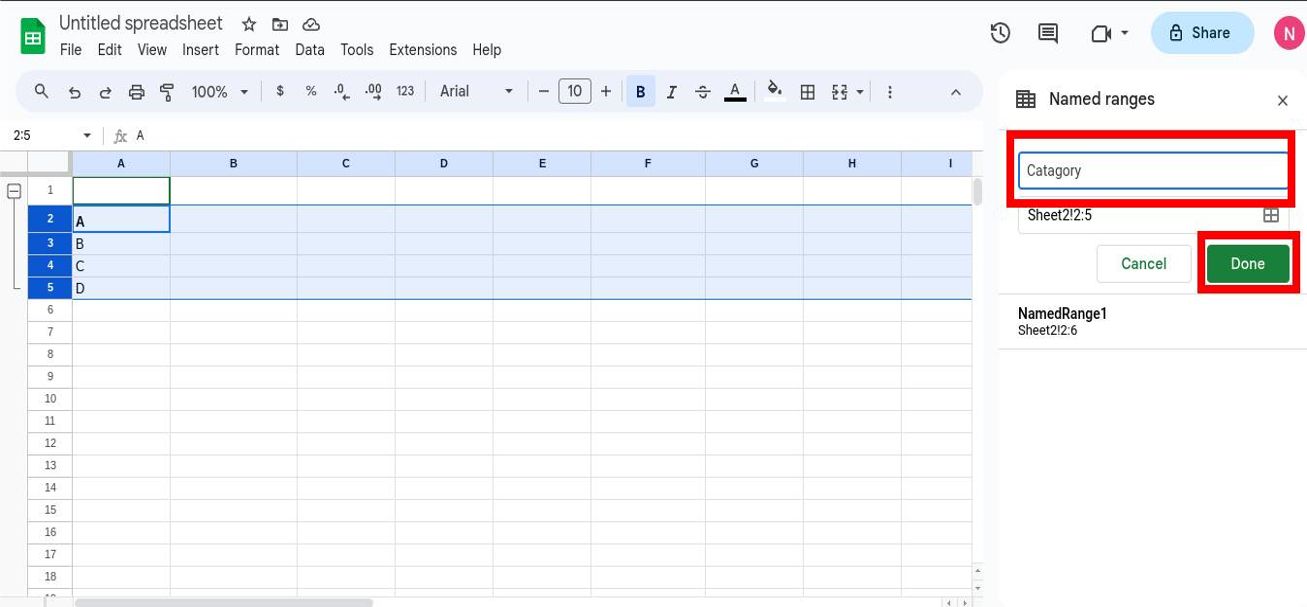
- Bring up and collapse the group by clicking on the plus sign on the left side of the screen. Backtrack to the View more row actions menu and click Define named range.
- This opens a menu where you’ll name this group. Click Done to name it.
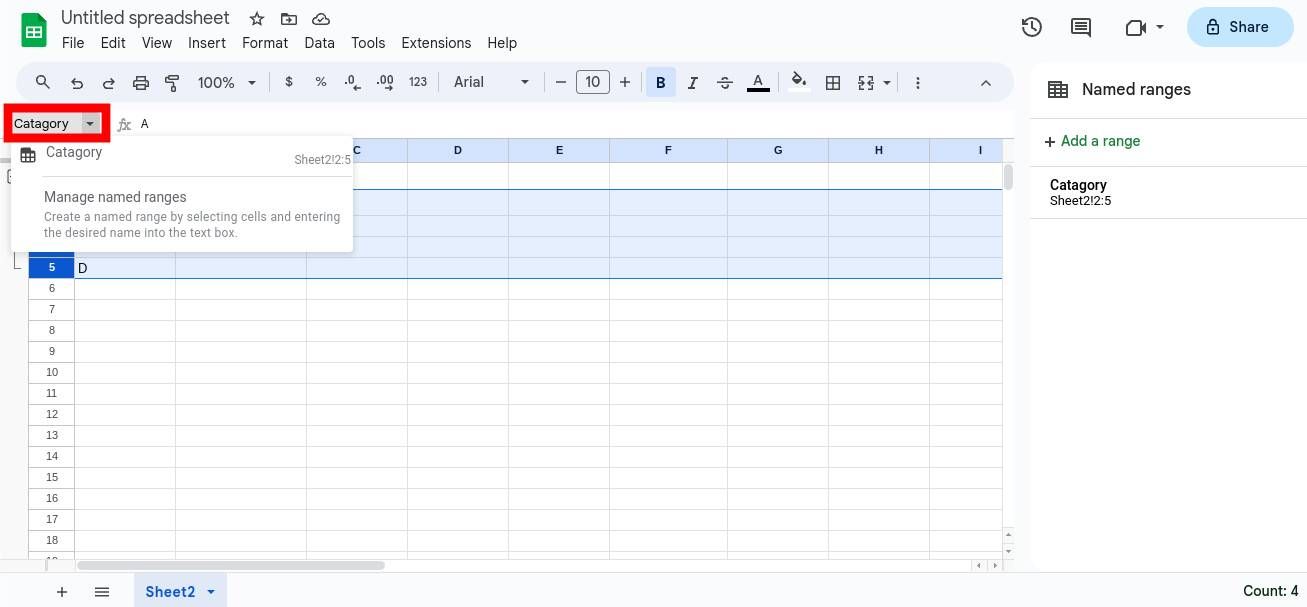
- This creates a drop-down menu on the left side of the screen, above the plus sign. Click it to browse your cell category groups.
How to make Google Sheets groups on Android
Android’s latest phones can run Sheets, providing a similar experience to the Chromebook edition. While the cell grouping mechanic can’t be as elegantly customized, the method can still be used effectively. It only takes a bit of manual editing. Here’s everything you need to know.
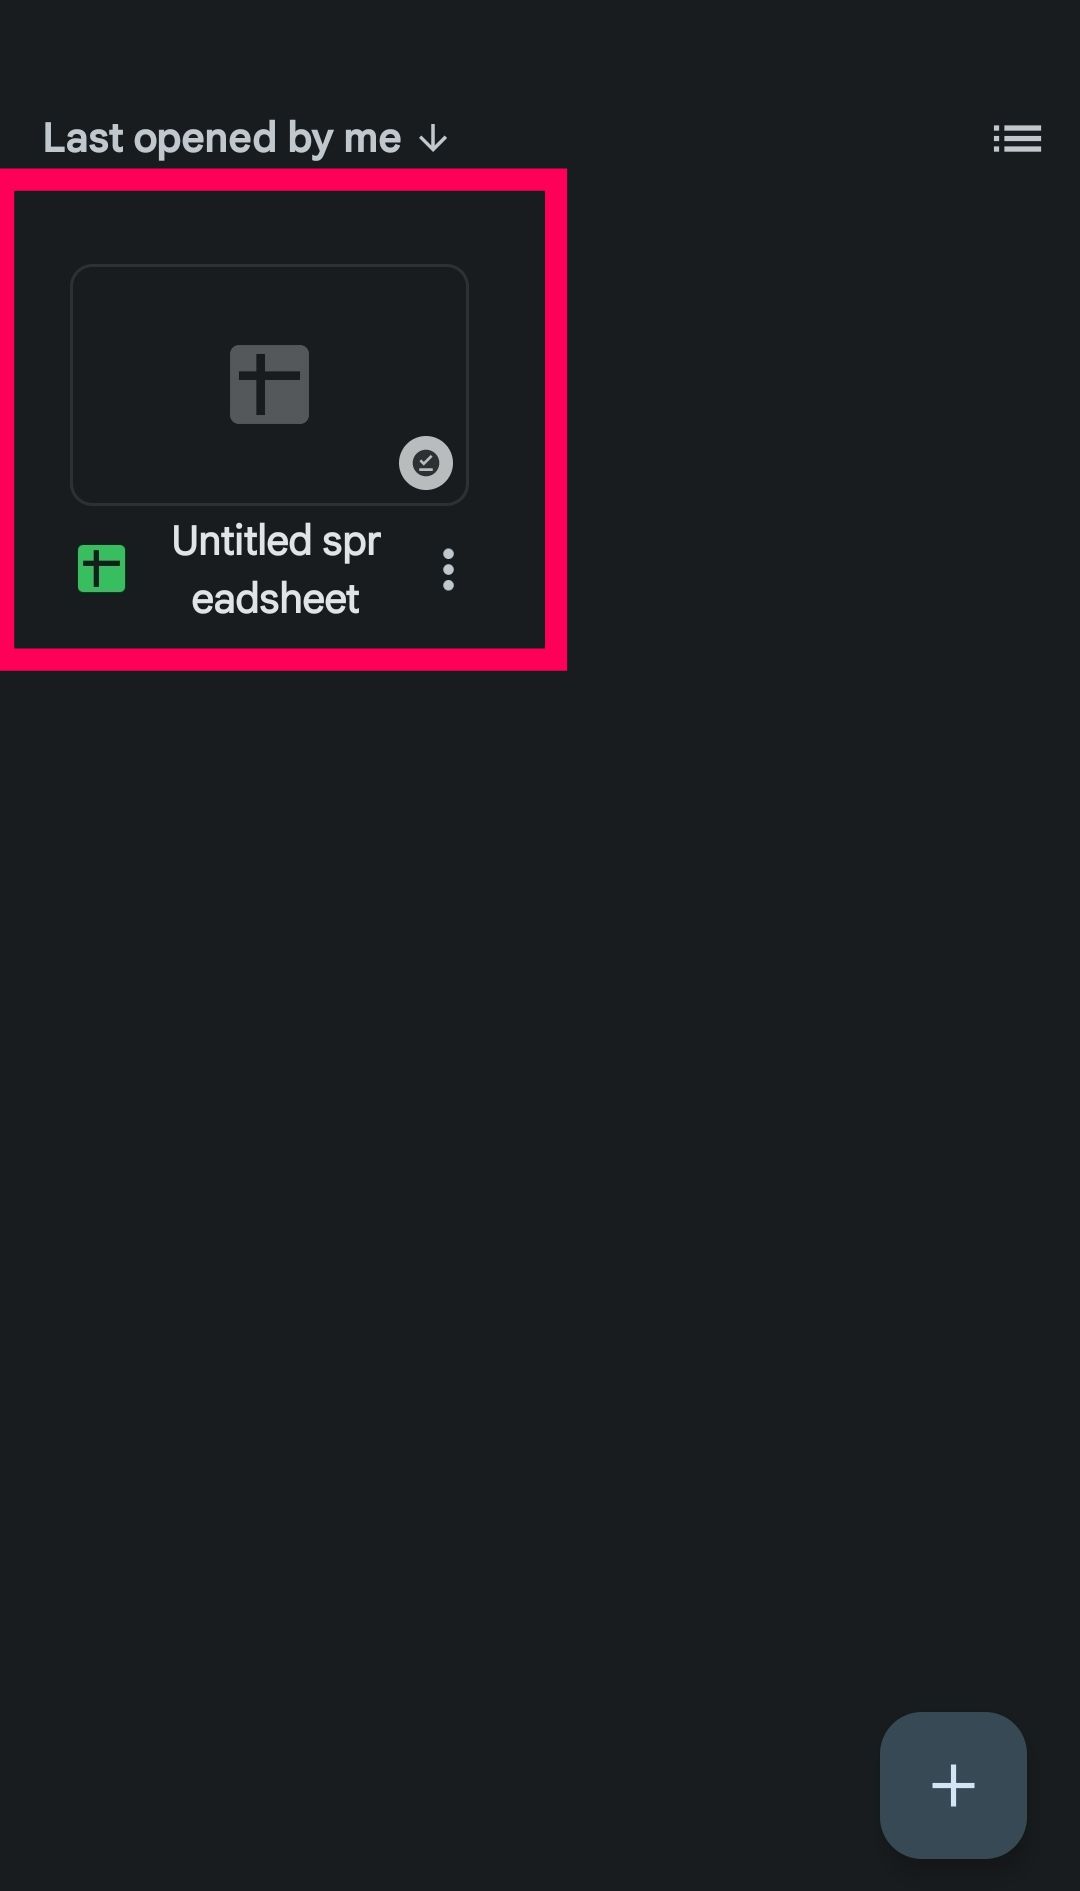
- Open the Google Sheets app.
- Open your spreadsheet.
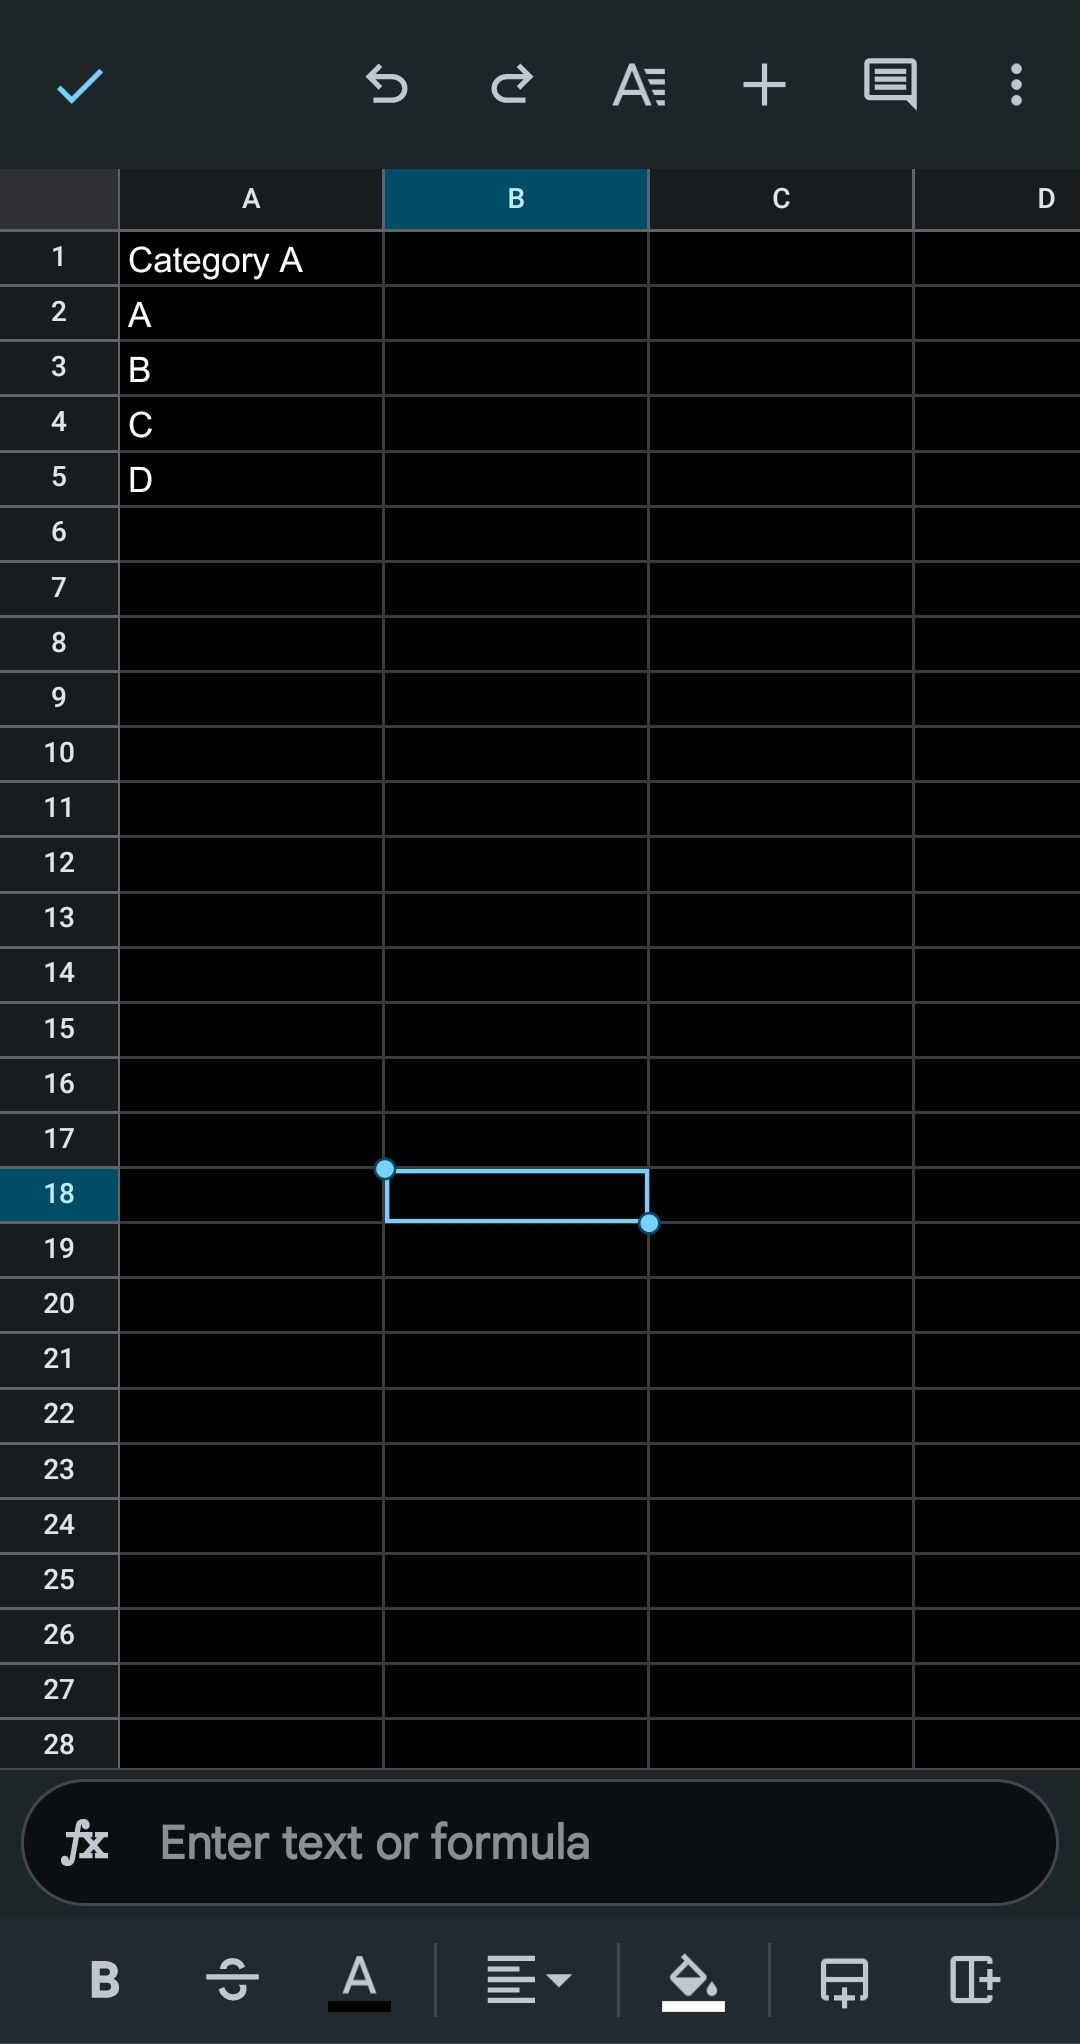
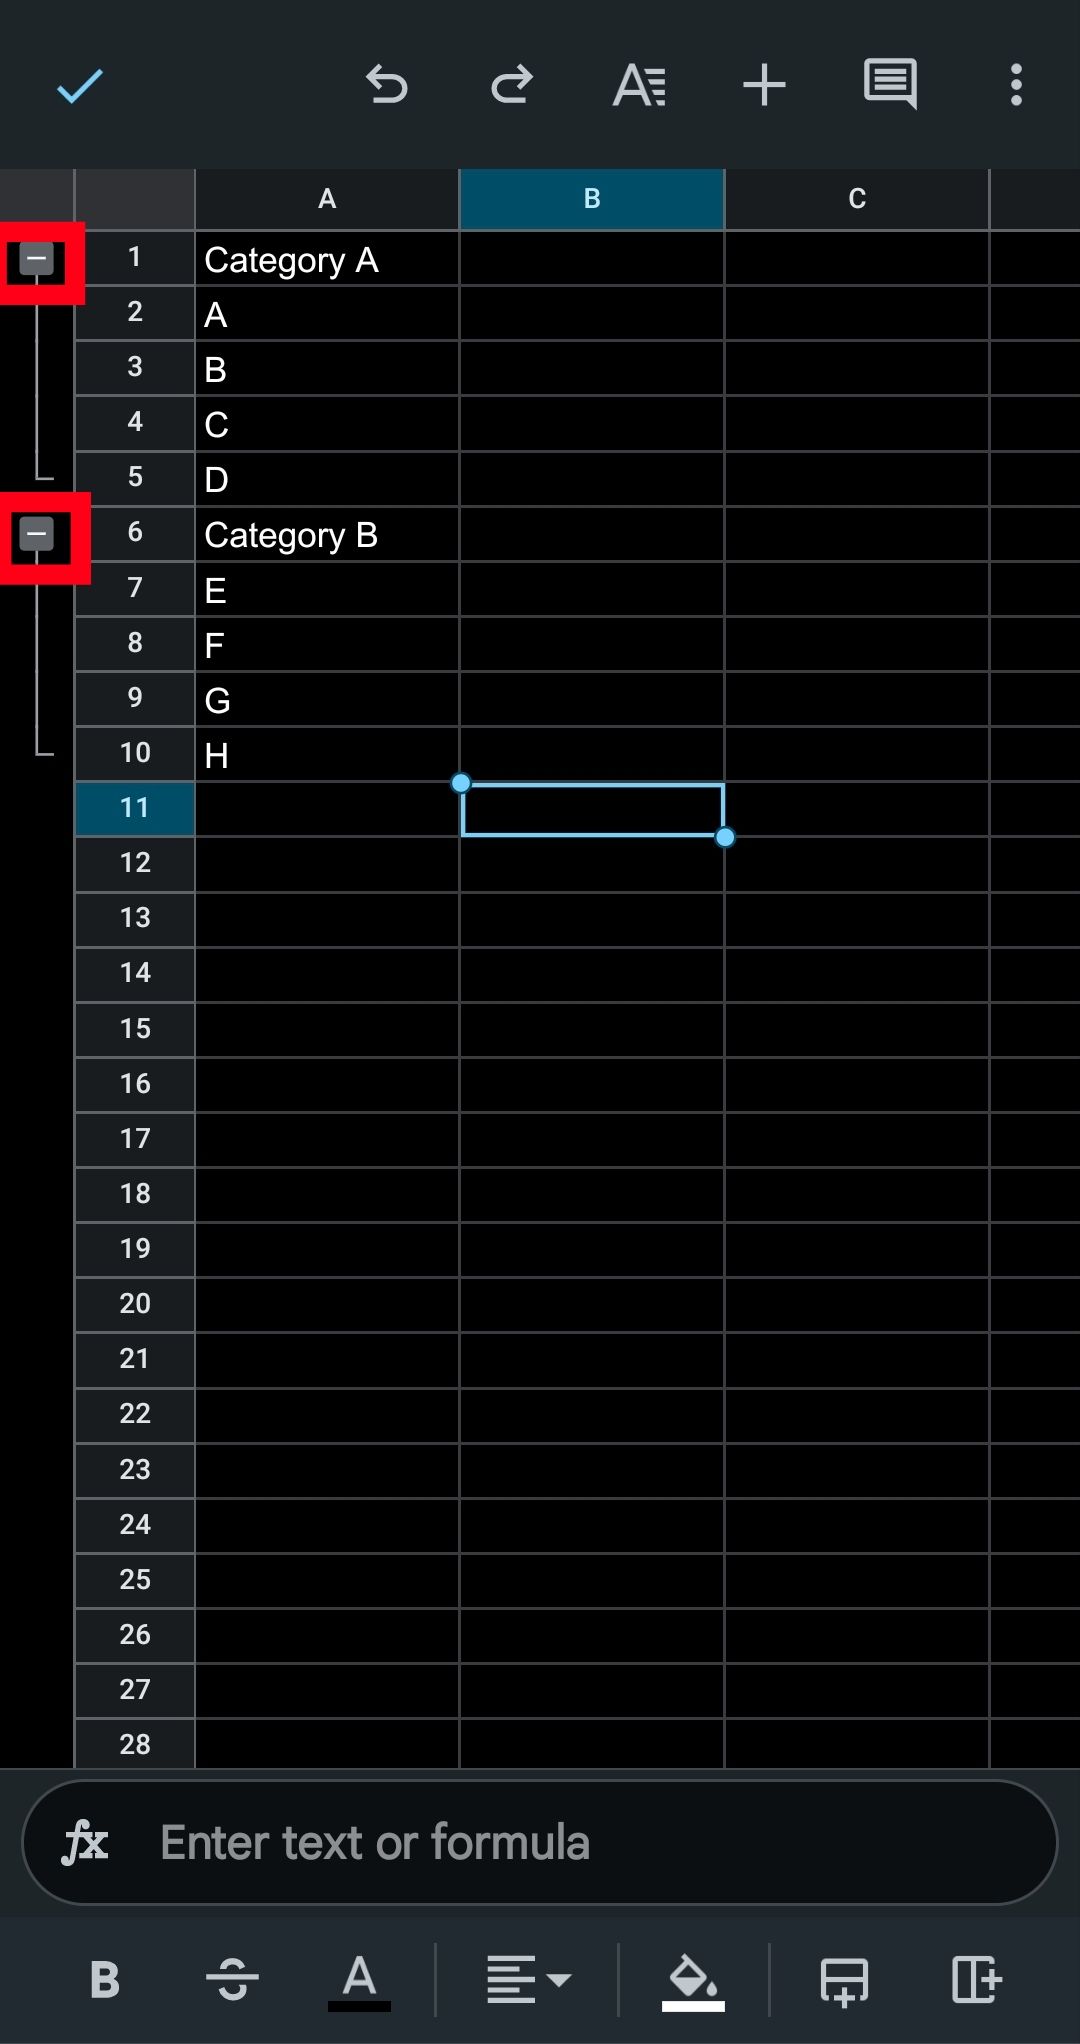
- Type your category name into row one of column one and its corresponding data below it.
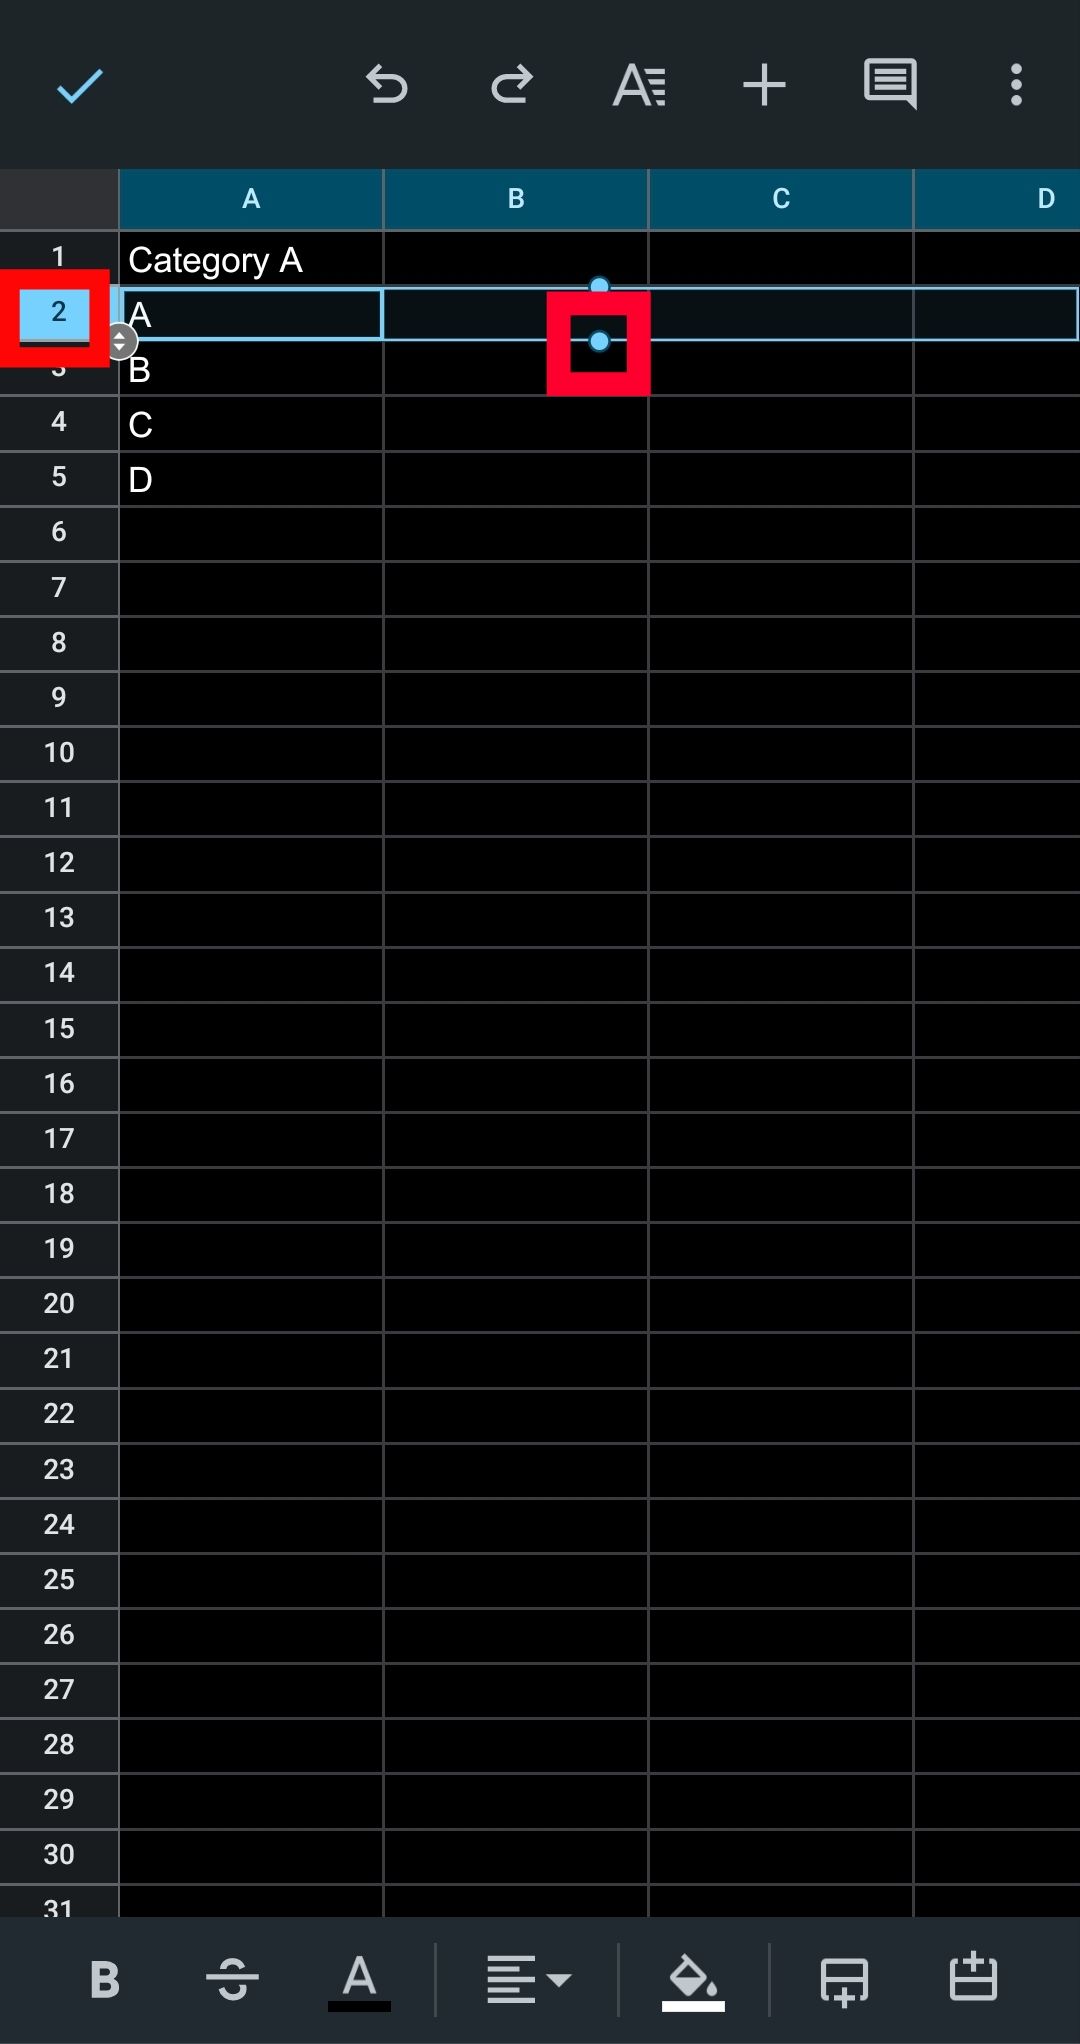
- Tap row two on the left side of the screen. The row is highlighted with two small circles at the top and bottom.
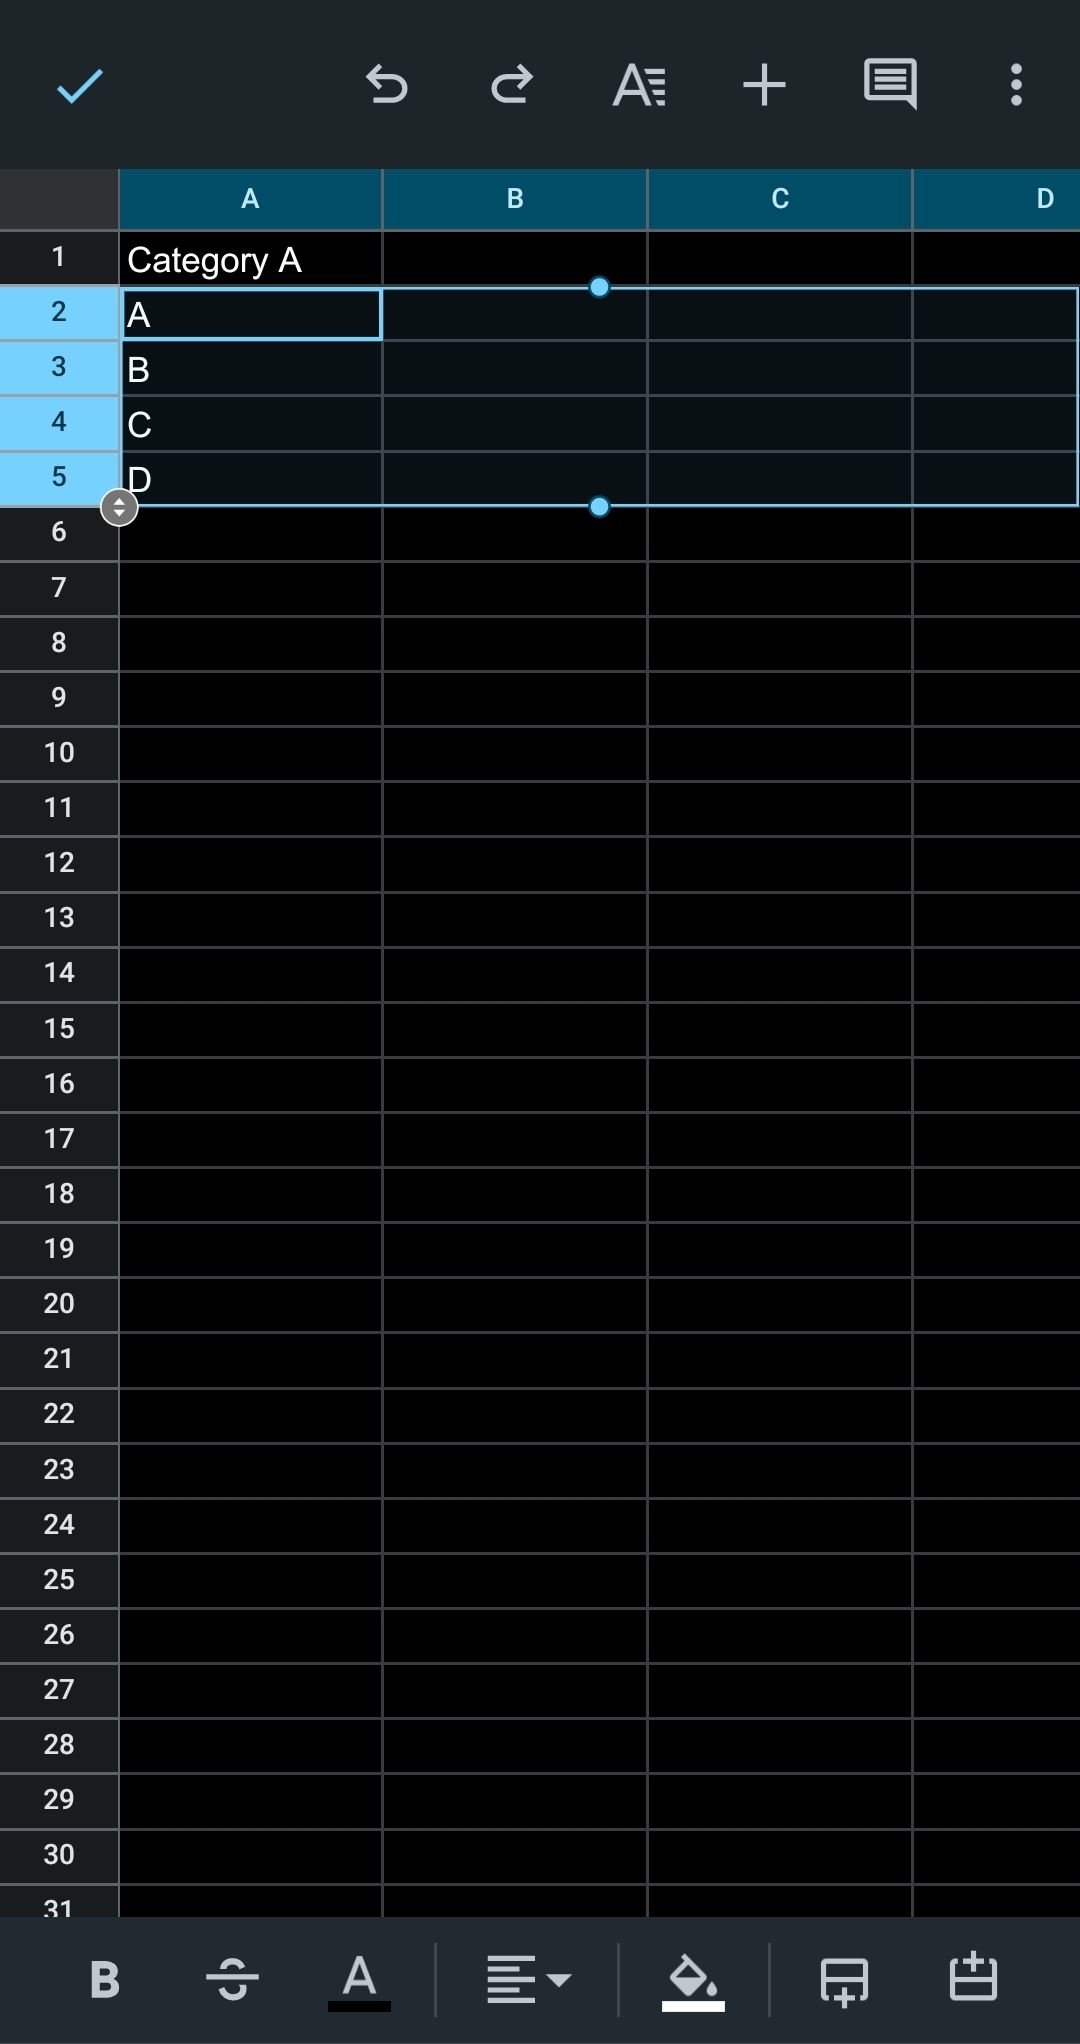
- Tap and drag the bottom circle down to select the number of rows to be grouped.
- When the desired rows are highlighted, press and hold them. After a moment, a menu appears.
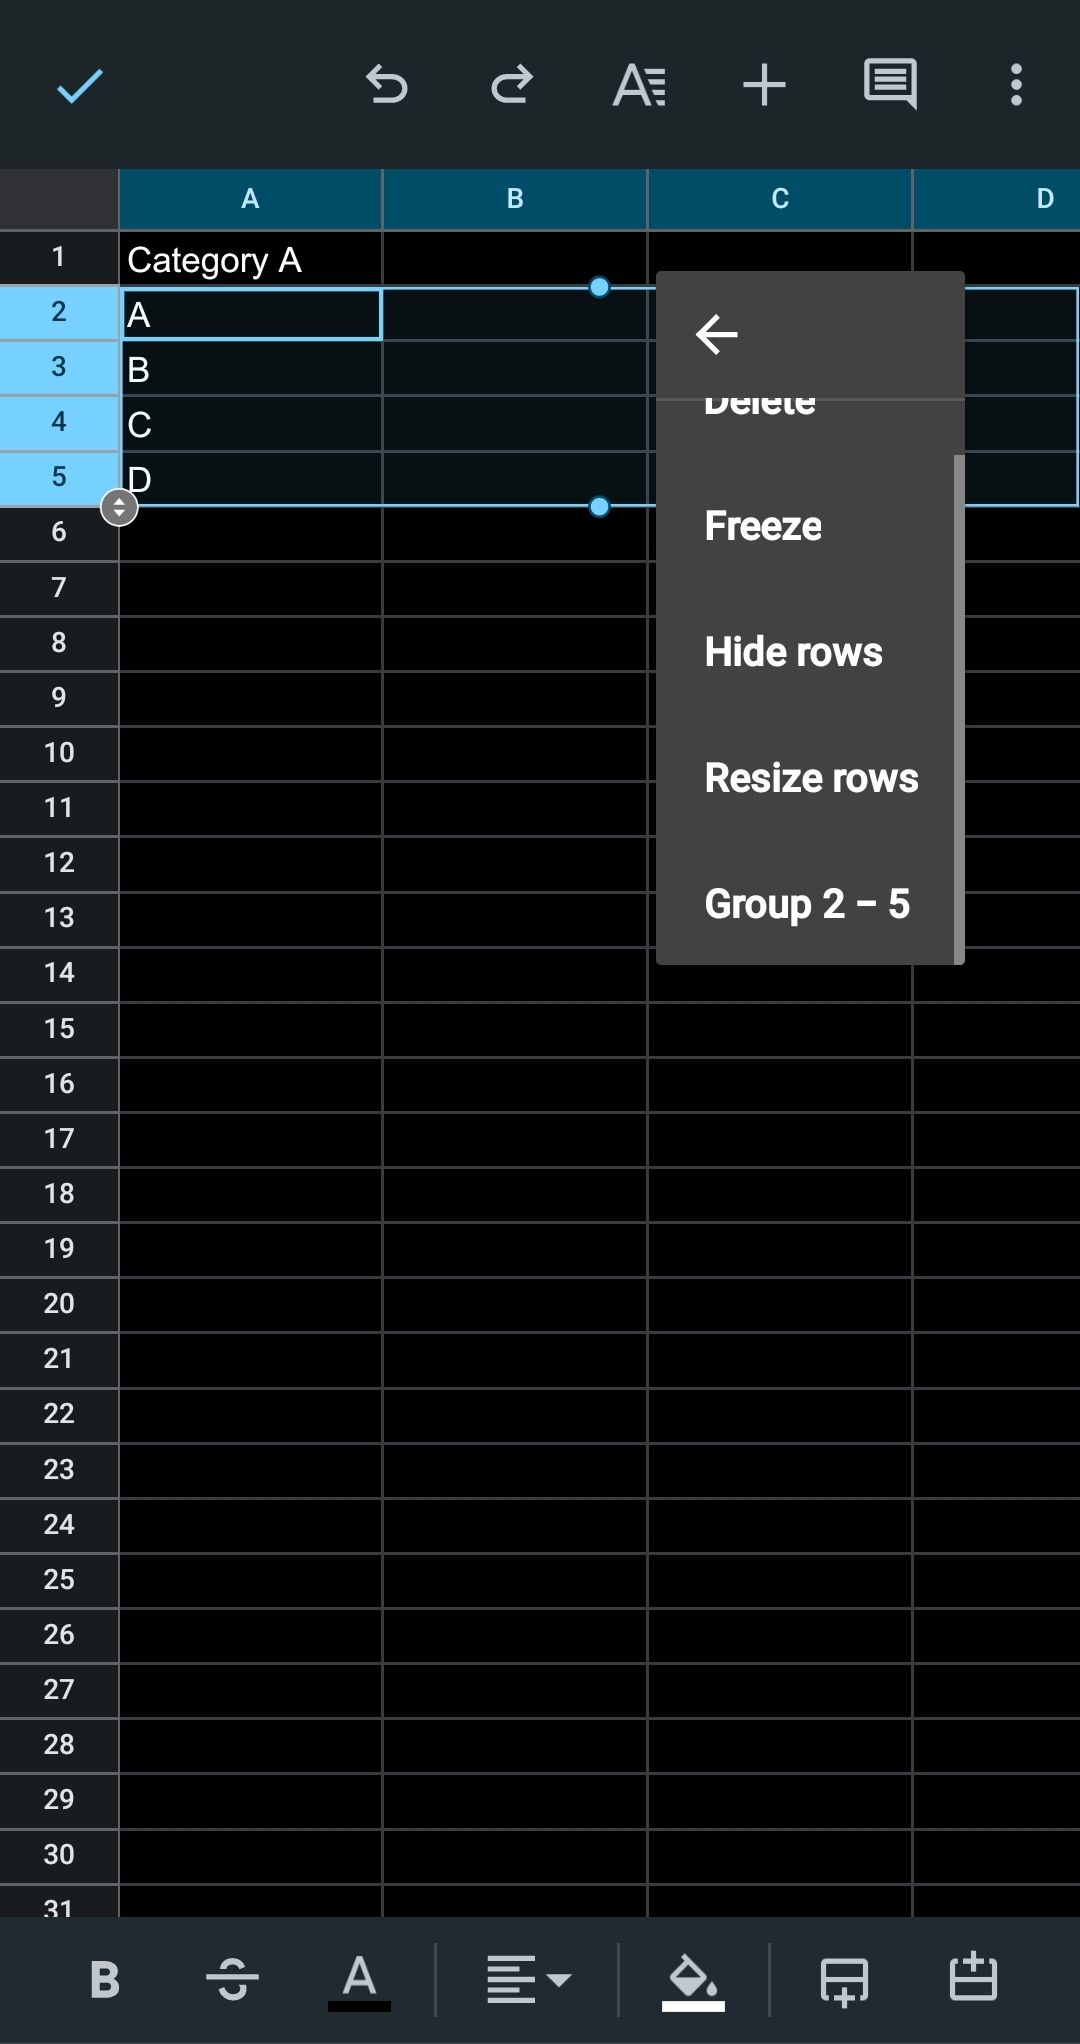
- Tap the three-dot icon at the far right.
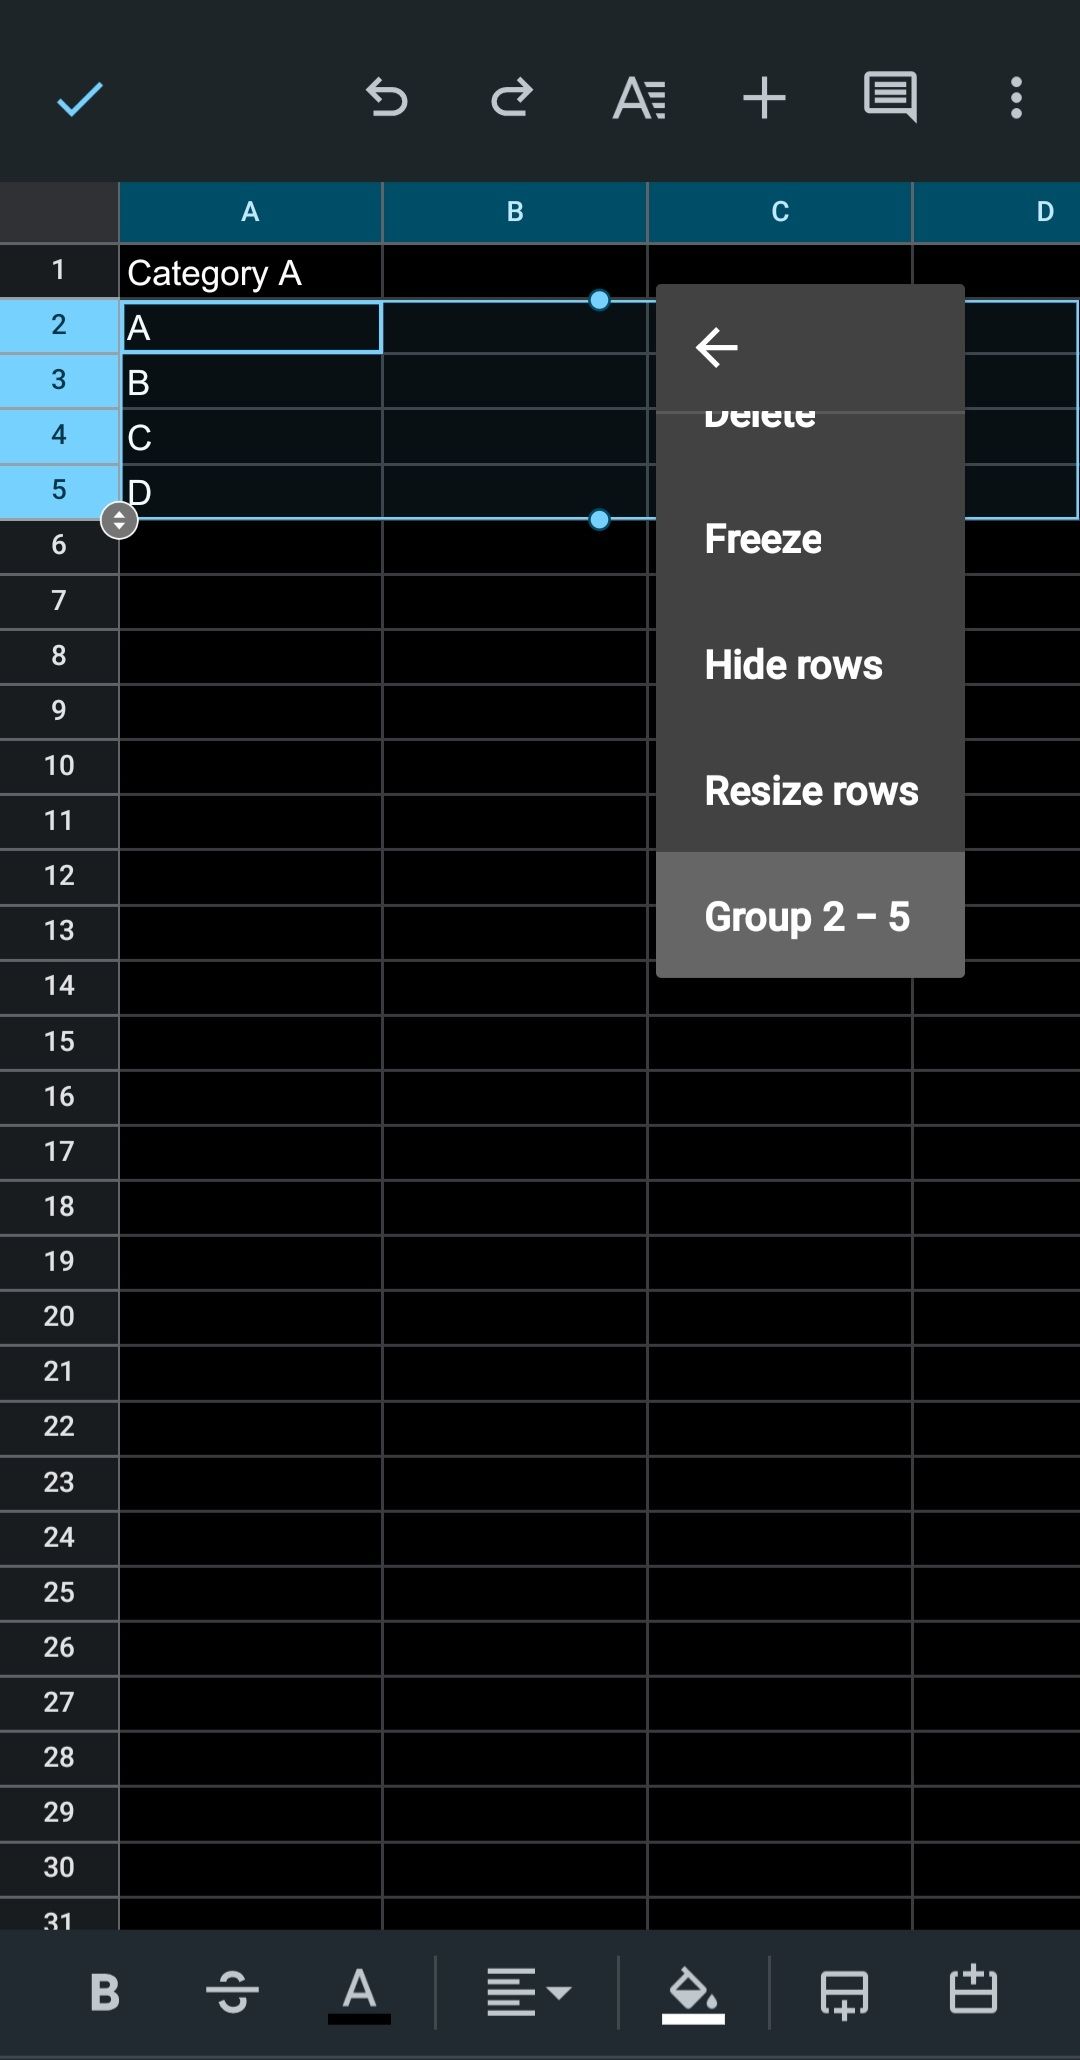
- Scroll down the new menu and tap Group 2-5 (these numbers refer to the row numbers you have selected, so yours may vary). This groups the rows into a category.
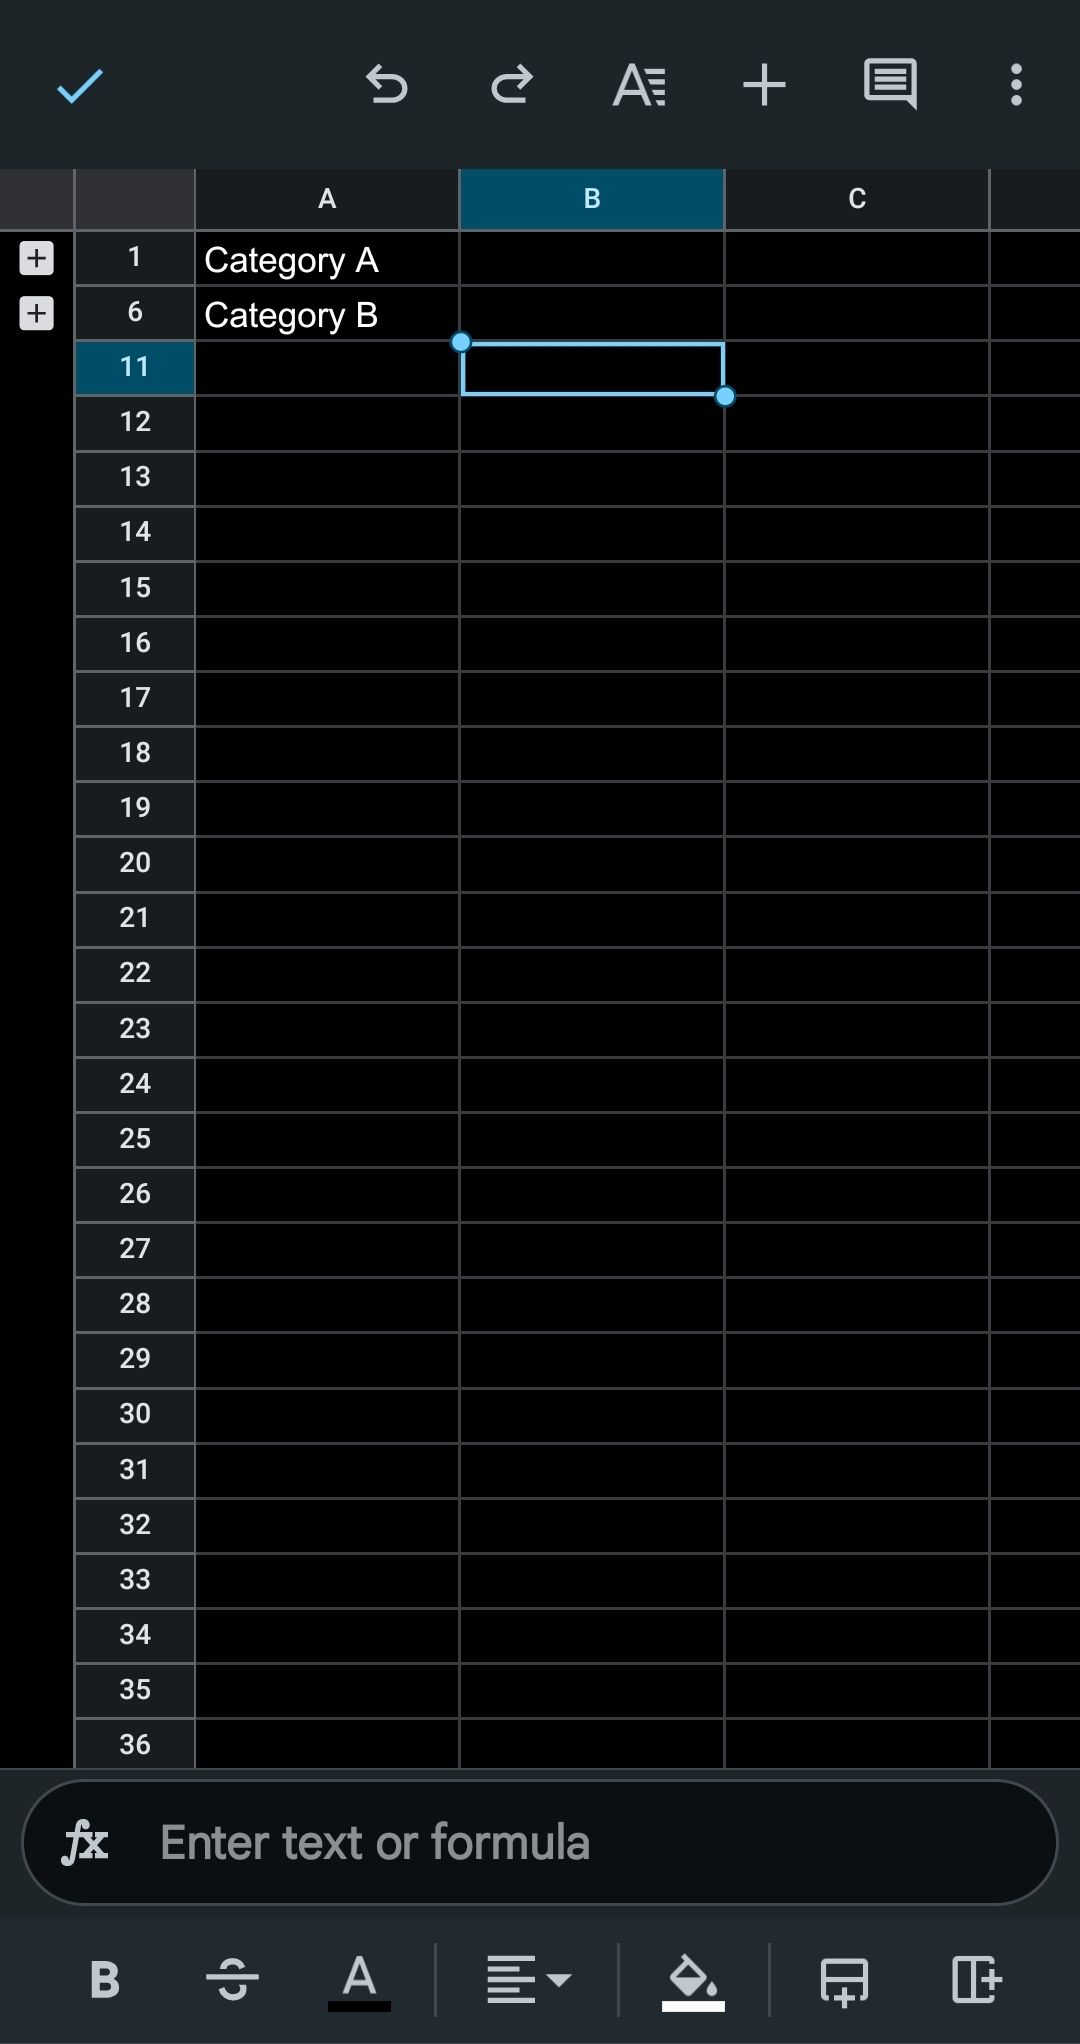
- To collapse the grouped cell category, tap its corresponding small square on the left side of the screen. Tap it again to reopen it.


All sorted on Google Sheets!
Despite being a fantastic way to keep things on track, spreadsheets get a bad rap for becoming overcomplicated very easily. Google Sheets cell groups are the perfect way to segment your spreadsheets, keeping things focused, accessible, and viable on the most optimized Android tablets.

Khám phá thêm từ Phụ Kiện Đỉnh
Đăng ký để nhận các bài đăng mới nhất được gửi đến email của bạn.

