

Review sản phẩm
Xóa Lịch Sử Tìm Kiếm Google Trong Nháy Mắt!

Th5
## Xóa Lịch Sử Tìm Kiếm Google Trong Nháy Mắt!
Bạn muốn xóa lịch sử tìm kiếm Google nhanh chóng và hiệu quả? Bài viết này sẽ hướng dẫn bạn từng bước, giúp bạn bảo vệ quyền riêng tư trực tuyến một cách dễ dàng.
Cách xóa lịch sử tìm kiếm Google nhanh chóng:
1. Xóa lịch sử tìm kiếm trên thiết bị:
* Trên điện thoại hoặc máy tính bảng:
* Mở ứng dụng Google Chrome hoặc trình duyệt bạn đang sử dụng.
* Nhấn vào biểu tượng ba chấm dọc ở góc trên cùng bên phải.
* Chọn “Lịch sử” > “Xóa dữ liệu duyệt web”.
* Chọn khoảng thời gian bạn muốn xóa (ví dụ: “Giờ qua”, “4 tuần qua”, “Tất cả thời gian”). Đánh dấu vào ô “Lịch sử duyệt web” và có thể chọn thêm các mục khác như “Cookie và dữ liệu trang web”, “Ảnh và tệp đã lưu trong bộ nhớ cache” tùy theo nhu cầu.
* Nhấn “Xóa dữ liệu”.
* Trên máy tính:
* Mở trình duyệt Google Chrome hoặc trình duyệt bạn đang sử dụng.
* Nhấn vào biểu tượng ba chấm dọc ở góc trên cùng bên phải.
* Chọn “Lịch sử” > “Xóa dữ liệu duyệt web”.
* Chọn khoảng thời gian bạn muốn xóa và các mục cần xóa tương tự như trên điện thoại.
* Nhấn “Xóa dữ liệu”.
2. Xóa lịch sử tìm kiếm trên tài khoản Google:
Đây là bước quan trọng để xóa lịch sử tìm kiếm toàn bộ, ngay cả trên các thiết bị khác bạn đã đăng nhập vào tài khoản Google của mình.
* Truy cập vào trang [myactivity.google.com](myactivity.google.com).
* Bạn có thể lọc lịch sử tìm kiếm theo ngày, sản phẩm hoặc hoạt động.
* Để xóa một mục cụ thể, hãy di chuột qua mục đó và nhấn vào biểu tượng thùng rác.
* Để xóa toàn bộ lịch sử, nhấn vào “Xóa” ở góc trên cùng bên phải, rồi chọn khoảng thời gian bạn muốn xóa.
Lưu ý: Xóa lịch sử tìm kiếm chỉ xóa dữ liệu trên thiết bị và/hoặc tài khoản Google của bạn. Các nhà cung cấp dịch vụ internet (ISP) vẫn có thể lưu lại lịch sử tìm kiếm của bạn.
Mua ngay sản phẩm công nghệ chất lượng cao tại Queen Mobile:
Bạn đang tìm kiếm điện thoại iPhone, máy tính bảng iPad hoặc đồng hồ thông minh Smartwatch chính hãng? Hãy ghé thăm Queen Mobile – địa chỉ tin cậy cung cấp các sản phẩm công nghệ cao cấp với chất lượng tuyệt vời và giá cả cạnh tranh.
Queen Mobile – Sự lựa chọn hoàn hảo cho trải nghiệm công nghệ đỉnh cao!
#xoalichsutimkiem #google #quyennieutrietuyen #chrome #baovesodữliệu #queenmobile #iphone #ipad #smartwatch #congnghe #muasamonline #vietnam
Giới thiệu How to quickly delete your Google search history
: How to quickly delete your Google search history
Hãy viết lại bài viết dài kèm hashtag về việc đánh giá sản phẩm và mua ngay tại Queen Mobile bằng tiếng VIệt: How to quickly delete your Google search history
Mua ngay sản phẩm tại Việt Nam:
QUEEN MOBILE chuyên cung cấp điện thoại Iphone, máy tính bảng Ipad, đồng hồ Smartwatch và các phụ kiện APPLE và các giải pháp điện tử và nhà thông minh. Queen Mobile rất hân hạnh được phục vụ quý khách….
_____________________________________________________
Mua #Điện_thoại #iphone #ipad #macbook #samsung #xiaomi #poco #oppo #snapdragon giá tốt, hãy ghé [𝑸𝑼𝑬𝑬𝑵 𝑴𝑶𝑩𝑰𝑳𝑬]
✿ 149 Hòa Bình, phường Hiệp Tân, quận Tân Phú, TP HCM
✿ 402B, Hai Bà Trưng, P Tân Định, Q 1, HCM
✿ 287 đường 3/2 P 10, Q 10, HCM
Hotline (miễn phí) 19003190
Thu cũ đổi mới
Rẻ hơn hoàn tiền
Góp 0%
Thời gian làm việc: 9h – 21h.
KẾT LUẬN
Hãy viết đoạn tóm tắt về nội dung bằng tiếng việt kích thích người mua: How to quickly delete your Google search history
Whether you forgot to use Incognito mode or fancy clearing out old data, deleting your Google Search history is a straightforward process. Google saves all your activity in Search to your Google account, giving you access to everything you searched.
We show you how to delete your Google Search history from the Google Search app, the Google Chrome app, and Chrome for desktop. As long as you’re signed in with the same account, deleting your search history deletes it from all devices, ideal if you use a Chromebook for work on the go. While you’re at it, why not protect your digital privacy with these quick and simple steps?
How to delete your search history from your Android phone
Using your phone, it takes a few taps to remove your recent queries or delete your entire search history. But if you need to delete a recent search, you can quickly delete the last 15 minutes of your search history. Otherwise, follow the steps below for a more granular way to remove your recent searches.
How to delete your search history from the Google Search app
- Open the Google Search app.
- Tap your profile picture in the upper-right corner.
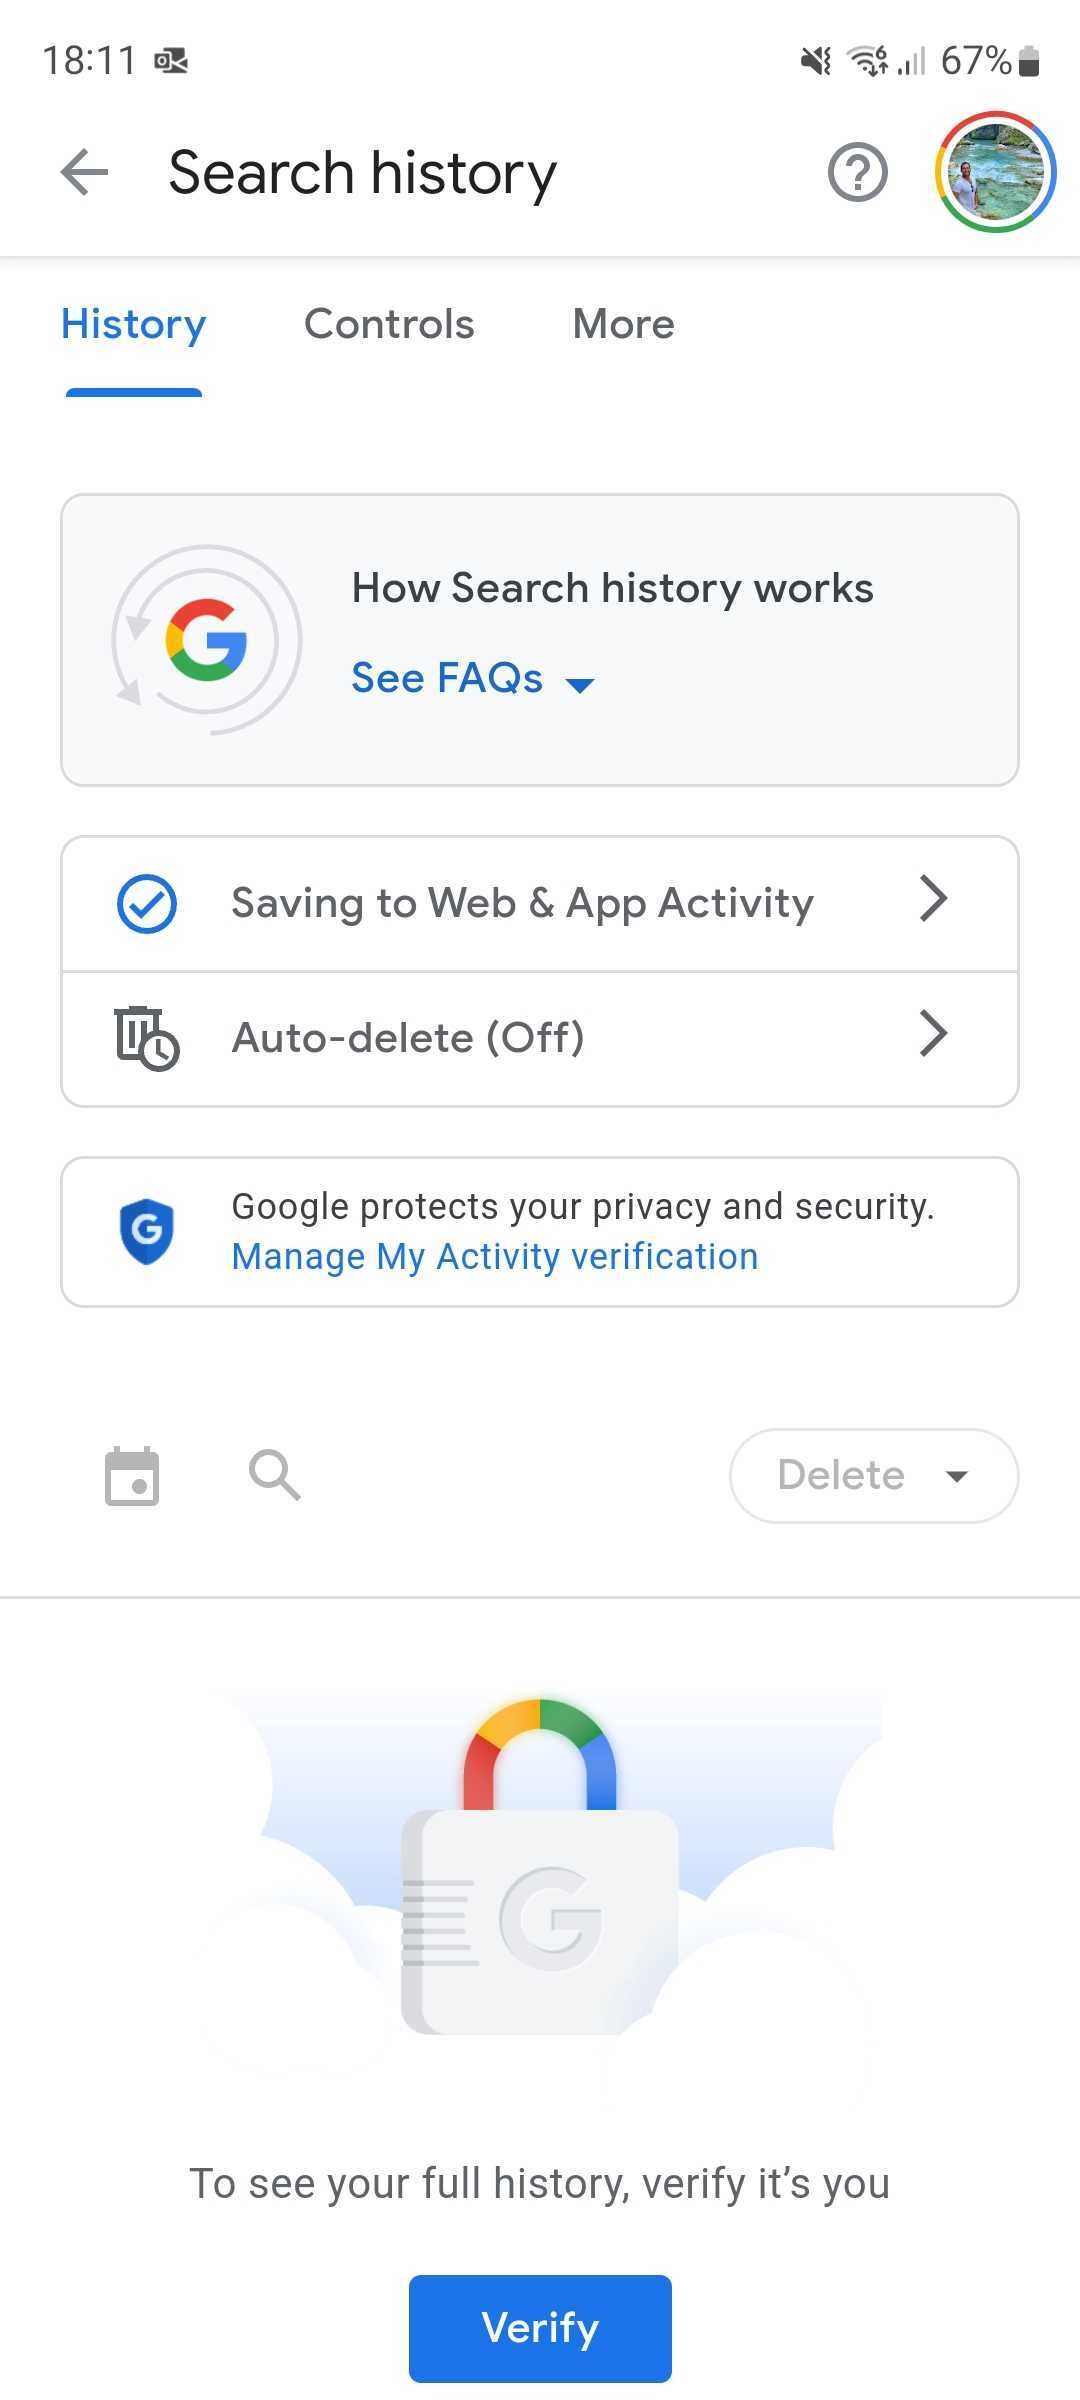
- Tap Search history.
- Tap the blue Verify icon at the bottom of the page to confirm your identity.
- Tap Continue and enter your screen lock pattern, password, PIN, or fingerprint.
- Your full Search history appears at the bottom of the page, with an X next to each item and day.
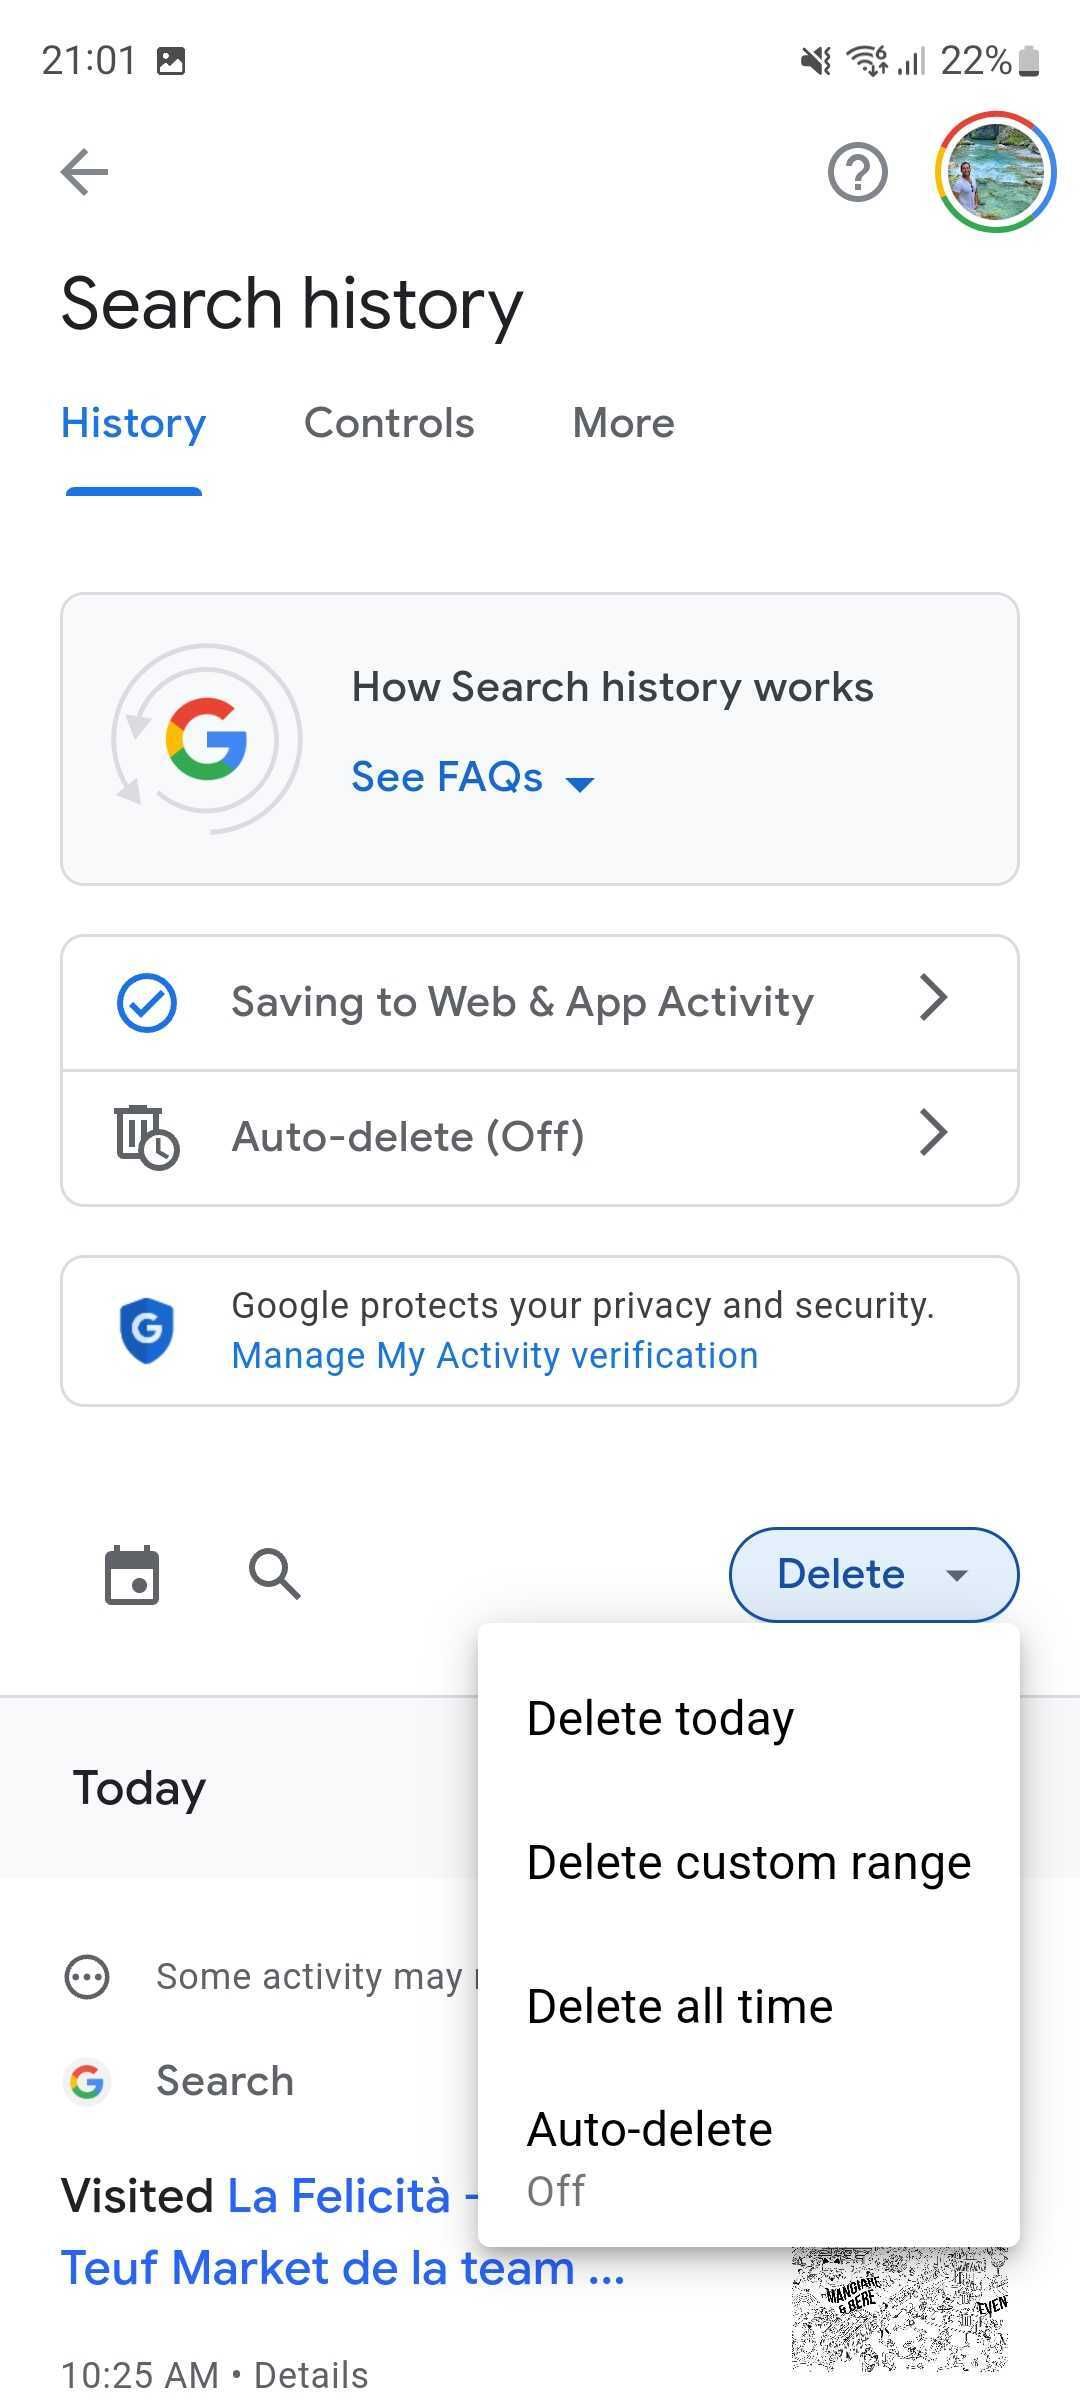
- Tap the X next to each query or day to delete it.
- To delete items in bulk from your search history, tap the blue Delete icon and select from the available options: Delete today, Delete custom range, Delete all time, or Auto-delete. The first three options let you delete all searches from the current day, a specific timeframe, or all of them, respectively. Auto-delete allows you to automatically delete searches older than 3, 18, or 36 months, letting you get rid of queries that aren’t relevant anymore.
Whichever option you choose, your search history is permanently removed. However, your browsing history isn’t cleared. We’re only talking about your Google search history. Follow the next steps to clear your Chrome browser’s history.
How to delete your search history from Google Chrome
If you use the Google Chrome app, you can clear your browsing history in a few taps:
- Tap the three-dot menu (⋮) in the upper-right corner.
- Navigate to Settings > Privacy and Security.
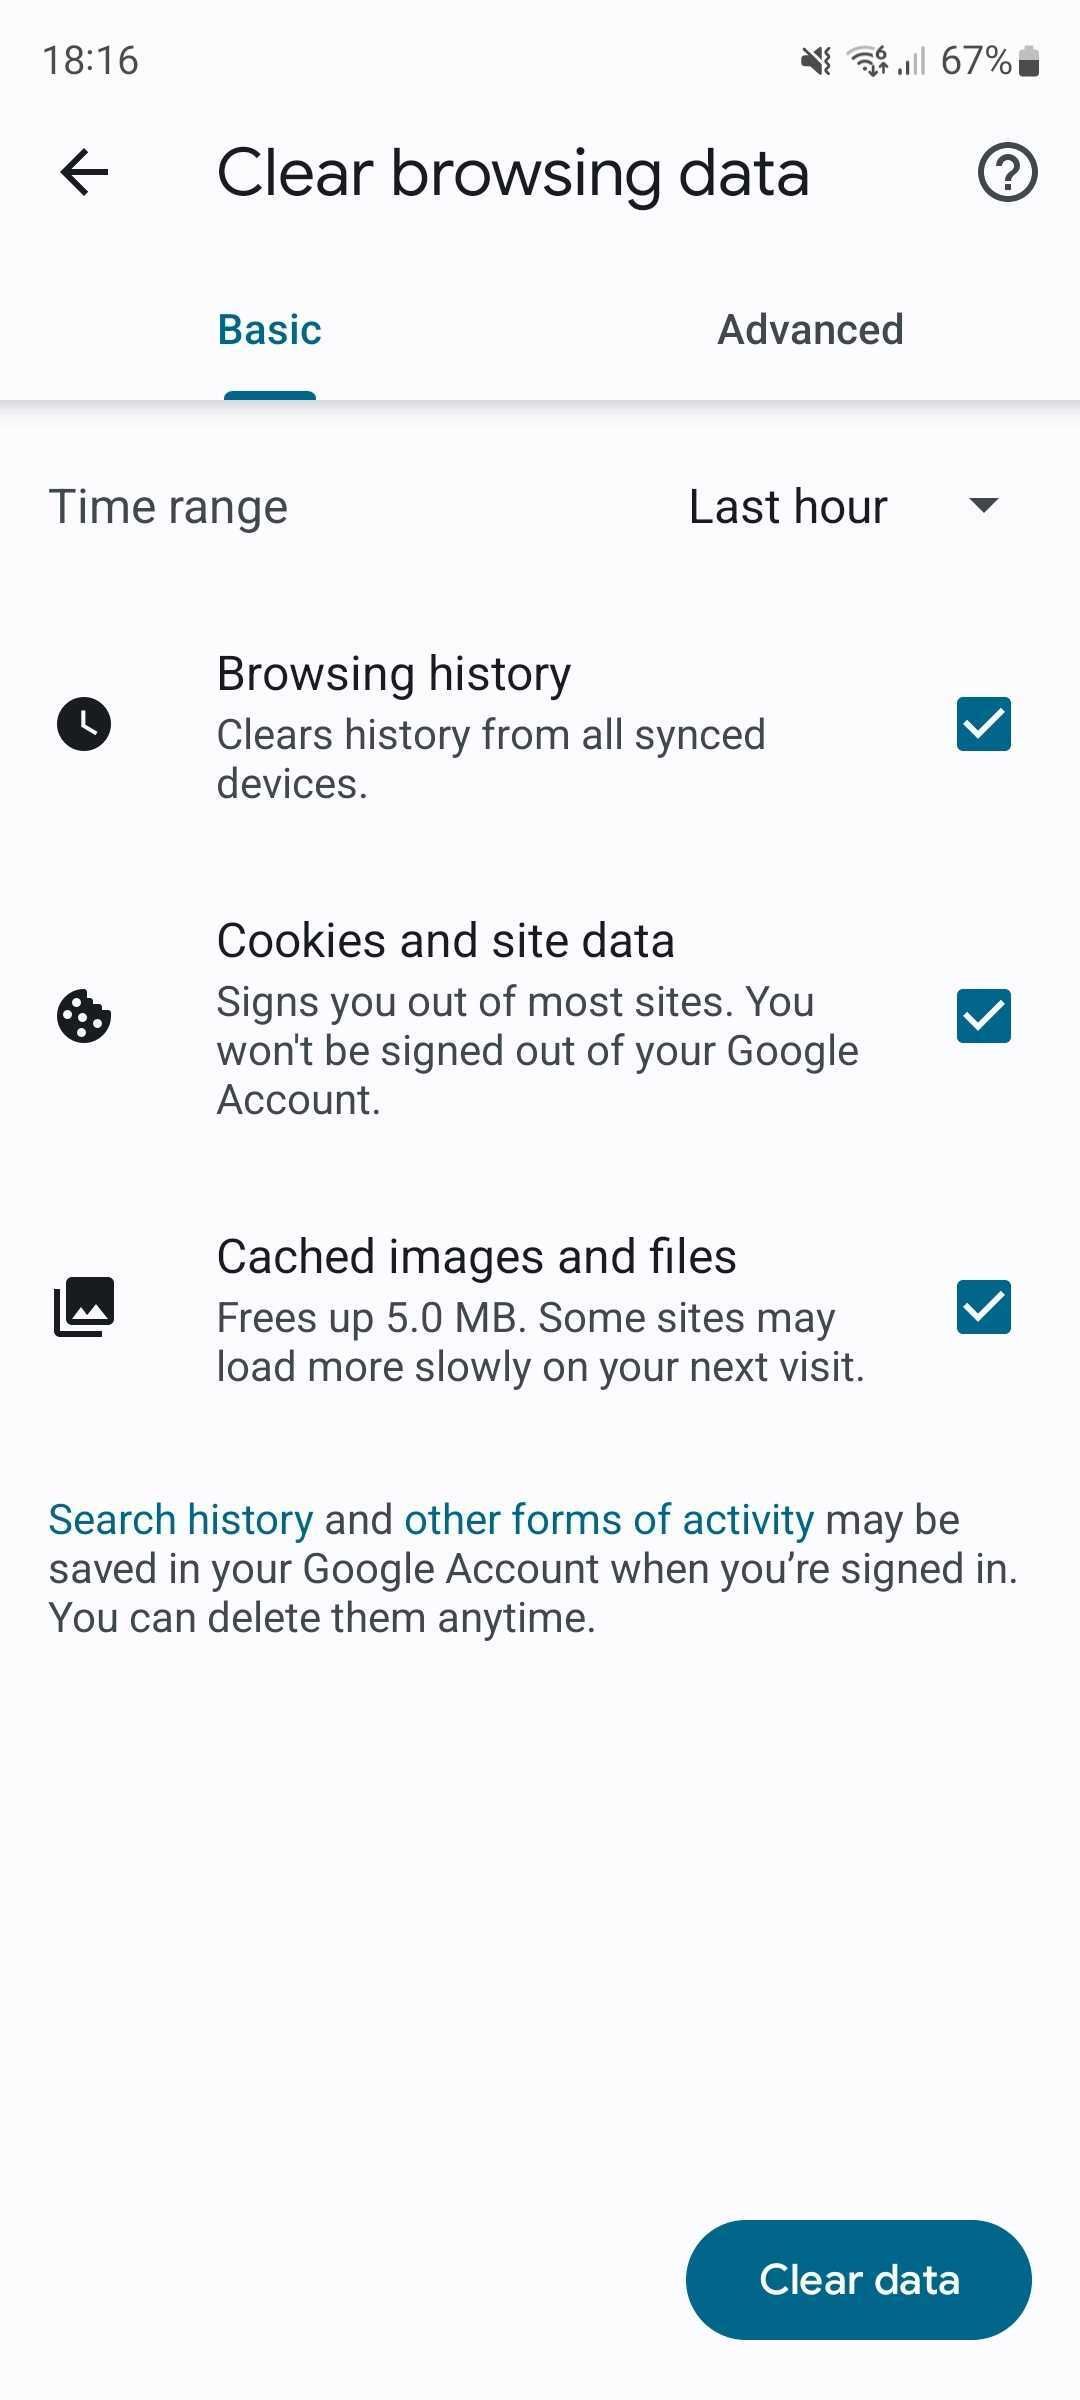
- Tap Clear browsing data.
- Select the data you want to remove and from what range, and then tap Clear data in the lower-right corner.
How to delete your Google search history from your computer or web browser
If you don’t have your phone handy, delete your browsing history using your web browser:
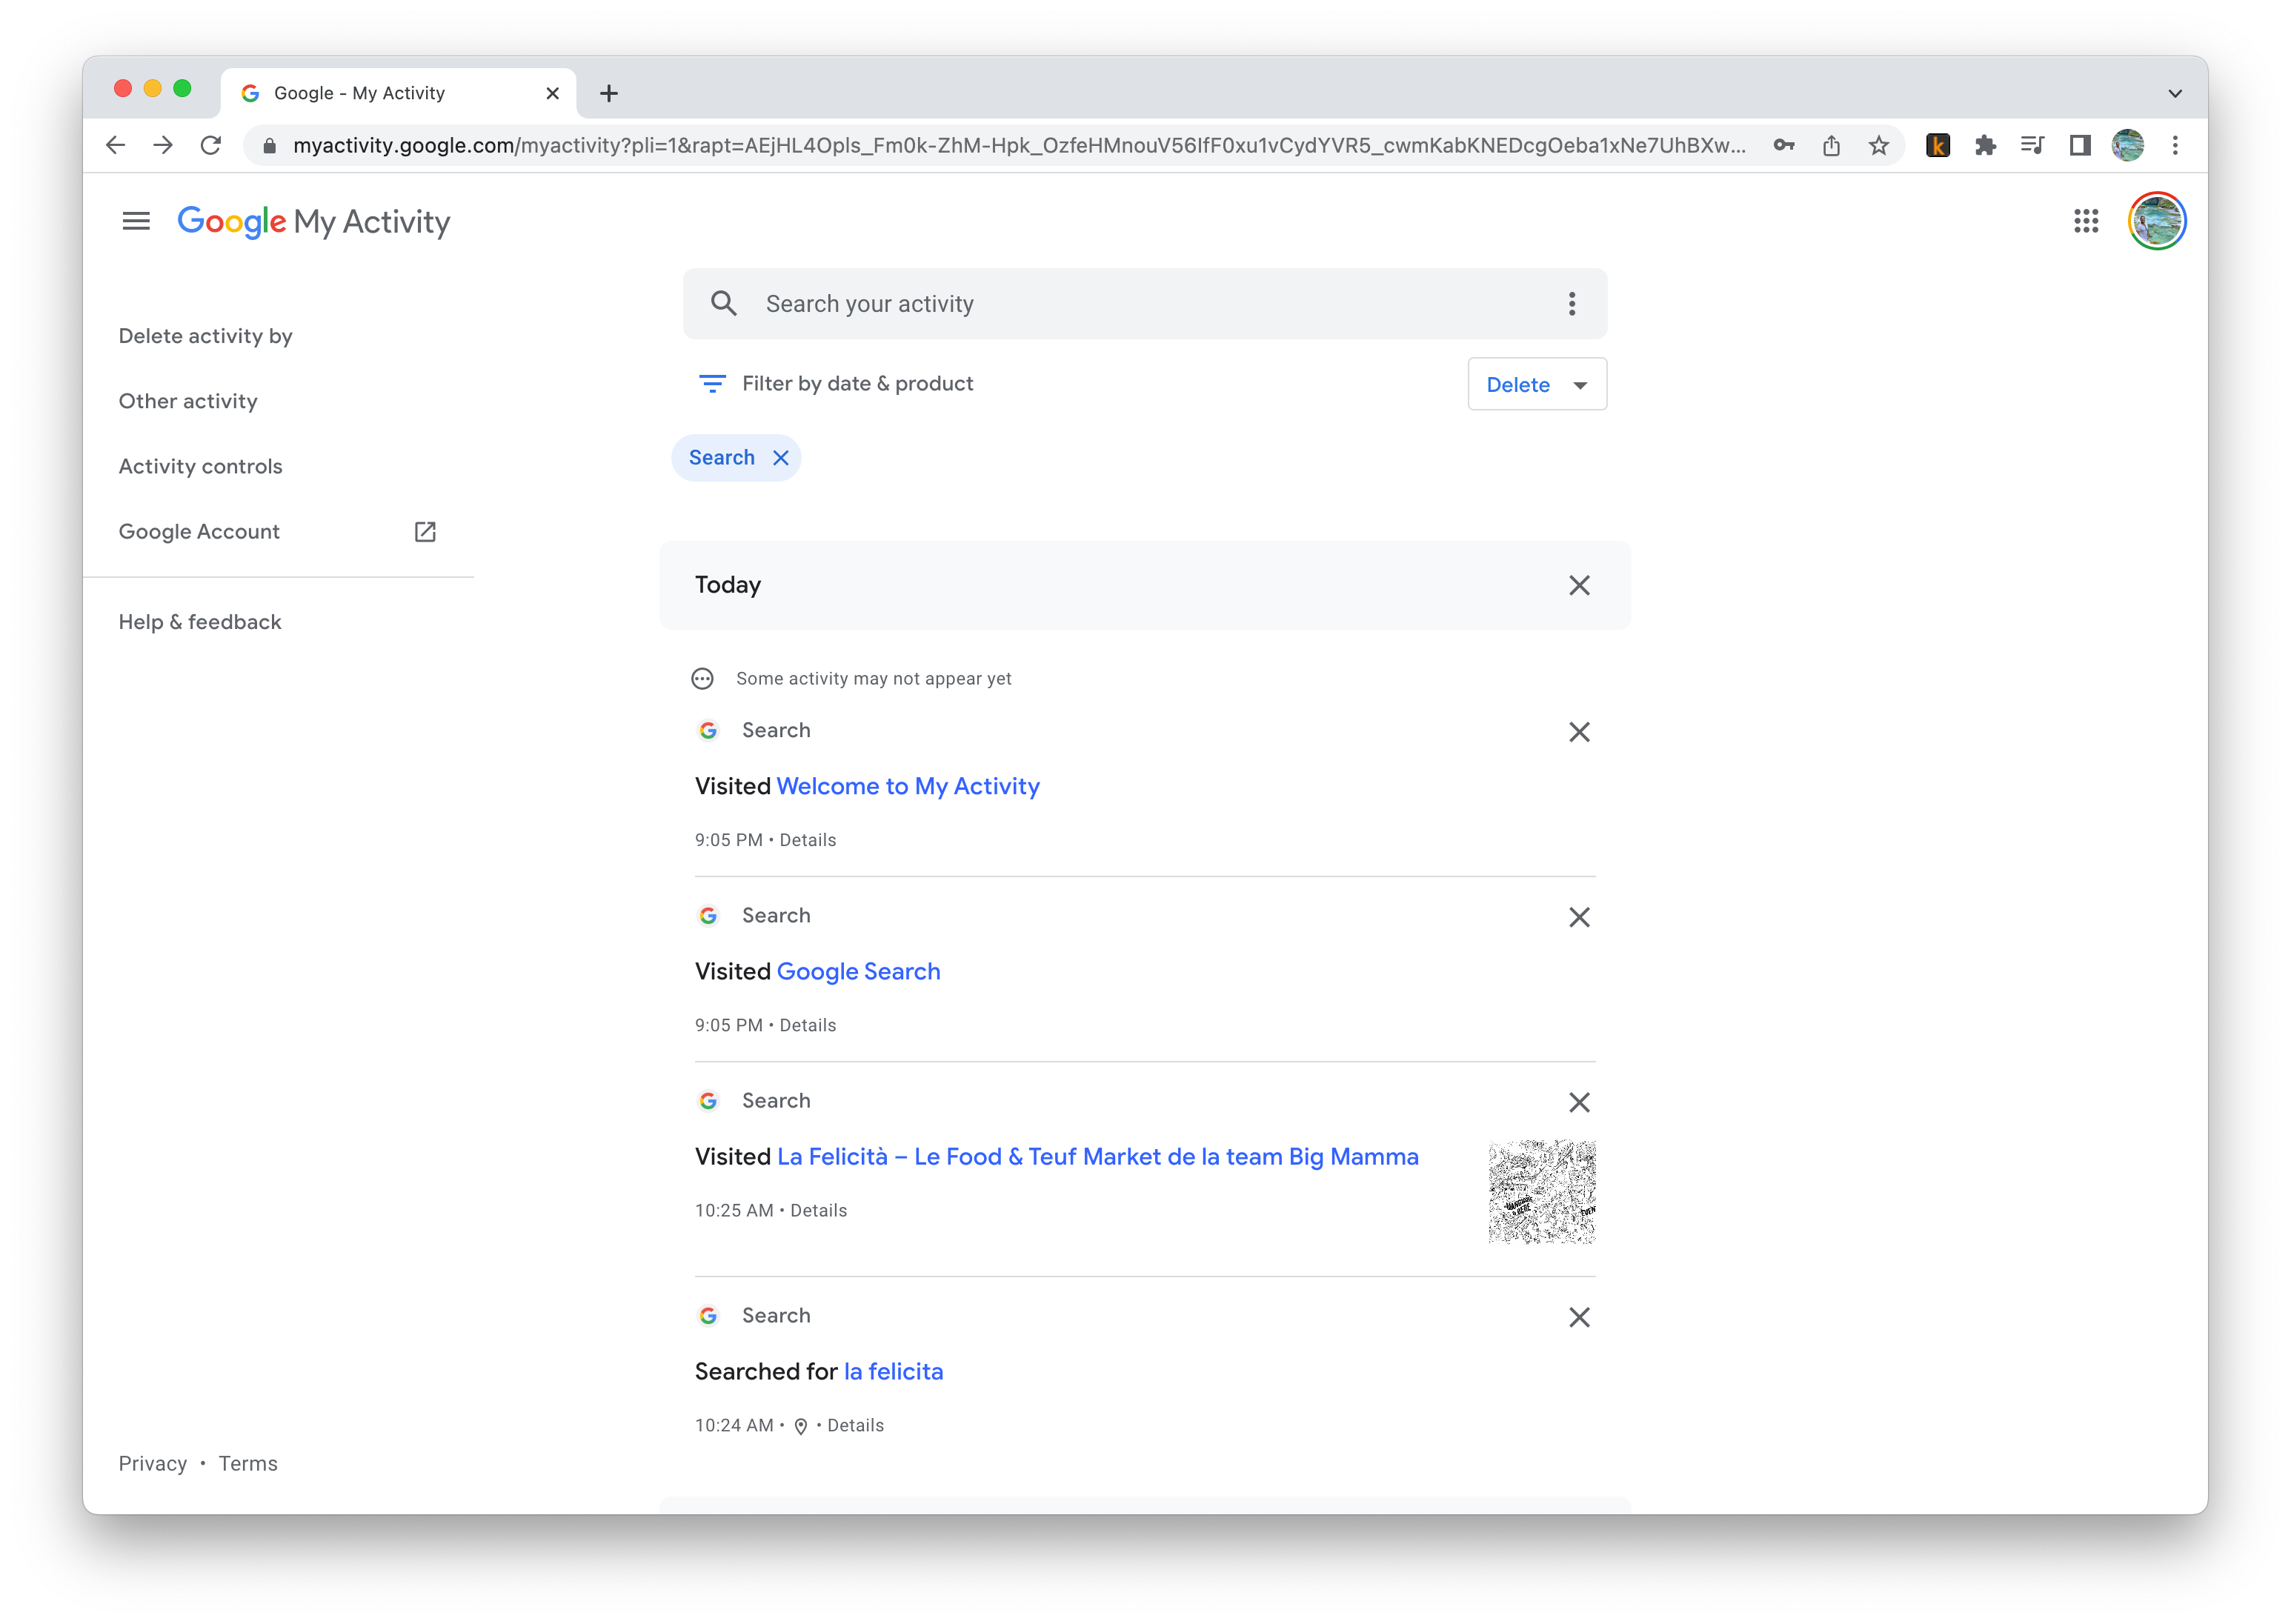
- Navigate to Google My Activity using your favorite web browser.
- Click the blue Verify icon to confirm your identity.
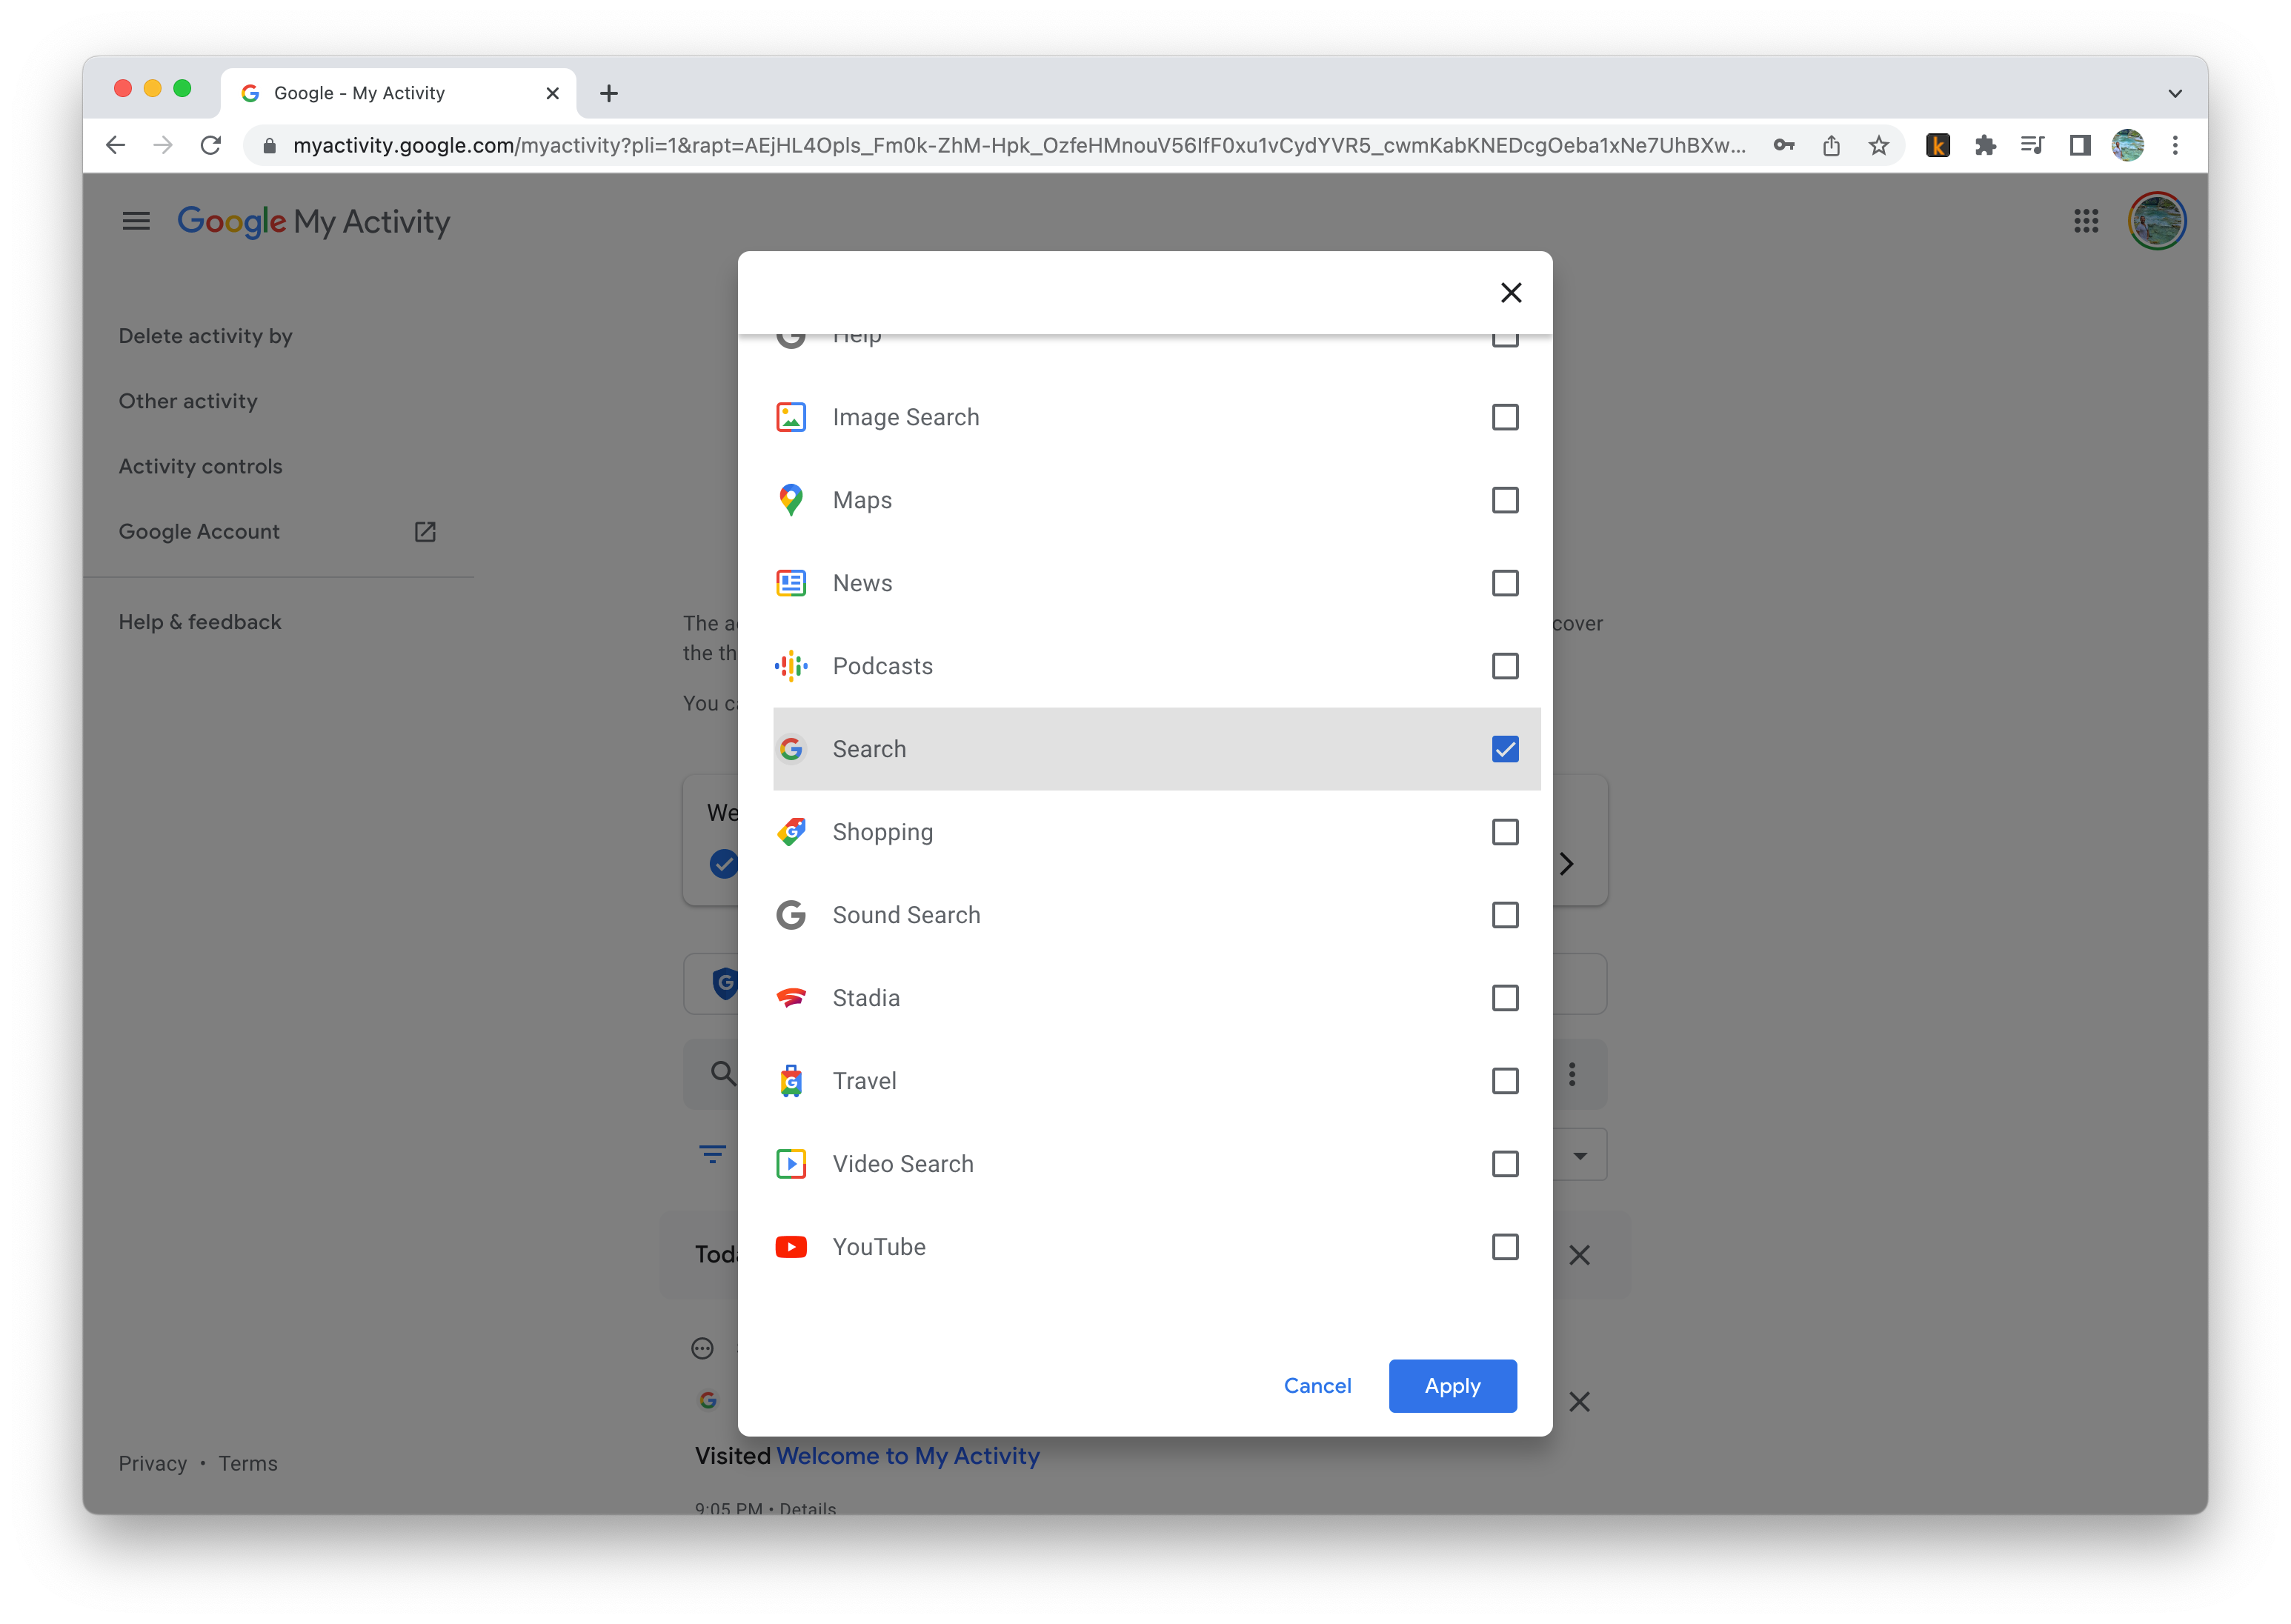
- My Activity lists anything you may have done using Google’s services, including the apps you used on your Android phone. To narrow your query to your Google searches, click Filter by date and product and select Search.
- Your full Search history displays at the bottom of the page, with an X next to each item and day. Click the X next to each query or day to delete it.
- To delete items in bulk from your search history, click the Delete icon and select from the available options: Delete today, Delete custom range, Delete all time, or Auto-delete. The first three let you delete all searches from the current day, a specific timeframe, or all of them, respectively. Auto-delete allows you to automatically delete searches older than 3, 18, or 36 months, letting you get rid of queries that aren’t relevant.
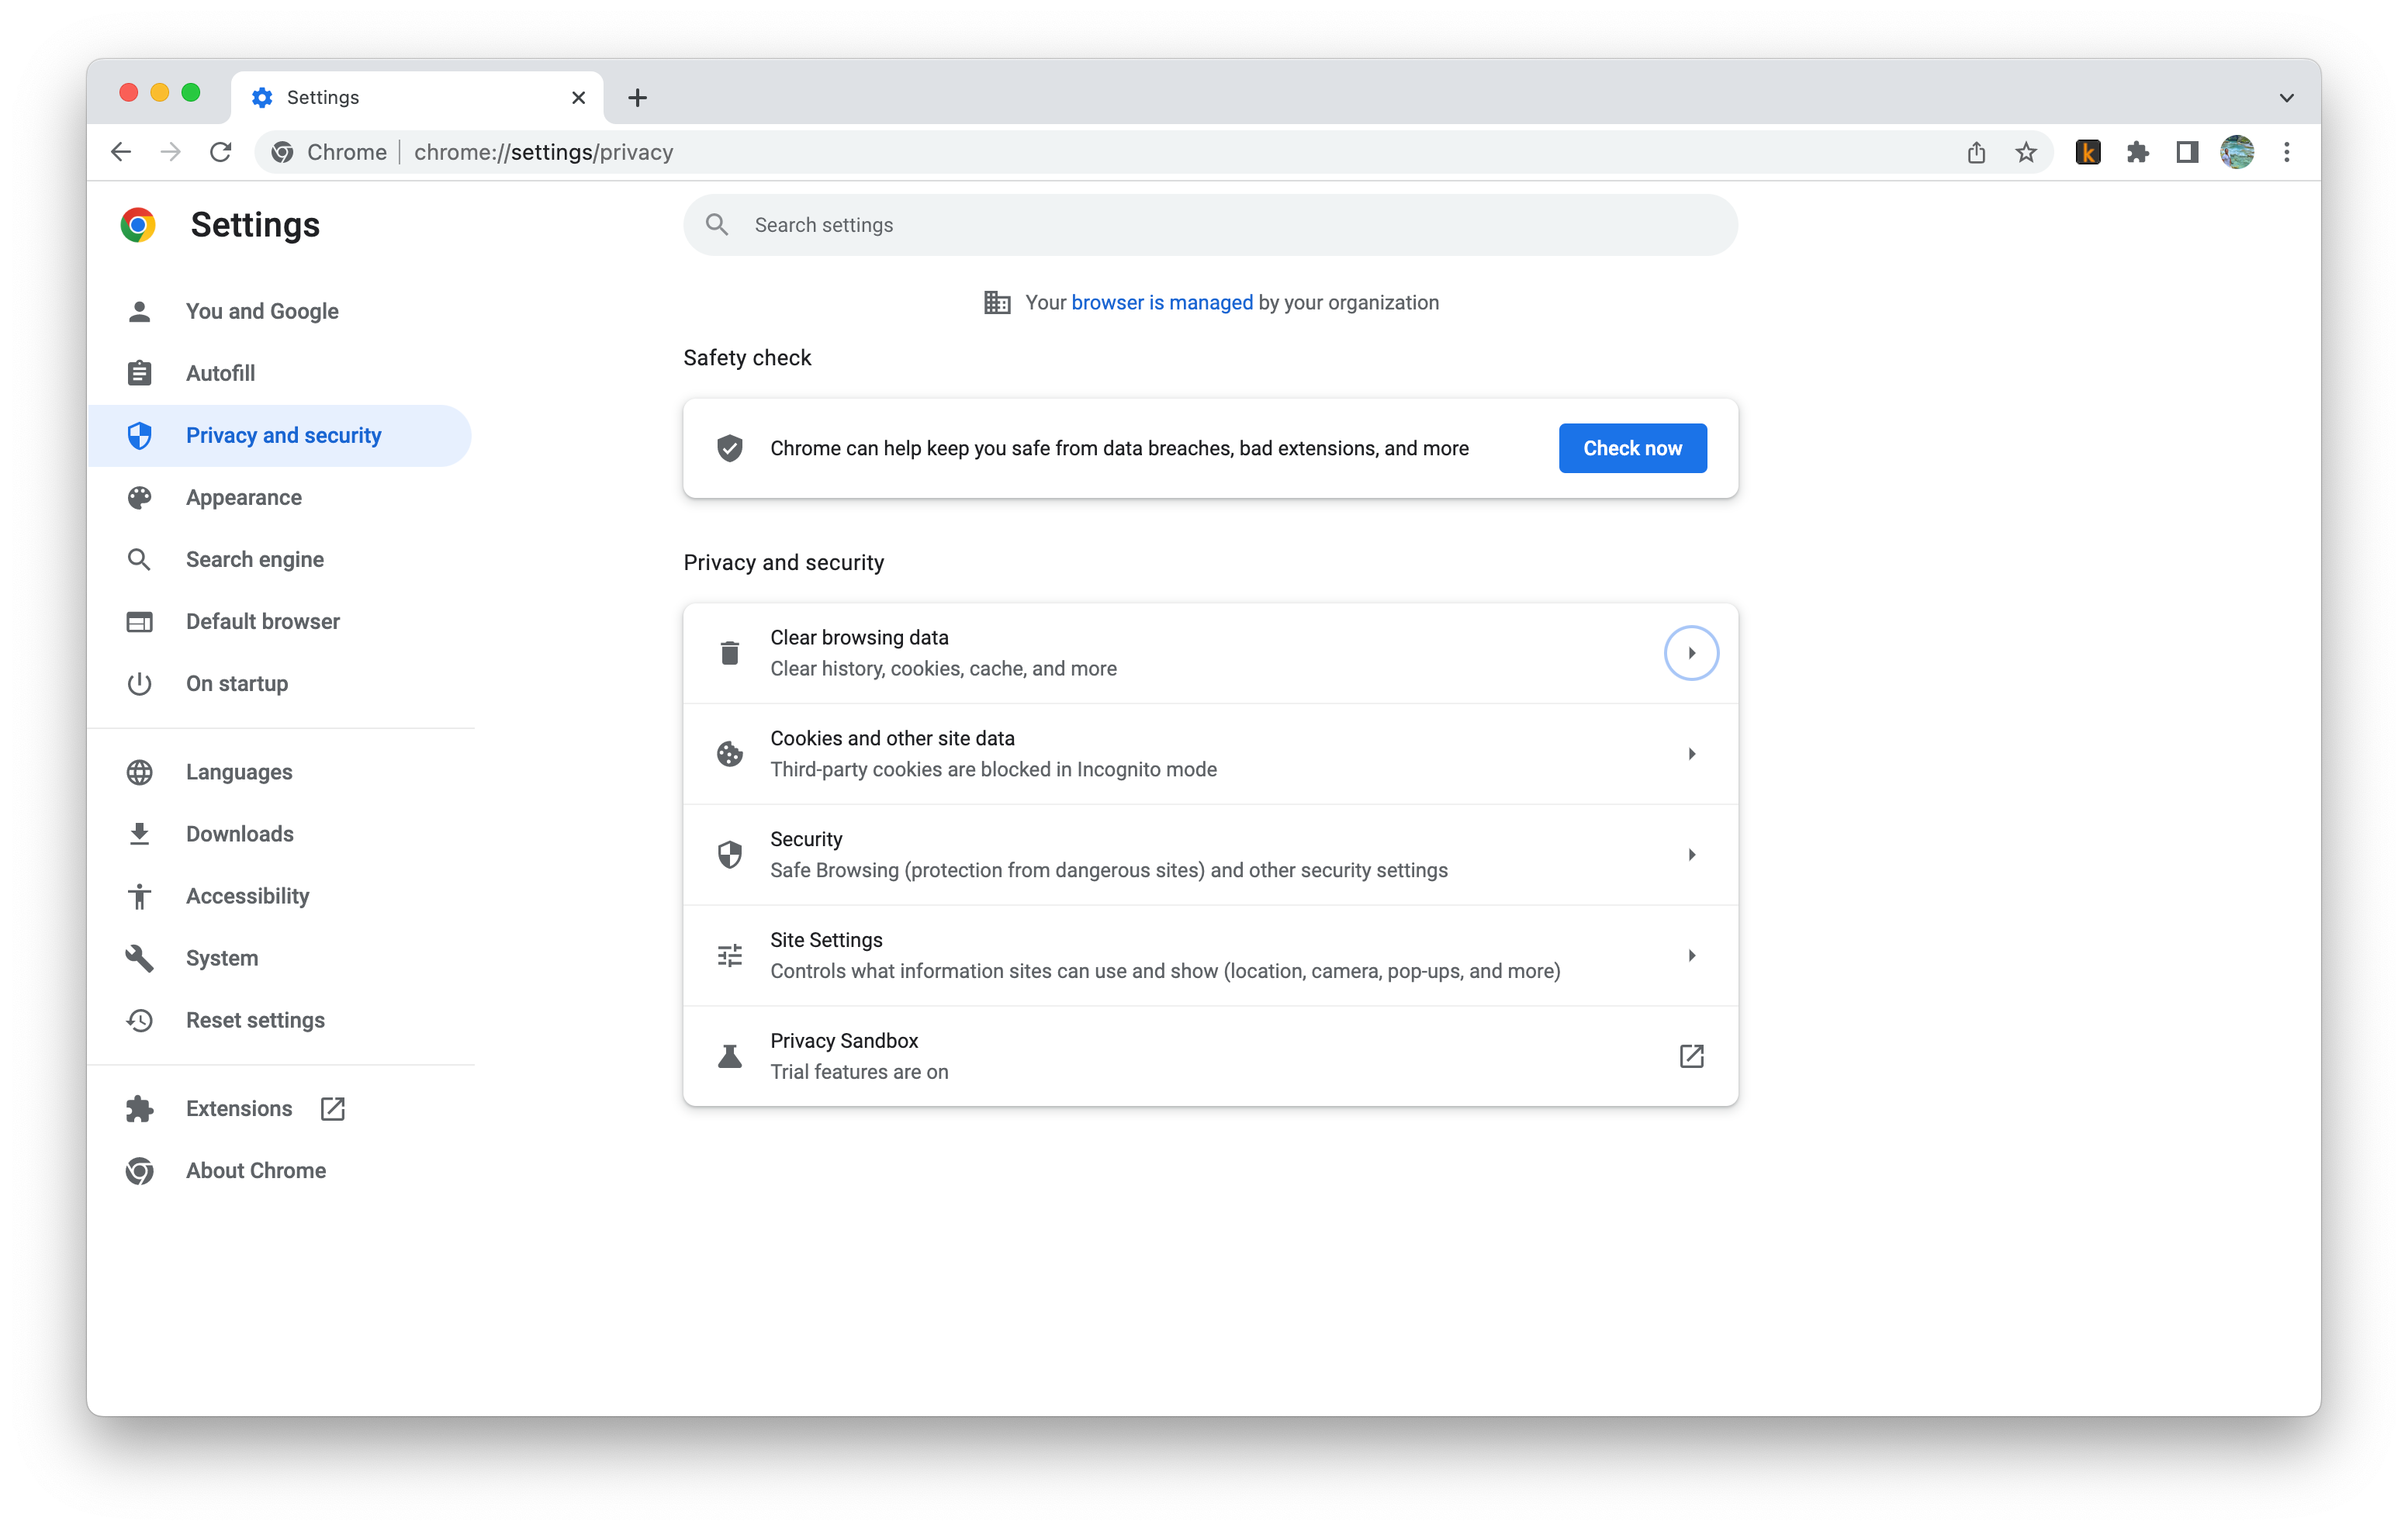
Like on your phone, only your search history is permanently removed, not your browsing data. To remove this using Chrome on your computer, follow these steps:
- Click the three-dot menu (⋮) in the upper-right corner.
- Navigate to Settings > Privacy and Security > Clear browsing data.
- Select the data you want to remove and from what range, and click Clear data.
You’re in control
It’s easy to take control of your search history to keep your data safe. Whether using your Android phone or computer, the process is easy to achieve and lets you start from a clean slate. However, we recommend always using incognito mode for private browsing.
You can also clear your history on a per-app basis. For example, you can stop YouTube from tracking your searches by clearing your watch history.

Khám phá thêm từ Phụ Kiện Đỉnh
Đăng ký để nhận các bài đăng mới nhất được gửi đến email của bạn.

